Sunday, September 26, 2010

Winter Wishes ♥


Supplies Needed
Tube  I am using is the artwork of Ismael Rac you can purchase his artwork here
Scrap kit I am using a great kit called Winter Wishes by Puddicat Creations,
you can find it here.scrappetizing
Font: Christmas
Drop Shadow of choice.
Mask_302 by Weescotslass
Remember to Save Often!!!

Let's begin
Open new image 700 x 600.

Select pdc_frame 1 copy paste resize 85 percent then Image -Rotate 90 degrees Right.
Using Magic Wand click insdie frame, Selections-Modify-Expand 4 -ok.
Select pdc_paper8 copy paste Selections-Invert-hit Delete, move below frame.Deselect.
Select pdc_tree 1 copy paste resize 110 percent move to center of frame.
Select pdc_bear copy paste resize 53 percent move to right lower side of frame,
 using Magic Wand erase his back leg, see tag.
Select pdc_bells2 copy paste resize 65 percent place top right corner.
Select pdc_snowmand 1 copy paste behind tree then resize by 68 percent,
 have him peeping around the tree.
Select pdc_bow 1 and 3 copy paste resize both 90 percent place on top of bells.
Select pdc element 1 copy paste resize 50 percent place at bottom of frame,
duplicate then angel them both slightly.
Select pdc_poinsettia 2 copy paste resize 48 percent place on b
Add your tube of choice move it to the left of frame.
New layer copy paste pdc_paper5 into selection.
Deselect then apply mask Merge group.

Give all a Drop Shadow.
Add your Artist © and your name then crop and save.
This is only a guide and feel free to use any other element you wish.
Most of all have fun creating.

This tutorial was written by Maree (aka Falcon) on 26 September 2010
Any similarities to this tutorial are purely coincidental
© Maree

Whispers of Fall ♥


Supplies Needed

Tube or Image of choice, I am using the beautiful artwork of Rachel Tallamy
you can purchase her artwork here www.rtallamy.com
Scrapkit of choice, I am using a great kit called Fall Tints by Lady Saphira ,
you can find it here.your scrap Additiction
Font:Ponytail Script
Drop Shadow of choice.
Mask_84 by Weescotslass
Remember to Save Often!!!

Let's begin

Open new image 650 x 650.

Select LS_FallTint_frame 2 copy paste resize 90 percent, click inside with Magic Wand,
Selections-Modify-Expand by 5 copy paste LS_FallTint_paper 15
 Selections-Invert-hit delete,move below frame layer.
Select LS_FallTint_tree copy paste resixe 90 percent place on right side of frame-hit delete.
Move below frame.Deselect.
Select your tube copy paste resize as needed move below frame,
Select LS_FallTint_string 2 copy paste resize 83 percent, Image-Free Rotate 60 Right
then Mirror place at top of frame. Using your Eraser tool remove some of the string
on top left corner, so it looks like it is hanging over the corner
Select LS_FallTint_leaves 5 copy paste resize 90 percent place on side of frame
 then Duplicate -Mirror.
Select LS_FallTint_bird 1, 2 and 3copy paste resize as needed
place bird 1 on string top left
corner, bird 2 on branch
 bird 3 on frame left bottom corner.
Select LS_FallTint_bubbles 1 copy paste above paper layer, resize 75 percent
 move it around till you are happy with it.
Select LS_FallTint_ balloons 1 and 2 copy paste above bubble layer
then resize by 38 percent.
Select LS_FallTint_mushroom 1 copy paste above frame layer
 move to the left bottom corner, resize 25 percent.
Select LS_FallTint_leaf 1 and 2 copy paste resize 32 percent then
 duplicate both leaves a few times then place at bottom of frame
move them around till you are happy with placement.
Select LS_FallTint_bow 5 copy paste place top right corner of frame
 resize 50 percent then 75 percent.
New layer Selections-select all copy paste LS_FallTint_paper3, deselect
then apply mask Merge Group.

Add your Artist © and your name then crop and save.
This is only a guide and feel free to use any other element you wish.
Most of all have fun creating.

This tutorial was written by Maree (aka Falcon) on 26 September 2010
Any similarities to this tutorial are purely coincidental
© Maree

Saturday, September 25, 2010

Fall Festival ♥


Supplies Needed
Tube I am using is the fantastc artwork of Elias Chatzoudis
 you can find the artwork at MPT.
Scrap kit  I am using is Fall Festival by D'Ambrosio Arts ,
you can find it at Sunflower scraps Boutqiue.
Template t2 by Dawn of Lollipops Candyland
Font: English
Drop Shadow of choice.
Mask_83 by Weescotslass
Remember to Save Often!!!

Let's begin


Open your template Shift+D close original. Delete the top layer.

Click on Horizontal Frame back layer-Selections-Float-Defloat-then copy paste
DAA_FallFestivalpaper11 as a New Layer- Selection-Invert- hit Delete,
then delete original layer.
Repeat above for other layers in  black color.I used these papers for each layer:
Vertical layer - DAA_FallFestival paper 6 resize 70 percent to give better effect.
Main Frame back - DDA_FallFestival paper 5.
Right Bottom D frame back - DDA_FallFestival paper 15, resize paper 50 percent.
Left Top D frame back - DDA_FallFestival paper 12 again resize paper 50 percent.

Now you have you completed this we will add some elements.
Select DDA_FallFestival_cart copy paste above Main frame layer
 resize by 65 percent.
Select DDA_FallFestival wheat flair and indian corn elements
resize to fit Top and Bottom D frames.
Select DDA_FallFestival wooden sign copy paste resize by 40 percent
place on left side layer.
Select DDA_FallFestival turkey copy paste resize by 50 percent
 place on top of sign.
Select DDS_FallFestival pumkins 2 and 3 copy paste resize
place at bottom of sign.
Add your tube and place on right side of layer.
Give all a Drop Shadow.
New layer, Selections -select all then copy paste DDA_FallFestival paper 15
 into Selection-deselect
.Apply mask then Merge Group.
Adjust-Blur-Guassian Blur - Radius 30.
Effects -Textured Effects-Polished Stone with these settings.

Add your Artist © and your name then crop and save.
This is only a guide and feel free to use any other element you wish.
Most of all have fun creating.

This tutorial was written by Maree (aka Falcon) on 25 September 2010
Any similarities to this tutorial are purely coincidental
© Maree

Friday, September 24, 2010

Babe Blues ♥


Supplies Needed
Tube or Image of choice, I am using the fantastic artwork of Elias Chatzoudis
 you can find the artwork here at MPT
Scrap kit I am using a great kit called Baby Got Blues by Purple Dragonfly Creations,
you can find it here Sunflower Scraps Boutique.
Font: Cattapilla
Drop Shadow of choice.
Mask_75 by Weescotslass

Remember to Save Often!!!

Let's begin

Open new image 600 x 600.
Select BGB_Element 7 copy paste then resize 75 percent click inside with Magic Wand.
Open your closeup tube copy paste, resize if needed,place on letf side then,
move below frame. Then lower layer Opacity to 75.
Select BGB_Paper 4, then go to selections-modify-Expand by 4
 paste BGB_Paper12,Selections-
Invert-hit Delete, deselect.
Add your main tube move just to the right,
 see tag for placement.
Select BGB_Elements 11, 12, 13 and 21. Resize element 13 by 48 percent
place in center bottom of frame.
Resize Elements 11 and 12 by 40 percent, place these on either side of element 13.
New layer Select your Picture Tube Tool and choose a flower then
move it over to the left, repeat again with new layer.
Select BGB_Element 21 copy paste in center, see tag then resize by 35 percent.
Select BGB_Element 1 copy paste resize 20 percent place on flower.
New layer-Select All, then copy BGB_Paper 8 paste into Selection, deselect.
Apply Mask then Merge Group, resize mask by 120 percent.
Give all Drop Shadow.

Add your Artist © and your name then crop and save.
This is only a guide and feel free to use any other element you wish.
Most of all have fun creating.

This tutorial was written by Maree (aka Falcon) on 25 September 2010
Any similarities to this tutorial are purely coincidental
© Maree

Peace n Joy ♥


Supplies Needed

Tube or Image of choice.
Scrapkit of choice, I am using a great kit called Winter Peace by Puddicat Creations,
you can find it here.Scrappetizing
Font: Azariel
Drop Shadow of choice.
Animation Shop
Xfeno 2-Constellation
Remember to Save Often!!!

Let's begin

Open new image 650 x 650.
Select pdc_frame 2 copy paste.Using your Selection Tool ,
 draw out a large square to edge of frame.
New layer open pdc-paper 13 copy paste into Selection,
Deselect then move below frame.
Select pdc_icicles 3 copy paste move to top of frame, Reduce the Opacity to 65.
Select pdc_doodle 1 copy paste below frame resize to fit.Move to top of frame.
Select pdc_wintercottage copy paste at bottom of frame then resize 65 percent.
Select pdc_bearnstar copy paste on left bottom side of frame resize 43 percent.
Select pdc_candle copy paste then Image Mirror place on left side of frame,
resize 35 percent.
Select ©Medi_peace 3 copy paste. place on right side of layer, resize 75 percent.
Select ©Medi_hat copy paste place on tube head resize to fit.
Give a Drop Shadow to all except the icicle layer.

Add your Artist © and your name then crop and save or continue for Animation.
This is only a guide and feel free to use any other element you wish.
Most of all have fun creating.


ANIMATION.
Open Animation shop then click back into Psp.
1. Select Selection Tool then draw out square around the paper layer.
Select Xfeno-Constellation and use these settings:


Deselect. Edit Copy Special - Copy Merged. click into AS paste as new animation,

2. Click back into Psp click Undo button twice then Effects Constellation and hit the random
button-click ok. Then Deselect.Click back into AS and paste after current frame,
Repeat 2 again.

Save as a Gif then resize if needed.

This tutorial was written by Maree (aka Falcon) on 24 September 2010.
Any similarities to this tutorial are purely coincidental
© Maree

Now Where is that Story!!! ♥


Supplies Needed
Tube or Image of choice.
Scrapkit I am using a great kit called Spookie Stories by Scraps by Cyrs,
you can find it at Scrappindollars.
Font: Hurricane
Drop Shadow of choice.
Mask_285 n 287 by Vix

Remember to Save Often!!!

Let's begin


Open new image 650 x 650.
Select Frame 3 copy paste.Using your Magic Wand click inside then
Selections -Modify-Expand by 6 open paper 13 copy paste,
 then Selections -Invert-hit Delete, move below frame.Deselect.
Select Spider web 1 copy paste above paper layer.
Select Reaper copy paste below frame,
Selection tool-Rectangle with these settings,

 then draw a square aound the head and shoulders of the reaper.


 Right click on layer - Promote Selection to Layer.Move Selection above the frame.
Before doing this make sure you have image in position.
Select Spider copy paste resize 25 percent place on right side of web-center.
Select Bat copy paste resize 25 percent place on top right side of frame.
Select Witch copy paste place on right side of frame.
Select Haloween doodle copy paste paper layer. Resize 110 percent.
Select Cauldron copy paste resize 45 percent place above full image layer.
Select Story book 2 copy paste above frame layer resize 45 percent.
Select Pumpkin face copy paste resize 55 percent.Place on left dise of book.
Select new layer Select All copy Paper 1 then paste into Selection.
Apply Mask 285 Merge Group.
Click on Frame paper lower Opacity to 55.
New layer Select All copy Paper 12 paste into selection.Deselect Ctrl+D.
 Apply mask 287, Merge Group.
Apply Drop Shadow 5/5/50/10.
Give all other layers a light Drop Shadow

Add your Artist © and your name then crop and save.
This is only a guide and feel free to use any other element you wish.
Most of all have fun creating.

This tutorial was written by Maree (aka Falcon) on 24 September 2010
Any similarities to this tutorial are purely coincidental
© Maree

Tuesday, September 21, 2010

Season Greetings ♥


Supplies Needed
Tube or Image of choice.
Scrapkit of choice, I am using a great kit called Festive Season by Shells Scraps,
you can find it here.
Font: Black Jack
Drop Shadow of choice.
Mask wsl_364 by Weescotslass
Let's begin

Open new image 600 x 600.

New layer Select all copy paste paper 14 into Selection-
Deselect then apply mask -Merge group.
Select Pianio 1 copy paste resize 95 percent.Lower Opacity to 85.
Select Decoration 16 copy paste resize 75 percent,
Drop Shadow -2,-2,50,5 then 2,2,50,5 this
will make it standout better.
Select Bear 2 copy paste resize 50 perecent then 25 percent place on left side of layer.
Select Decoration 3 copy paste resize 50 percent then 25 percent -
Image,mirror place at bottom of layer,see tag.
Select Present 1 copy paste resize 65 perecent then 25 percent place at bottom of tree.
Select your tube I used ©Medi Cindy 1 copy paste resize 95 percent
place on righ side of  layer.
Select Star 5 copy paste resize by 25 percent twice then place at top of tree.
Select Bauble 4, Bow 5 and Decoration 12, resize them all
 by 50 percent then 30 percent and place on tree,
 please add any other you wish to use.
Give them all Drop Shadow.
Select Decoration 24 resize by 50 percent then 25 percent then
place on tube hand, see tag.

Add your Artist © and your name then crop and save.
This is only a guide and feel free to use any other element you wish.
Most of all have fun creating.

This tutorial was written by Maree (aka Falcon) on 21 September 2010
Any similarities to this tutorial are purely coincidental© Maree

Halloween Time ♥


Supplies Needed

Tube or Image of choice, I am using the fantastc artwork of Keith Garvey you can find the
artwork here at MPT
Scrapkit of choice, I am using a great kit called Halloween Time by Rieka_Rafita, you can
purchase it here at The Creativity Box
Font: Beurk
Drop Shadow of choice.
Mask_284 by Vix
Remember to Save Often!!!

Let's begin

Open new image 650 x 650.

New layer fill with color #000000 then apply these setting Muir Meister-Clouds:

New layer fill with color #808080 and then apply mask Merge group give this
a Drop Shadow 2/2/50/5.
Select RR_Paper 4 copy paste resize 50 percent, move to midle of layer then
move layer below mask, this will show the wording on mask.
Select RR_Moon copy paste resize 85 percent place at top of layer.
Select RR_Bat 1 copy paste resize 45 percent place at bottom of moon.
Select RR_Wordart 1 copy paste move to top of moon.
Select RR_Witch copy paste Image Mirror then resize 35 percent
place on right side of moon
Select RR_Door copy paste resize 65 percent center this at bottom of layer
under mask wording.Give this a Drop Shadow 2/25/50/5.
Select your tube/s I used 2 from this artist place on either side of door.
Select RR_Pumkin 2 copy paste resize 55 percent and
 place at bottom of tube left side.
Select RR_Candle resize 38 percent place at bottom of layer
 right side.Give all other layers a light Drop Shadow.

Add your Artist © and your name then crop and save.
This is only a guide and feel free to use any other element you wish.
Most of all have fun creating.

This tutorial was written by Maree (aka Falcon) on 21 September 2010
Any similarities to this tutorial are purely coincidental
© Maree

Saturday, September 18, 2010

Doodle Bug Queen ♥


Photobucket


Supplies Needed
Tube of choice
 Font of choice 
Mask of Choice
 Fairies Folly  you can get the kit Here
I used the beautiful artwork of Suzanne Woolcott
you  can be purchase from Here
Please do not use this tube unless you have a license to use.

Okay let’s get started

Layers open a new image 600 X 600 (we can resize later)
Select frame copy and paste.
Select Magic wand click inside frame
Selections – Modify-Expand by 3
Select Cream paper 1-resize by 50% then copy and paste as new layer
Selections – Invert-delete, move below frame.
Select KW-pinkflower copy and paste –resize by 40%
Move to side of frame, check above for placement or use different element of choice
Duplicate –Image- Mirror
Add any other elements of choice.
Select KW beaded swirl and place below frame –duplicate – Image – Mirror
Add a drop shadow.
Add a new raster layer then flood fill with #3af5f4
I choose to use Vix Valentine Mask 13
Layers –New Mask Layer- New Image click on the mask you are going to  use.
Merge- Merge Group
I used the font Aja
Drop Shadow
2
2
50
4
Add your © and your name or watermark. Resize and crop.
Save and your done!

I would love to see your result. Thank you for trying my tutorial
©Maree

Rain Rain ♥

Supplies Needed

PSP – I used X2 but will work in any version

Tube of choice
 Font of choice -I used A&S Speedway 
Mask of Choice
Noah’s Ark Scrap Kit and Add on Kit (PTU) can be found at Baby Cakes HERE
I used the beautiful artwork of Suzann Woolcott to use her art  work 
you can be purchase from HERE

Okay let’s get started

Layers open a new image 600 X 600 (we can re size later)
Open Scallop frame from the Add-on kit re size to fit. Give it a light drop shadow
Select Magic Wand and click in white space inside frame and
Remember to click inside white area around the ribbon also.
Select Modify-Expand by 3
Select a paper of choice and then / Image / re size by 25%
Edit copy –paste as new then Selections – Invert-Delete Selections-select none
Bring down under frame.
Select your tube and copy and paste, and then use the background eraser
the area near the ribbon
to make sure it looks like the tube  is behind the ribbon. Give this a light drop shadow also.
I have added the rain cloud and droplets behind the tube but this is up to you.
Choose a paper of choice and click on background (white) and paste as a new layer or
add a new layer and flood fill with a colour of choice.
Select  your mask then Layers/ new mask layer and select mask then click ok
Click on the layer click on merge / merge group.
Add your © and your name or watermark. Resize and crop.
Save and your done!

I would love to see your result. Thank you for trying my tutorial
© Maree

Picture Purffect ♥

PICTURE PURRFECT

Supplies Needed

Scrap kit Nostalgia by KatNKDA
you can purchase it  HERE 
Tube is PinUpToons and can be purchased HERE 
Mask WSL_74 or mask of Choice HERE.
Animation Shop.


Lets Begin.
1. Open new canvas layer 700 x 600.

2. Copy / Paste Element 12 resize by 50 percent.

3.  Select Paper 4 or one of your choice, resize 50 perecnt.

4.  Selection Tool /Selection draw around the edge of frame on left side, Copy / Paste Paper 4
Selections / Invert / Delete. Duplicate layer / Image / Mirror, place it blow the frame. 
Layers Merge / Merge down.
 5.  Select Paper layer. Effects / Textured Effects / Mosaic Glass  with these settings
75     4
75     0
         2
         25


6.  Copy / Paste Element 44 resize 50 percent.Duplicate / Layers/ Merge / Merge down, then 
 Duplicate /Image / Flip. See tag for placement.Layers / Merge / Merge down.

7.  Copy / Paste Element 13 resize by 30 perecnt and place on left corner. Duplicate / Image / Mirror.
Add a drop shadow. Layers Merge / Merge down.

8.  Copy / Paste Element 05 resixe by 30 perecnt place belove the bows add a drop shadow.

9.  Copy / Paste Element 53 resize by 20 percent add a drop shadow.

10.  Copy / Paste Element 47 resize by 20 percent add a drop shadow see my tag for placement.

11. Copy / Paste Paper 03 apply mask  Merge / Merge group.

12.  Add your © information and name.

Now to Animate tag.

Open Animation Shop

1.  Select Bow layer, then Adjust / Add/Remove noise.

Select  Gaussian  noise 25 % 

2.  Repeat this with the Doodle  layer, do not deselect.

3.  Copy /Copy special / Copy Merged.

4.  Click in  AS right click mouse Paste as New Animation.

5. Back in psp clcik the undo button on both layers. Click back to Bow then  Doodle  layer, 
then repeating step 1 selecting noise 30 % then again repeating this step noise 35 %.

6. Control + A select all View Animation if happy all we need do is resize.

7. View / Resize Animation by 80 percent. Save as a gif 

I hope you have enjoyed this tutorial.
©Maree

A Royal Rose ♥

Supplies Needed

Scrap kit by KatNKDA Royal Roses
you can purchase the kit  Here

 Tube used  Jennifer Janesko you can purchase it Here.
Or one of your choice
 WSL_Mask12 at Weescotslass Here
Font of choice or the one I have used akaDora.

Lets Begin..

1.     Open new layer canvas 600 x 600.

2.     Open Element  08 Copy /  Paste resize by 50 percent. Apply mask / merge / merge group.

3.     Open Frame 27 resize 50 percent. With your Selection Tool / Freehand selection trace 
         around the inside of frame. Copy / Paste tube of choice resize the Selections / Invert / 
         Delete. Add a drop shadow.
4.     Open Element 02 resize by 30 percent duplicate and arrange in centre below frame.
         Add a drop shadow.

5.     Open Element  05 resixe by 50 percent arrange to the left of roses, then duplicate / 
         Image / Mirror then add  a drop shadow.

6.     Open Element 06 resize by 50 percent place in between roses, see tag above for 
         placement.

7.     Open Element 31 resize 20 percent place between the roses.

8.     Open Element 44 resixe by 75 percent place behind frame then duplicate / Image / Mirror.

9.     Add your © information and  your name. Font used akaDora  Foreground Gold 
         Grandient and Background #c0c0c0 size 72.

10.    I hope you enjoyed this tutorial and please I would love to see your results.
  ©Maree


Forever Garv ♥

Photobucket


SUPPLIES NEEDED
PSP X2 ( any version will work)

Tube of Choice
I used artwork by Keith Garvey. You can purchase it Here

Scrap kit Heart Sparkles PTU by KatnKda  HERE

Mask WSL Mask 84 Here
Or Masks of Choice.

* LETS BEGIN *

1.  Open new Image 600 x 600 ( we can crop and resize later)

2.  Add a new layer and flood fill with #72262b add your mask I used Mask 2 that comes with kit.
     Layers /  merge layers.
3.  Select Element 14 copy / paste /resize. With Magic Wand click inside heart frame then Select / Modify /
     Expand by 6, Copy and Paste Paper 17 or your choice Select / Invert / Delete. Move below frame.
4.  Copy / Paste Element 45 resize 2 x 50%. Image / free rotate 25 % Right. See tag for placement.
5. Add tube of choice, erase any parts showing that you  need to. Resize if necessary.
6.  Add any other Elements you wish to use. I used the following Elements 2, 5, 10, 19, 33 and 52.
7.  Add new layer, Flood fill with #72262b, Add mask of choiceor the one  I used WSL_mask, Layers /
    Merge / Merge Group.    
8.  Crop and resize the tag add your © and info
9.  Add your name.
10. If happy save as a png and your done.

Thanks and I hope you enjoyed trying my Tutorial.

I would love to see your creation.

Turn Back Time ♥


Supplies Needed
I am using the artwork of Keith Garvey you may
purchase his tubes at MPT
Or tube of choice
Scrap Time Traveller by Lynn of Scrapin Emporium Here
Font: Oxida
Drop Shadow of choice.
Mask_148 and 196 by Weescotslass Here
Remember to Save Often!!!

Let's begin
Open new image 600 x 600.
Select TTBrad 1, 2 and 3 copy paste resize to 20 percent each
. Move them around to your happy with placement.
Close out background layer and merge layers.
Open MuRa's Meister -Copies and use these settings:

Select TTClock copy paste resize to fit brad circle, see tag.
New layer copy paste TT Paper 9 into selection, deselect.
Apply mask 148 merge group.
Select TT Beads 1 copy paste resize to 20 percent then
go to Image-Free Rotate - 90 degrees left place
on side of mask -duplicate -mirror.
Select TT Deco copy paste resize to 23 percent place above beads.
Duplicate -Mirror.
Copy and paste your tube resize if needed, place to the left.
I used the following elements to compliment my tube.
TT Corset
TT Boot
TT Flower Clip
TT Hat
TT Luggage
TT Little Bird
TT Sachet
Copy and paste your elements resize as needed
New layer Select all copy paste TT Paper 3 into selection, deselect.
 Apply mask 196.Merge group.
Add drop to all except your mask layers.
Add your Artist © and your name then crop and save.
This is only a guide and feel free to use any other element you wish.
Most of all have fun creating.
This tutorial was written by Maree (aka Falcon) on 24 July 2010
Any similarities to this tutorial are purely coincidental
© Maree

As One in Harmony ♥


Supplies Needed
Tube or Image of choice, I am using the fantastc artwork of Jennifer Janesko
 you can find the artwork here at CILM
Scrapkit of choice, I am using a great kit called Harmony by Lynn Scrappers Emporium ,
you can find it Here
Font: Alexbrush 
Drop Shadow of choice.
Mask_363 by Weesctoslass

Remember to Save Often!!!

Let's begin

Open new image 600 x 600.
Select Harmony frame 1 copy paste resize 75 percent.
Select Magic wand click inside frame then copy paste Harmony Paper 12
Selections-Invert-Delete,add your tube of choice now then deselect.
Move paper below frame.
X-out bottom layer then Merge visible.
Image - Mirror'-resize 45 percent move to bottom left corner.
Select Harmony Coursage, Branch, then Branch Blossom copy paste resize as needed
then arrange flowers, on right side large frame..
Select Harmony Bow 2 copy paste resize 65 percent
place at bottom of flower arrangement.
Select Harmony Flower Deco copy paste resize 25 percent
 place left side small frame layer.
Select Harmony buterfly 1 and 2 copy paste resize as needed
place on or near flowers.
New layer then select all.
Select Harmony Paper 8 copy aste into selection-then deselect.
Apply Mask Merge group.Duplicate layer.
Click on mask layer 1 then Effects - Textured Affects -
 Mosaic Antique using these settings:

Add your Artist © and your name then crop and save.
This is only a guide and feel free to use any other element you wish.
Most of all have fun creating.

This tutorial was written by Maree (aka Falcon) on 17 September 2010
Any similarities to this tutorial are purely coincidental
© Maree

Happy Haunting ♥

Supplies Needed

Tube or Image of choice, I am using the fantastc artwork of Ismael Rac
you can find the artwork here at Xeracx
Scrapkit of choice, I am using a great kit called Halloween Fright by  Nik's Scripts & Scraps,
 you can find it at Scrappetizing.
Font: Bleeding Freaks
Drop Shadow of choice.
Mask_282 by Vix
Remember to Save Often!!!

Let's begin
Open new image 600 x 600.
Select Nik-HFOBDGravestone copy paste.
New layer Select All copy paste Nik HFPaper 6 into selection, deselect,
 apply mask Merge group.
Add your tube place on right side of layer.
Select Nik-HFOBD Spellbook copy paste resize 35 percent
 place on left side of tube.
Select Nik-HFHangingSign copy paste resize 15 percent move it around
 till it looks like it is hanging of the leters L and N, see tag.
Give all a drop shadow even the mask layer.
Click on background layer then Image - Add Border -
with these settings.


SelectNik-HFPaper 7 copy paste into selections,
then Effects - 3D Effects - Outer Bevel with
these settings:

Then Effect Drop Shadow using these settings:


You now can deselect.
Select Nik-HFOBDSpider copy paste resize 23 prcent.
Place on bottom left corner.
Add your Artist © and your name then crop and save or continue on for animation.
This is only a guide and feel free to use any other element you wish.
Most of all have fun creating.

Animation.

Open your Animation Shop,click back to Psp
Edit -Copy Special -Copy Merged,click on AS paste as new animation.
Back in Psp move the spider up the side half way then repeat above again,
 this time pasting after current frame.
Repeat this till you have 11 frames.
Select all (Crtl + A ) Animation -Frame Properties change to 45,
 this slows the animation down.
Click view animation to see it, if you are happy then save as a Gif.
I hope you have enjoyed this tutorial.

This tutorial was written by Maree (aka Falcon) on 17 September 2010.
Any similarities to this tutorial are purely coincidental
© Maree

Tuesday, September 14, 2010

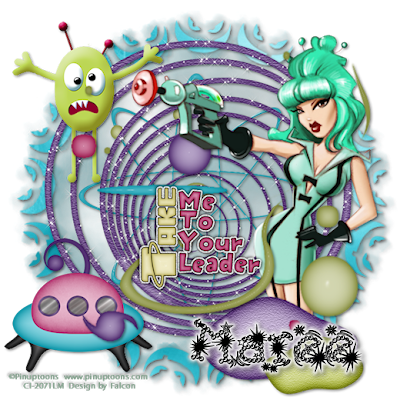
Spaced Out ♥


Supplies Needed

Tube or Image of choice, I am using the fantastc artwork of PINUPTOONS
you can find the artwork here  at  CILM
Scrapkit of choice, I am using a great kit called Lost In Space by Sinfully Creative Scraps,
you can find it here at Scrappin Dollars.
Font: Kingthing FlashBang
Drop Shadow of choice.
Mask_281 by Vix
Remember to Save Often!!!

Let's begin

Open new image 600 x 600.

New layer Selelct all copy paste paper 2 apply mask Merge Group.
 Give a Drop Shadow 2/2/50/6,  repeat this again.
Select Space doodle 2 copy paste center on layer.
Select Blackhole copy paste center on layer.
Select Alien copy paste resize 55 percent place top left corner.
Select Spaceship copy paste resize 65 percent place bottom left corner.
Select your tube copy paste on right side of layer.
Select Space Doodle copy paste move around to you are happy with it.
Select MoonRock cop paste resize 46 percent place at bottom of tube.
Select WordArt 4 copy paste resize 35 percent place in center of layer.
Give all a Drop Shadow 2/2/50/5.

Add your Artist © and your name then crop and save.
This is only a guide and feel free to use any other element you wish.
Most of all have fun creating.

This tutorial was written by Maree (aka Falcon) on 13 September 2010.
Any similarities to this tutorial are purely coincidental
© Maree

Autumn Fairie ♥


Supplies Needed
Tube or Image of choice, I am using the fantastc artwork of  Nikki Burnette
you can find the artwork here at CILM
Scrapkit of choice, I am using a great kit called Journee D'Autumn by Annie's Designs,
you can find it here at Sunflower Scraps.
Font: Aja
Drop Shadow of choice.
Mask_190 and 196 by Vix

Remember to Save Often!!!

Let's begin

Open new image 600 x 600.

New layer select all copy paste AD_paper 1 apply mask 190 Merge Group.
Add your tube place in center of layer.
Select AD_button copy paste below tube and off to the left of tube.
Select AD_Corner copy aste resize 55 percent place on left side of layer.
Select AD_citrouliles copy paste on right side of layer.
Select AD_AutumnLeaf copy paste above corner layer then resize 45 percent.
Select AD_Eyelet copy paste above mask layer resize to fit across mask,
use your Deform Tool for this.
Select AD_butterflie2 copy paste resize 35 percent place on left side, see tag.
New layer select all copy paste AD_paper 6 apply mask 196, then resize at 115 click ok.
Give all a Drop Shadow of choice, I used 2/2/50/5.

Add your Artist © and your name then crop and save.
This is only a guide and feel free to use any other element you wish.
Most of all have fun creating.

This tutorial was written by Maree (aka Falcon) on 13 September 2010
Any similarities to this tutorial are purely coincidental
© Maree

Snow Angel


Supplies Needed

Tube or Image of choice, I am using the fantastc artwork of Jessica Dougherty
you can find her artwork here at CILM

Scrapkit of choice, I am using a great kit called Winters Ice by Puddicat Creations,
you can find it here at Scrappetizing.
Font:
Drop Shadow of choice.
Mask by

Remember to Save Often!!!

Let's begin

Open new image 600 x 600.
New layer slect all copy paste pdc_paper3 then apply mask-merge layers.
Select pdc_frame3 copy paste resize 85 percent.
Select pdc_xmasball 01 copy paste resize 120 percent
then moe below frame.
Select pdc_bow 5 copy paste resize 65 percent
place on top of ball see tag.
Select your tube copy paste on right side of frame.
Select pdc_bearornament 1 copy paste resize 45 percent
place at bottom of frame.
Select pdc_snowman 1 copy paste resize 40 percent
 place on left of frame.
Give all a light Drop Shadow.

Add your Artist © and your name then crop and save.
This is only a guide and feel free to use any other element you wish.
Most of all have fun creating.

This tutorial was written by Maree (aka Falcon) on 12 September 2010
Any similarities to this tutorial are purely coincidental
© Maree

Monday, September 6, 2010

Snow Dreaming ♥


Supplies Needed

Tube or Image of choiceI am using the artwork of Keith Garvey
 you can purchase at MPT
Scrapkit of choice, i am using a great kit called Lilsnowman by Puddicat Creations,
you can find at Scrappetizing.
Font: Renaissance
Drop Shadow of choice.
Mask_248 by Weescotslass
Animation Shop
Snow effect Here
Remember to Save Often!!!
Let's begin

Open new image 600 x 600.
New layer select all copy paste paper 11 into selection-deselect. Apply mask.
Select pdc_tree2 copy paste resize 75 percent.
Select pdc_doodle 3 copy paste below tree layer then resize 65 percent,
 I did not add a drop shadow to this.
Duplicate-Mirror, move till your happy with placement.
Select pdc_bench copy paste mirror then resize 56 percent place on right of layer.
Select pdc_present 1 n 3,copy paste resize to fit on bench.
Select pdc_candycane 2 copy paste resize by 43 percent place on bench between presents.
Select pdc_lamppost1 copy paste place on left side of tree.
Select pdc-element 10 copy paste resize 48 percent place in front of tree.
Select pdc_element 2 copy paste resize 45 percent place on right side, see tag.
Add your tube of choice.
Give all except your Mask and Doodle a light Drop Shadow.

Add your Artist © and your name then crop and save or continue for Animation.
This is only a guide and feel free to use any other element you wish.
Most of all have fun creating.

Open Animation Shop
In psp X-out your tube Edit-Copy Special -Copy Merged.
In AS right click paste as new animation.
Hit Ctrl + L 3 times, giving you 4 frames.
Open your snow effort select all Edit copy paste into frame 6 times to fill layer.
Back in Psp select your tube copy paste in AS as new animation then

Edit copy Edit-Paste - Into selected frame (1st frame) position your tube.
Save as a Gif and your done.

This tutorial was written by Maree (aka Falcon) on 3 September 2010
Any similarities to this tutorial are purely coincidental
© Maree