Monday, October 31, 2011

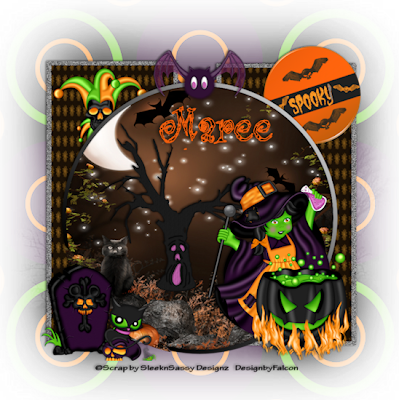
Spooky Halloween ♥


My Tutorials are strictly my own creations,
if they resemble another it is purely coincidence.

This was written with the use of PSP X2.
You may create it any version of PSP.

Supplies Needed.

Scrap kithaunted Halloween from Jen SleeknSassy Designz .
You can purchase scrap at ScrappinDollars.

Art work Of Choice .

Font:Of choice

Mask by Bev HorsePlays Pastures HHP_11 Here


Image is better to have larger to work with then we can crop and resize when completed.
Open 700 X 700 transparent Image.

In your Material pallete select FG:#808080 BG:#000000
Select Preset Shape-Ellipse draw out large cirlcle.With Magic wand click inside circle then hit

delete.
C/P HH_Paper9 arrange to your liking then hit delete,
move below outer circle.
Give your outer circle a Drop shadow 4/4/50/5.Deselect.Merge layers down.
Change shape to rectangle then draw out a large rectangle duplicate Image Mirror.
With Magic wand click inside hit delete C/P HH_Paper6 into Selection. Click on outer rim.

Adjust Add Noise Uniform 65% tick Monochrome box ok.
Repeat for other rectangle.
C/P HH_Element 19 arrange on left of layer resize 48% add drop shadow.
C/P HH_Element 37 arrange on right of layer resize 65% add drop shadow.
C/P HH_Element 6 arrange in center of cirlce add drop shadow.
C/P HH_Element 18 Image Mirror arrange on left of layer resize 65% add drop shadow.
C/P HH_Element 20 arrange on right of layer resize 85% add drop shadow.
C/P HH_Element 2 arrange at top of cirlce resize 75% add drop shadow.
New layer select all C/P HH_Paper1 apply mask Merge Merge group.

Add your Artist © and your name then crop.
This is only a guide and feel free to use any other element you wish.
Most of all have fun creating.


Written and copyrighted to Maree (aka Falcon) October 2011.
Under no uncertain terms are you allowed to make money
from anything produced from this tut, this is against my TOU's.

Thursday, October 13, 2011

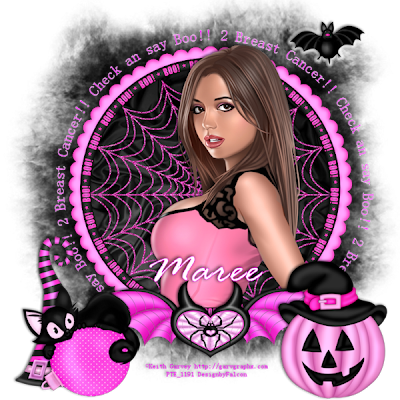
Say Boo!!2 Breast Cancer!! ♥


My Tutorials are strictly my own creations,
if they resemble another it is purely coincidence.

This was written with the use of PSP X2.
You may create it any version of PSP.

Supplies Needed.

Scrap Halloween Treats from Aurellie-Pink Candy Designs .
You can get Here.
Art by © Keith Garvey . Remember to purchase a license to use this art work,.
You can do so at PTE

Font: SimSun an Rage It


Mask:Designs by Vaybs DBV_111 Here.

Plug-In
Eye Candy any version.

Image is better to have larger to work with then we can crop and resize when completed.
Open 700 X 700transparent Image.

Copy paste frame 2 as new layer.click inside with Magic wand. Selections Modify Expand by 4.
New layer copy paste pp4 into selection. Deselect move below frame layer.Add drop shadow.
Copy paste web move below frame layer.
Select PreSet Tool-Ellispe draw out a circle to cover frame.Select Text tool I used #ff00ff
then using Simsun font type "Check an say BOO!! to Breast Cancer!! repeat twice.
Click on the + sign close out the circle leaving your text showing. Convert layer to raster.
Add drop shadow.
Copy paste your tube of choice arrange to your liking add drop shadow.
Copy paste heart resize 85% arrange bottom of frame add drop shadow.
Copy paste hat3 arrange on left of layer resize 85% add drop shadow.
Copy paste decor (cat) arrange on left resize 65% add drop shadow.
Copy paste pumpkin resize 75% arrange on right of frame.
Copy paste bat resize 35% arrange to of frame.

Open Eye candy-Gradient Glow give bat cat and pumpkin a using
#ffffff with these settings.


Click background layer floodfill with #000000 then apply mask merg merge group.

Add your Artist © and your name then crop.
This is only a guide and feel free to use any other element you wish.
Most of all have fun creating.


Written and copyrighted to Maree (aka Falcon) October 2011.
Under no uncertain terms are you allowed to make money
from anything produced from this tut, this is against my TOU's.

Saturday, October 8, 2011

Magic Potion ♥


My Tutorials are strictly my own creations, if they resemble another it is purely coincidense. This was written with the use of PSP X2. You may create it any version of PSP.

Supplies Needed.

Scrap Magic Potion from Galerie Jackie .You can get Here.

Art work by ©Lorenzo Di Mauro . Remember to purchase a license to use this art work.
You can do so Here.

Font: Pumpkin

Mask: Designs by Vaybs DBV_97 Here.


Image is better to have larger to work with then we can crop and resize when completed.
Open 700 X 700transparent Image.

Open Galeriejackie_Kitmagicpotion (40) frame copy paste as new layer resize 30%
add drop shadow.
Click inside frame with Magic wand. selections Modify Expand by 5.Open new layer.

Open Galeriejackie_Kitmagicpotion (46) paper copy paste into selection on new layer.Deselct.Move below frame layer.
Open Galeriejackie_Kitmagicpotion (2) rock coopy paste resize 25% arrange on layer
add drop shadow
Open Galeriejackie_Kitmagicpotion book resize 9%
Open Galeriejackie_Kitmagicpotion (3) fence resize 30% paste above bagckground layer
add drop shadow.
Open Galeriejackie_Kitmagicpotion (31) candle copy paste resize 20%
add drop shadow arrange on left of layer.
Open Galeriejackie_Kitmagicpotion (13) grass copy paste resize 22%
add drop shadow arrange to left of layer.
Duplicate layer Image/Mirror move below fence layer.
Open Galeriejackie_Kitmagicpotion (30) pot copy paste resize 25% arrange on r
ight of layer add drop shadow.
Open Galeriejackie_Kitmagicpotion (4) web copy paste below fence layer.
Resize to fit fence then duplicate , move duplicated layer
to left side of fence, see tag.
Open Galeriejackie_Kitmagicpotion (5) branch with lights copy paste below web layer
add drop shadow.
Add your tube now resize if needed and arrange on layer.
Open Galeriejackie_Kitmagicpotion (6) pumkin copy paste below
frame layer resize 20% add drop shadow.
Open Galeriejackie_Kitmagicpotion (8) bat copy paste above pumkin layer
resize 23% add drop shadow arrange on layer.
Open Galeriejackie_Kitmagicpotion (42) clouds copy paste above backgrund layer
resize 90% arrange above fence, see tag.
Open Galeriejackie_Kitmagicpotion (48) paper copy. Select all on background layer
then paste into selection. deselect.
Apply mask to layer merge merge group.


Add your Artist © and your name then crop.
This is only a guide and feel free to use any other element you wish.
Most of all have fun creating.


Written and copyrighted to Maree (aka Falcon) October 2011.
Under no uncertain terms are you allowed to make money
from anything produced from this tut, this is against my TOU's.

Friday, October 7, 2011

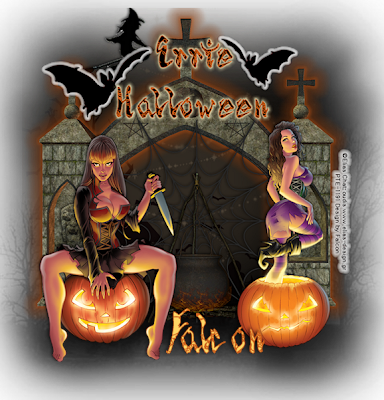
Errie Halloween. ♥


My Tutorials are strictly my own creations, if they resemble another it is purely coincidence.

This was written with the use of PSP X2. You may create it any version of PSP.
Supplies Needed.

Scrap kit Everything Errie from Jen -SleeknSassy Designz.
You can get download it Here.

Art work by ©Elias Chatzoudis. Remember to purchase a license
to use his art work. You can do so Here.

Font: Spiderbite.

Mask:HorsePlay's Pastures HPP_4 & 11

Image is better to have larger to work with then we can crop and resize when completed.
Open 700 X 700transparent Image.
Flood fill layer with #000000 then apply mask HPP_11/merge/merge group.
C/P Paper 2 as new layer then apply mask HPP_4/merge/merge group.
C/P Archway arrange in center of layer, add drop shadow.
Effects/Eye Candy/Gradient Glow usingthese settings.
On your color palette FG: #cf5d19.


C/P Web resize 85% arrange in center of archway then add drop shadow.
C/P Cauldron 2 arrange in front of spiderweb add drop shadow
C/P Flying Witch below arcway layer, arrange at top of layer, add drop shadow.
C/P Bat as new layer resize 65% Effects/Eyecandy/Gradient Glow with these settings:


Add drop shadow. Duplicate bat. Image/Mirror/ resize 65% arrange over archway.
Add your tube/s resize if needed and arrange on layer, give a drop shadow to each tube.

Add your Artist © and your name then crop.
This is only a guide and feel free to use any other element you wish.
Most of all have fun creating.


Written and copyrighted to Maree (aka Falcon) October 2011.
Under no uncertain terms are you allowed to make money
from anything produced from this tut, this is against my TOU's.
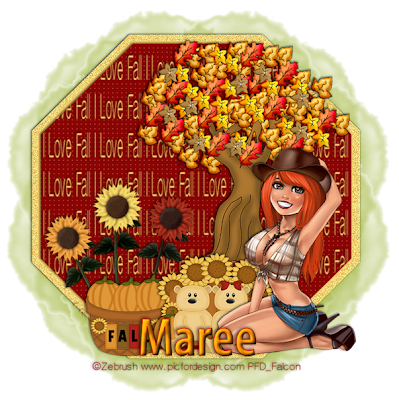
I Love Fall ♥


My Tutorials are strictly my own creations, if they resemble another it is purely coincidence. This was written with the use of PSP X2. You may create it any version of PSP.
Supplies Needed.

Scrap kit Welcome to Our Patch CU from Jen-SleeknSassy Designz.
You can purchase it Here

Art work by ©Zebrush . Remember to purchase a license to use this art work.
You can do so at PFD.

Font: Of choice

Mask:HorsePlay's Pasture HPP_7 Here.
Thanks Bev.

Jen has created some beautiful CU items, I hope you enjoy creating with them.

Image is better to have larger to work with then we can crop and resize when completed.
Open 700 X 700transparent Image.

I chose the colors for my shape from the color swatch that is included with these CU product.
Foreground #fccf6a Background# 8a0401.

Select Preset Tools and draw out a shape of choice.
These are the settings I used:

Right click and convert layer to raster.

Click inside with Magic wand/Effects Penta/Dots n Cross's apply these settings.


Add drop shadow then deselect.

Using Magic wand click on outside of shape/Adust/Add Noise-Uniform 50% tick the box then click OK.Add drop shadow then Deselect.

I add my own wordart' I Love Fall' using #fccf6a.
Use the Pick tool to fit wordart inside shape.
Then use your eraser to clean up the edges.
Give a drop shadow twice.
5/5/25/5 then -5/-5/25/5.

C/P Tree arrange on right of layer, add drop shadow.
C/P Fall_basket resize 45% arrange on left of shape, add drop shadow.
C/p Sunflowers 1, 2 an 3 resize 65% these below the fall_basket layer.
Use your pick tool and angle them, give all a drop shadow.
C/P Bears resize 40% arrange in center of shape, add drop shadow.
Add your choice of tube now and resize if needed. Add drop shadow.
Arrange on the right of layer.
New layer flood fill with #8fa818 apply mask/merge/merge group.


Add your Artist © and your name then crop.
This is only a guide and feel free to use any other element you wish.
Most of all have fun creating.


Written and copyrighted to Maree (aka Falcon) October 2011.
Under no uncertain terms are you allowed to make money
from anything produced from this tut, this is against my TOU's.

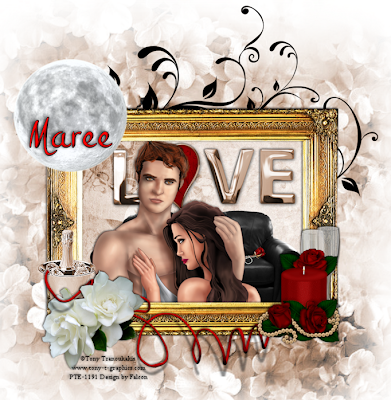
Touch of Seduction. ♥


My Tutorials are strictly my own creations, if they resemble another it is purely coincidence.

This was written with the use of PSP X2. You may create it any version of PSP.

Supplies Needed.

Scrap kit Desire n Seduction from Missy Lynn-Immortal Dreams .
You can get Here.

Art work by ©Tony Tzanoukakis . Remember to purchase a license to use this art work.
You can do so at PTE

Font:P22 Hopper Joesphi


Image is better to have larger to work with then we can crop and resize when completed.
Open 900 X 700transparent Image.

C/P ID-SD-FRAME 5/Image/FreeRotate 90 right. Add drop shadow to frame.
Click inside frame with Magic wand.Selections/Modify/Expand by 5.
C/P ID-SD-paper13 arrange to your liking. Selections/Invert/hit delete/
move below frame layer.
C/P ID-SD-Couch below frame layer, resize 75% arrange in center.
Add drop shadow.
C/P ID-SD-Flower 3 resize 18% move to right of couch,
add drop shadow.
C/P ID-SD-Love wordart arrange above couch,
add light drop shadow.
C/P ID-SD-Candle 4 resize 55% arrange on right of frame,
add drop shadow.
C/P ID-SD-Champange resize 45% arrange on left of frame.
Add drop shadow.
C/P ID-SD-Flower 9 resize 45% arrange next to champagne,
add drop shadow.
C/P ID-SD-Bow 5 resize 85% arrange on bottom of frame.
With Selection tool select part of the flower 9 when happy right click
Promote Selection to layer.Deselect. Arrange above bow layer, see tag.

C/P ID-SD-Doodle above background layer, add drop shadow,
arrange so it shows above frame.
C/P ID-SD-Moon paste above frame layer resize as needed.

New layer then C/P ID-SD-Paper9 apply mask/Merge/Merge group.


Add your Artist © and your name then crop.
This is only a guide and feel free to use any other element you wish.
Most of all have fun creating.


Written and copyrighted to Maree (aka Falcon) October 2011.
Under no uncertain terms are you allowed to make money
from anything produced from this tut, this is against my TOU's.

Monday, October 3, 2011

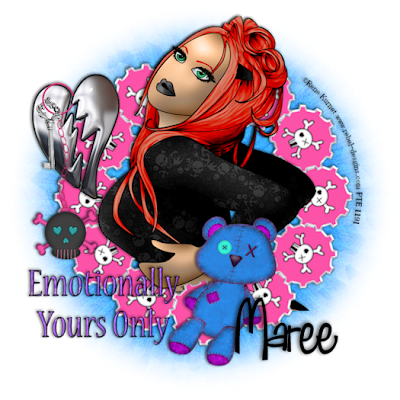
Emotionally Yours Only ♥


My Tutorials are strictly my own creations, if they resemble another it is purely coincidence.

This was written with the use of PSP X2. You may create it any version of PSP.

Supplies Needed.

Scrap kit Emotionally Yours from Kim's Korner .You can get it Here

Art work I am using from Rene Kunert. Remember to purchase a license to use this art work, You can do so Here.

Font: Fabulous 50's

Mask:HorsePlay's Pasture HPP_1 Here.

Plugin: MuRa's Meister-Copies
Image is better to have larger to work with then we can crop and resize when completed.
Open 700 X 700 transparent Image.
C/P july11_emotionallyyours_KK_bottlecap03 resize 50%. Open MuRas Miester-copies
use these settings:


Objects/Align/Center in canvas.Add drop shadow.
C/P your tube below cap layer. I used a closeup tube for this.
With your Selections Tool outline your tube so its going to pop out.
Right click Promote Selection to Layer.Deselect.
C/P july11_emotionallyyours_KK_Heart place on left of layer, resize 75%.Add drop shadow
C/P july11_emotionallyyours_KK_Skullchain move over left side of heart, add drop shadow
C/P july11_emotionallyyours_KK_key resize 45% place over keyring on left side.
Use your Selection tool to remove part of key,
to show keyring. Add drop shadow.
C/P july11_emotionallyyours_KK_Teddybear01 resize 42% position on
lower right of tube, add drop shadow.
C/P july11_emotionallyyours_KK_Paper09 apply mask/merge/merge group.


Add your Artist © and your name then crop.
This is only a guide and feel free to use any other element you wish.
Most of all have fun creating.


Written and copyrighted to Maree (aka Falcon) October 2011.
Under no uncertain terms are you allowed to make money
from anything produced from this tut, this is against my TOU's.
Magic ♥


My Tutorials are strictly my own creations, if they resemble another it is purely coincidence. This was written with the use of PSP X2. You may create it any version of PSP.
Supplies Needed.

Scrap kit Magical Winged Unicron from Conchi-DnScraps.You can get it Here.

Art work I am using from Alehandra Vanhek. Remember to purchase a license to use this art work, You can do so Here.

Font: MV Boli

Mask:HorsePlay's Pastures HHP_11 Here.

Animation: Made by Love Shack Animation-3Flash Here.

Animaation Shop.

Image is better to have larger to work with then we can crop and resize when completed.
Open 700 X 700transparent Image.

C/P Mgicwingedunicornboxmagic/Objects/Alin center.Add drop shadow.
C/P Mgicwingedunicornbow3 resize 45% position on top left, add drop shadow.
C/P Mgicwingedunicornunicorn resize 75% position slightly to left of layer.
C/P Mgicwingedunicornflowers position on right of layer resize 85%, add drop shadow.
C/P Mgicwingedunicornmushroom postion on right lower edge of layer resize 65%, add drop shadow.
C/P Mgicwingedunicornstep4 positon at bottom of layer, add drop shadow.
C/P Mgicwingedunicornmagicbox position on left then resize 50%, add drop shadow.
C/P your tube of choice resize if needed add drop shadow.
C/P Mgicwingedunicornbook3 posiiton at bottom of layer resize 65%, add drop shadow.
C/P Mgicwingedunicornlight position at top of flowers use your selection tool to remove top of string.This gives the effect of hanging in flowers.
C/P Mgicwingedunicornbutterfly4 resize 40% move to top of flowers, add drop shadow.
C/P Mgicwingedunicornwordart resize 75% move to top of layer, add drop shadow.
C/P Mgicwingedpaperdn17 apply mask/merge/merge group.


Add your Artist © and your name then crop.If you wish to Animate please continue.
This is only a guide and feel free to use any other element you wish.
Most of all have fun creating.

Animation

Open AS then click back into Psp.
Edit/Copy, click into AS Paste as New Animation.
Crtl+L hit this 16 times we now have 17 frames.Select the prograte Paste button.
Open animation Select All then resize animation by 50%. Select all/copy.
Select All frames on tag/click in first frame/Edit/Paste/Into Selected frame.
I placed mine in the light.
Save as a Gif.

Written and copyrighted to Maree (aka Falcon) October 2011.
Under no uncertain terms are you allowed to make money
from anything produced from this tut, this is against my TOU's.

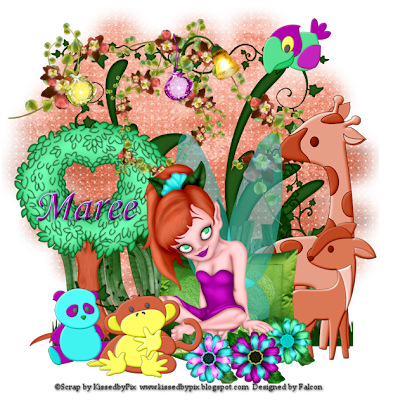
Chilling with Friends ♥


My Tutorials are strictly my own creations, if they resemble another it is purely coincidence.

This was written with the use of PSP X2. You may create it any version of PSP.

Supplies Needed.

Scrap kit Woodland Ball from Kissedby Pix Design .You can get Here.

Mask:Vaybs DVB_89 Here.

Image is better to have larger to work with then we can crop and resize when completed.
Open 700 x 700 transparent Image.

C/P KBP-WB_Grass3 move to bottom of layer.
C/P KBP-WB_Doodle5 move to center of layer.Add drop shadow.
C/P KBP-WB_WackyFence2 resize 85% then duplicate position,
add drop shadow.
C/P KBP-WB_HeartTreee resize 90% move to left of layer,
add drop shadow.
C/P KBP-WB_LeafFrame2 resize by 110%. Add drop shadow.
C/P KBP-WB_Vine resize 75%, duplicate move one to right side of frame.
Click one 2nd vine Image/FreeRotate 90 Right.
Add drop shadow to both.
C/P KBP-WB_Giraffe resize 75% place on right of layer.
Add drop shadow.
C/P KBP-WB_Deer resize 65% place in front of giraffe.
Add drop shadow
C/P KBP-WB_Bear resize 50% place in front of tree,
dd drop shadow.
C/P KBP-WB_Pillows resize 68% move to center of layer,
add drop shadow.
C/P KBP-WB_Flower1 resize 20% place near back of pillow,
add drop shadow.
C/P KBP-WB_FairyQueen resize 85% place on top of pillows,
add drop shadow.
C/P KBP-WB_Flower 2 & 3 resize both 22% place in front of pillow.
C/P KBP-WB_Monkey resize 75% move to left of pillow,
add drop shadow.
C/P KBP-WB_DangleDust 1 & 2 resize both 18% position along top of frame.
Use your selection tool to delete part of the string,
this gives the effort they are hanging on the branch.
C/P KBP-WB_GlassLatern resize 25% position at top of frame, add drop shadow.
C/P KBP-WB_Bird4 resize 23% place on top right of frame, add drop shadow.
C/P KBP-WoodlandBallLeafpaper1 apply mask, merge /merge group.

Add your Artist © and your name then crop and save.
This is only a guide and feel free to use any other element you wish.
Most of all have fun creating.


Written and copyrighted to Maree (aka Falcon) October 2011.
Under no uncertain terms are you allowed to make money
from anything produced from this tut, this is against my TOU's.