Wednesday, April 27, 2011

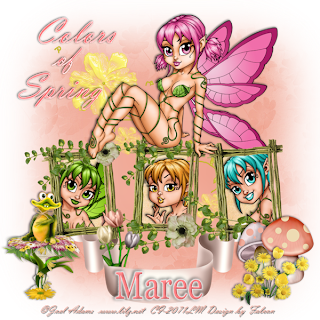
Colors of Spring ♥


For this Tutorial you will need.

A selection of Tube/s of your choice I am using the awesome artwork of © Joel Adams ,
which you must have a license to use you can get one at CDO
* Please note that I purchased my tube from CILM *

Elements and Papers are from a scrap kit called Spring Time Color
by Cindy of *Puddicat Creations* you can purchase it Here.
Font: Vani
Drop Shadow of choice.
Mask by *HorsePlays Pastures*, it's #11 you can download it Here
Remember to Save Often!!!

Let's create

Open new image 700 x 6700 we can crop later.

Select pdc_ladder1 place center of layer. Using the Magic Wand click inside each frame.
Copy paste pdc_paper1/selections/invert/delete, move below frame.
Select your tube/s then hit delete/deselect. Move below frame layer, give all a Drop Shadow.
Layers Merge/Merge visible.

Open your main tube and place on top of frame, give a Drop Shadow.
Select pdc_mushroom2 resize 48% move to right of frame.
Select pdc_flowers 8 resize 27% move infront of mushrooms.
Select pdc_frog 1 Image/Mirror move to left of frame/resize 32%.
Select pdc_ribbon 3 paste below frame layer.

Select pdc_flowers 1 paste above frame layer then resize 42%,
then using Freehand selection tool erase the lower stems,
giving the effect flowers are behind ribbon.

Select pdc_blingflower1 resize 75% move to left of layer.
Select pdc_paper14 new layer select all paste into selection. Duplicate.
On Duplicated layer Adjust/Blur/Gaussian Blur-50.

Give a Drop Shadow to any layer that requires it.

Add your Artist © and your name then crop and save.
This is only a guide and feel free to use any other element you wish.
Most of all have fun creating.

Email me your creation, so I can show off your creations on my blog.
Thank you for using my tutorial.

Written and copyrighted to Maree (aka Falcon) on 28th April 2011.
Under no uncertain terms are you allowed to make money from anything
produced from this tut, as this is against my TOU's.

Any similarities to this tutorial are purely coincidental.

Friday, April 22, 2011

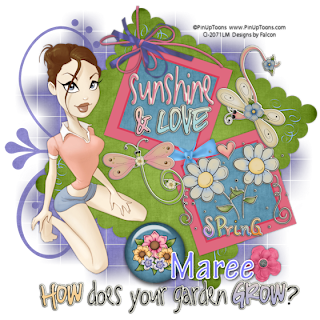
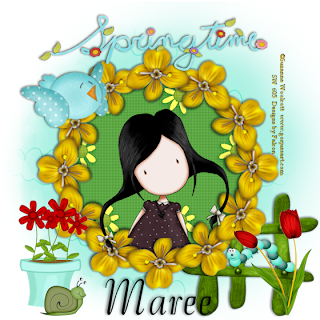
SpringTime ♥


Supplies Needed

Scrap kit Down In The Garden by Scraps by Danielle,
you can purchase the kit Here

This artwork of ©Suzanne Woolcott, you can purchase this tube Here

Font: BernHard Tango

Drop Shadow of choice.

Mask_01 by HorsePlaysPasture Here
Remember to Save Often!!!

Let's create

Open new image 650 x 650.
Select flower2 center then using MuRa's meister with these settings:


Click inside with Magic wand/selections/Modify/Expand by 10 then
copy/paste Paper 1.Selections/Invert/hit delete.
Then using Penta.com-color dots with these settings:


Then move below flower frame.
Add your tube now resize if needed.
Open fense and paste below frame background layer,
resize 22% move to right of layer.

Open Earthworm resize 23% move to lower rung on fense.
Open Tulip resize 24% move to right of fense.

Open Flower pot resize 26% move to left of layer.
Open Snail resize 21% move to side of flower pot.

Open Bird resize 26% Image/Mirror/ move to left of layer.
Open Springtime wordart move to top of flower frame.
Select Paper 12/new layer select all paste into selection
then apply mask/merge group.
Add a Drop Shadow I used Lokas-3D Shadow -30.

Add your Artist © and your name then crop and save.
This is only a guide and feel free to use any other element you wish.
Most of all have fun creating.

Email me your creation, so I can show off your creations on my blog.
Thank you for using my tutorial.

Written by © Maree (aka Falcon) on 22 April 2011.
Any similarities to this tutorial are purely coincidental.
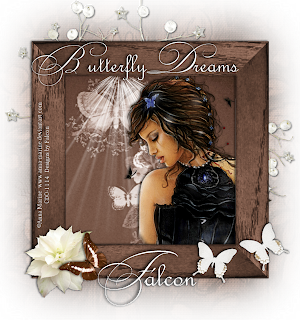
Butterfly Dreams ♥


Supplies Needed

Scrap kit Just Meg by Mystical Illusionz, you can purchase the kit Here

This artwork of ©Anna Marine, you can purchase this tube Here
Please remember to use the artist license when using their artwork.
Font:
Drop Shadow of choice.
Mask_11 by HorsePlaysPastures Here
Remember to Save Often!!!

Let's create

Open new image 600 x 600.
Select mizl1-justmeg-frame3 resize 85% click inside frame with Magic wand.
Selections/Modify/Expand by 6. New layer copy past into selection
emizl1-justmeg-pp8/deselect.

Select mizl1-justmeg-rayoflight copy paste move over butterfly on
background paper.
Open your tube copy paste resize if needed.I chose to Mirror my tube.
Select mizl1-justmeg-flower4 resize 35% move to left of frame.
Select mizl1-justmeg-branch resize 75% move below paper layer.
Select mizl1-justmeg-butterly1 resize 23% move to side of flower.

Select mizl1-justmeg-butterflies resize 22% move to bottom right of frame.
Select mizl1-justmeg-pp4 paste as new layer then apply mask/merge group.

Give all a light Drop Shadodw of choice.

Add your Artist © and your name then crop and save.
This is only a guide and feel free to use any other element you wish.
Most of all have fun creating.

Email me your creation, so I can show off your creations on my blog.
Thank you for using my tutorial.

Written by © Maree (aka Falcon) on 22nd April 2011.
Any similarities to this tutorial are purely coincidental.

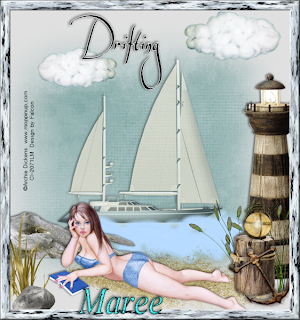
Drifting ♥


Supplies Needed

Scrap kit Out To Sea by Jessica - Jessica's Sweet Nothings Here
The artwork of ©Archie Dickens,I have used my CILM license,
the artwork can now be purchased Here

Font: Vijaya
Drop Shadow of choice.

Mask_11 by HorsePlays Pastures Here
Remember to Save Often!!!

Let's create

Open new image 650 x 650.
Select jsn_ots_pp3 and apply mask/merge group.
Select jsn_ots_lighthouse resize 85% move to right of layer.
Select jsn_ots_sailboast 2 resize 75% move to center of layer.
New layer click on Material FG: change color to #b6daff.
Select Paint brush and add a few sweeping brushstrokes, to give a wave effect,
then use your Smear tool around the edege of waves to soften the effect.
Effects/Textured Effects/Sandstone with these setting:

Select jsn_ots_driftwood resize 65% move to left of layer just below wave line.
Select jsn_ots_seagrass resize 42% ,Image/Mirror/move to left of layer.

Select jsn_ots_pierpost 2 resize 32%, move to right of layer.
Select jsn_ots_pampassgrass/paste below peirpost layer resize 39% duplicate.

Select jsn_ots_latern resize 15% move to sit upon pierpost.
Select jsn_ots_anchor resize 16%, using your Pick tool to angle it.

Select jsn_ots_cloud resize 35% duplicate resize this by 28%.
Select jsn_ots_sand paste move to bottom of layer.

Add your tube resize if needed.
Give all a Drop Shadow 2/2/55/6.

Layers Merge visible - open Filters Unlimited 2 and apply these settings:


Add your Artist © and your name then crop and save.
This is only a guide and feel free to use any other element you wish.
Most of all have fun creating.

Email me your creation, so I can show off your creations on my blog.
Thank you for using my tutorial.

Written by © Maree (aka Falcon) on 22nd April 2011.
Any similarities to this tutorial are purely coincidental.

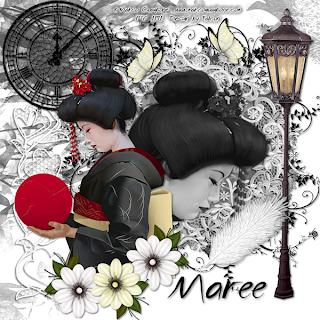
Friday, April 15, 2011

Just A Memory ♥


Supplies Needed

I'm using the artwork of Marco Guaglione , you can purchase the tube Here
Scrap kit by Shellz Creations called Just A Memory Here
Font: Imagination Theory
Drop Shadow of choice.
Laurie Made Mask_128 Here

Remember to Save Often!!!

Let's create

Open new image700 x 700.
New layer select all copy paste into selection.sc-just a memory paper12
apply mask/merge group.
Open your close up tube paste into center of mask and resize if needed.
Select sc-just a memeory element 51 resize 43% move to left of layer.
Select sc-just a memeory element 44 resize 48% move to left of layer.
Select sc-just a memeory element 43 resize 85% move to top left of layer
Add your main tube place on left of layer.
Select sc-just a memeory element 29 resize 42% using your pick tool angle the feather.
Select sc-just a memeory element 34 resize 35% move to bottom of main tube/duplicate move

toleft side.
Select sc-just a memeory element 33 resize 33% Image/Flip/move to center of tube.
Select sc-just a memeory element 19 resize 29% move to top of mask/duplciate/Image/Mirror, move

to your happy with placement.
New layer/layers/Arrange/send to bottom/selections/select all/open
sc-just a memory paper 5/paste into selection.

Add your Artist © and your name then crop and save.
This is only a guide and feel free to use any other element you wish.
Most of all have fun creating.

Email me your creation, so I can show off your creations on my blog.
Thank you for using my tutorial.

Written by © Maree (aka Falcon) on 16th April 2011.
Any similarities to this tutorial are purely coincidental.
Friday, April 8, 2011

Bunny Surprise ♥


Supplies Needed

I'm using the artwork of© Keith Garvey , you canpuchase tube Here
Scrap kit by Mimi Concept called Collab PaquesBooking Here
Font: Chark Text116 tt
Drop Shadow of Choice.
WSL Mask_83 Here

Remember to Save Often!!!

Let's create

Open new image 650 x 650.

Open MimMiConcept-collab paquesbooking 4 (frame)resize 25%
click inside with Magic WandSelections/Modify/Expand by 4
copy paste MimMiConcept-collab paquesbooking background resize 19%.
Selections/Inver/hit Delete/move below frame.
Open MimMiConcept-collab paquesbooking element 7 (branch)
resize 15% move to left of frame.
Open MimMiConcept-collab paquesbooking element 22(fence)
resize 22% move to bottom of frame.
Open MimMiConcept-collab paquesbooking element 57(pink egg) resize 10%
Open MimMiConcept-collab paquesbooking element 23(easter bunny) resize 25%
Open MimMiConcept-collab paquesbooking element 14(leaves) resize 6%
Open MimMiConcept-collab paquesbooking element 41(cho egg) resize 7%
Open MimMiConcept-collab paquesbooking element 25(eggbasket) resize 18%
Open MimMiConcept-collab paquesbooking element 03(blue egg)
resize 10% place in basket
Open MimMiConcept-collab paquesbooking element 20 (leaf ribbon)resize and
place on basket handle.
Open MimMiConcept-collab paquesbooking element 30 (blue bow) resize 5%
move place on rabbit, see tag.
Open your tube and place on right of layer.
Open MimMiConcept-collab paquesbooking paper5 paste as new layer
apply mask/merge group
Open MimMiConcept-collab paquesbooking element 31 resize 11%
move to top left of frame.

Add your Artist © and your name then crop and save.
This is only a guide and feel free to use any other element you wish.
Most of all have fun creating.

Email me your creation, so I can show off your creations on my blog.
Thank you for using my tutorial.

Written by © Maree (aka Falcon) on 6th April 2011.
Any similarities to this tutorial are purely coincidental.
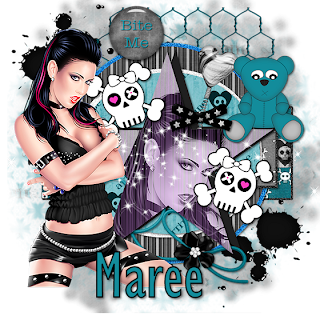
Bite Me!! ♥


Supplies Needed

I'm using the artwork of ©Ismael Rac , you can purchase tubes Here
Scrap kit by Alika's Scraps called Bite Me Here
Font:Of Choice
Drop Shadow of choice.
HorsePlays Pastures mask_10 & 13 Here
Template_30 by Amy & Leah's Gimtastic Here

Remember to Save Often!!!

Let's create

Open template and delete © layer.
Click on rect 2 layer/Selections/Float/Defloat/newlayer paste aspaper19/
Selections/Invert/delect/ then delete original layer.
Repeat for circle 2,3 layers, rect 1 and thin rect layers using paper of your choice
or the ones I used.
Select Star1 layer Selections/Float/Defloat/new layer/paste your closeup tube/Delete.
Change Blend Mode to Luminance (legacy).
Click on Cirlce 3 layer Adust/AddNoise/Guassian 50, repeat on Circle 2 layer.
Click on circle 1 layer paste as24 resize 45%, move to bottome of circle.
Open as14 resize 22% palace on bow.
I add these elements as19,as38,as40 and as53 resize and place
or add your own choice.
Open as17 paste above streaks layer.
Open as22 paste above above background layer, move to top of layer
Open as35 paste above background layer/duplicate/Image/Mirror/Flip.
New layer open aspaper02 apply mask 13/merge/merge group.
New layer open aspaper17 apply mask 10/merge/merge group.
Give all a Drop Shadow 1/1/50/4.

Add your Artist © and your name then crop and save.
This is only a guide and feel free to use any other element you wish.
Most of all have fun creating.

Email me your creation, so I can show off your creations on my blog.
Thank you for using my tutorial.

Written by © Maree (aka Falcon) on 7th April 2011
Any similarities to this tutorial are purely coincidental.

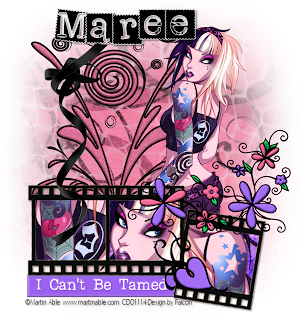
I Can't Be Tamed ♥


Supplies Needed

I'm using the artwork of©Martin Abel, you can purchase tube Here
Scrap kit by Tammy's Scraps called I Can't Be Tame Here
Font: 2Peas Gone Postal.
Drop Shadow of choice.
HorsePlay's Pasture Mask_28 Here
Remember to Save Often!!!

Let's create

Open new image 650 x 650.
Select Cant BeTamed Film Strip1 resize 65%/click inside each square with Magic wand
choose your tube and select different parts for each square/Deselect
Give both your tube and film strip a light Drop Shadow then right click Merge down.
Add your main tube and move to rlight of layer, give this a Drop Shadow.
Select Cant BeTamed Doodle 2/Image/Miror move to right of film.

Select Cant BeTamed Doodle 3 resize 65% move to film strip place on right sidee.
Select Cant BeTamed Doodle 6 paste above background layer resize 67%
Select Cant BeTamed Label 3 paste below film layer resize if needed.
Select Cant BeTamed Ribbon 3 resize 23% move to left off doodle,
give light a drop shadow
Give all other layers a Drop Shadow.
New layer select all copy paste into selection Cant BeTamed Paper 8
, apply mask/merge group.
Duplicate layer then click back to original layer/Adjust/Blur/Guassian Blur 20.

Add your Artist © and your name then crop and save.
This is only a guide and feel free to use any other element you wish.
Most of all have fun creating.

Email me your creation, so I can show off your creations on my blog.
Thank you for using my tutorial.

Written by © Maree (aka Falcon) on 8th April 2011.
Any similarities to this tutorial are purely coincidental.

Memories of the Sea ♥


Supplies Needed

I'm using the artwork of ©Anna Marine, you can purchase tube Here
Scrap kit by Mystic Creations called Colors of the Sea Here
Font: MV Boli
Drop Shadow of choice.

Remember to Save Often!!!

Let's create
Open new Image 650 x 650, transparent ticked
Open MCCOTSPaper06 resize 93%
Open MCCOTSAnchor Frame resize 95%
Open MCCOTSLighthouse02 resize 92% Image/Mirror place on right of frame.
Open MCCOTSWhaleTale resize 45% then using your Pick Tool,
hold down shift key and pull corner out to angel tail.

Move below lighthouse layer see tag.
Open MCCOTSYatch resize 67% move to lower left of frame.
Open MCCOTSSeagulls resting resize 56% move to lower left of frame.
Open MCCOTSSeagull resize 63% move to post on frame.
Select your tube and paste into frame.
Open MCCOTSShell02 resize 35% move to rest in front of anchor,
Open MCCOTSPebbles resize 95% move to right of frame.
Open MCCOTSTallGrass resize 65% duplicate twice place around the pebbles.
Give all a Drop Shadow of choice.

Add your Artist © and your name then crop and save.
This is only a guide and feel free to use any other element you wish.
Most of all have fun creating.

Email me your creation, so I can show off your creations on my blog.
Thank you for using my tutorial.

Written by © Maree (aka Falcon) on 6th April 2011.
Any similarities to this tutorial are purely coincidental.
Welcome Spring ♥


Supplies Needed

I'm using the artwork of © PinUpToons, you can purchase tube Here
My license for this tube is with CILM.
Scrap kit by Baby Cakes Scraps called Welcome Spring Here
Font: Rankle
Drop Shadow of choice.
WSL Mask_84 Here
Remember to Save Often!!!

Let's create

Open new image 650 x 650.
Select bcs_simple_frame resize 75% align in center of layer.
Click inside each frame with Magic Wand/ /selections/Modify/Expand/select
bcs_paper_four/Selections/Invert/Delete
/move below frame layer/Deselect.
Select bcs_sticker_four resize to fit frame.
Select bcs_sticker_two resize to fit frame.
Select bcs_dragonfly_sticker_two and three resize both 36%.
Select bcs_ties resize 27% move to top of frame.
Add your tube move to left of layer resize if needed.
Select bcs_sticker_three resize 48% move to bottom of layer.
Select bcs_flair_four resize 65% move above wordart.
Select bcs_pink_flower resize 23% move above wordart, right side.
Select bcs_paper_doodle three paste above background layer
then reisze 75% move to left of layer.

Select bcs_paper_two paste above doodle layer then apply mask/merge group.
Select bcs_journal_block paste above mask layer.
Give all a light Drop shadow.

Add your Artist © and your name then crop and save.
This is only a guide and feel free to use any other element you wish.
Most of all have fun creating.

Email me your creation, so I can show off your creations on my blog.
Thank you for using my tutorial.

Written by © Maree (aka Falcon) on 8th April 2011.
Any similarities to this tutorial are purely coincidental.

Sunday, April 3, 2011

Silver Dreaming ♥


Supplies Needed

I'm using the artwork of ©Eso Sparks , you can purchase them Here
Scrap kit by BooLand Designs called Silver Lining Page Kit Here
Font: Of Chocie
Drop Shadow of choice.
HorsePlays Pasture Mask_11 Here
Remember to Save Often!!!

Let's create

Open new image 700 x 700.
Select bld_silverlining_FS_element5 resize 30% center frame in layer.
Click inside with Magic Wand selections/Modify/Expand by 8.
Select bld_silverlining_FS_Paper9 new layer/select all/paste into selection/resize 80%.
Click back onto frame layer Selections/Invert/click onto paper layer/Delete/Deselect,
move below frame layer.
Add your tube now and place - a sitting tube is better for this.
Select bld_silverlining_FS_element 31 resize 15% move to top left of frame/duplicate/Image/Flip/Mirror
Select bld_silverlining_FS_element 16 resize 10% move to left of frame.
Select bld_silverlining_FS_element 11 resize 14% Image/FreeRotate 90 Left.
Using your eraser remove part of the ribbon on her arm.
Select bld_silverlining_FS_element 26 resize 15% place at top of ribbon.
Select bld_silverlining_FS_elemnet 35 resize 12% move to right of layer
Select bld_silverlining_FS_Paper3, apply mask/merge group.
Give all except mask layer a Drop Shadow.

Add your Artist © and your name then crop and save.
This is only a guide and feel free to use any other element you wish.
Most of all have fun creating.

Email me your creation, so I can show off your creations on my blog.
Thank you for using my tutorial.

Written by © Maree (aka Falcon) on 3rd April 2011
Any similarities to this tutorial are purely coincidental.
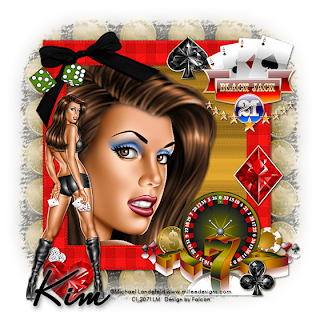
Stake Your Claim ♣


Supplies Needed

I'm using the artwork of© Michael Landfeld, you find it Here
Scrap kit by Kim's Korner called Waking Up In Vegas Here
Font:
Drop Shadow of choice.
HorsePlay's Pastures mask_14 Here
Remember to Save Often!!!

Let's create

Open new image 650 x 650.
Open kk_WUIV_Frame01 copy paste resize 85%.
Click inside with Magic Wand/selections/Modify/Expand by 4,paste kk_WUIV_Paper02/selections/Invert/Delete/move below frame.
Add your close up tube resize if needed.Then add your main tube move to left of frame.
Open kk_WUIV_Dice resize 65% move to top left of frame.
Open kk_WUIV_Blackjack resize 45% move to top right of frame.
Open kk_WUIV_Gambling resize 65% move to bottom right of frame.
Open kk_WUIV_Bling 1,2,3 and 4 resize 35% place around frame.
New layer selections/select all/open kk_WUIV_Paper25/apply mask/merge group.
Duplicate layer then on original Adjust/Blur/Guasian Blur20.
Give layers a Drop Shadow of 2/2/50/5.


Add your Artist © and your name then crop and save.
This is only a guide and feel free to use any other element you wish.
Most of all have fun creating.

Email me your creation, so I can show off your creations on my blog.
Thank you for using my tutorial.

Written by © Maree (aka Falcon) on 3rd April 2011
Any similarities to this tutorial are purely coincidental