Monday, October 18, 2010

Ghosty Halloween ♥


Supplies Needed
Tube or Image of choice, I am using the fantastc artwork ofRene' Kunert
you can purchase the artwork at MPT
Scrap kit I am using a kit called Happy Halloween by Tracey.F,Designz,
you can find it here.
Font: Haunting Attraction
Drop Shadow of choice.
Xfeno 2 Burnt Edges
Remember to Save Often!!!

Let's begin
Open new image 650 x 650.
New layer flood fill with #000000 then use Xfeno 2-BurntEdges with these settings'
Then reduce the opacity to 75.
Select TracyFDesignz-HappyHalloween-web3 copy paste.
Select TracyFDesignz-HappyHalloween-Hauntedhouse copy paste center it.
Select TracyFDesignz-HappyHalloween-gravestone2 copy paste
 resize 43 percent move to bottom left.
Select TracyFDesignz-HappyHalloween-Moon1 copy paste under hauntedhouse layer.
Using your Pick Tool make it the size of the orange moon.
Select TracyFDesignz-HappyHalloween-Bats2 copy paste
resize 65 percent place at top of layer.
Select TracyFDesignz-HappyHalloween-Pumpkins1 copy paste resize 43 percent
place in front of gravestone.
Select TracyFDesignz-HappyHalloween-Bag1 copy paste resize 38 percent
 place on right lower side.
Select TracyFDesignz-HappyHalloween-Mummy copy paste place just
off center to the right, see tag. Lower the Opacity to 70.
Add your tube and place near the Mummy.
Select TracyFDesignz-HappyHalloween-Candlestick copy paste resize 45 percent
.Place near your tube out-streched hand then using your Freehand Selection tool
 out line the flames(hold down the shift key to
outline the other 2 flames).
Then apply these settings using Eye Candy nature-Fire:

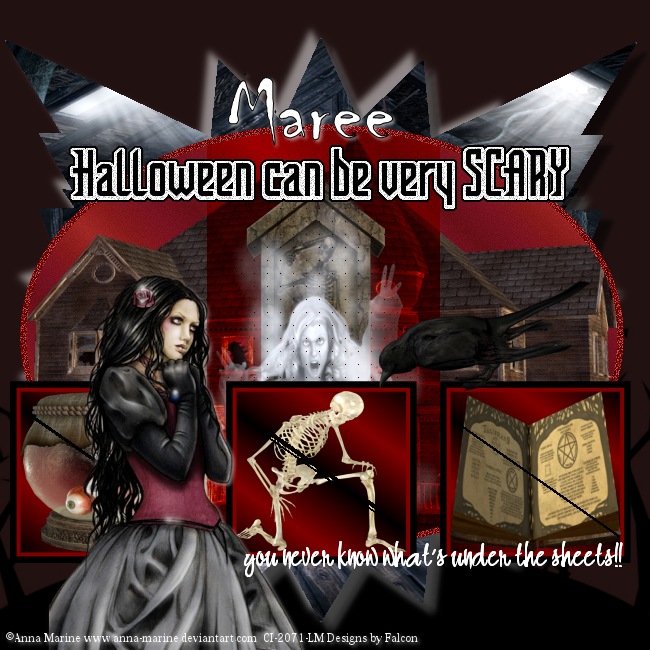
Add your Artist © and your name then crop and save if you don't wish to animate.
This is only a guide and feel free to use any other element you wish.
Most of all have fun creating.

Open Animation Shop
Now Hit Ctrl+D to deselect then we will copy and paste into AS below .
1.In Psps Edit - Copy Special - Copy Merged,
 click into AS paste as new animation.
2.Back in Psp click undo twice then repeat above with fire this time
 hit the Random Button once.
3.Repeat 1 and 2 again. Check your animation then save as a Gif.

This tutorial was written by Maree (aka Falcon) on 18 October 2010
Any similarities to this tutorial are purely coincidental


Friday, October 15, 2010

Last Summer ♥


Supplies Needed
Tube or Image of choice, I am using the fantastc artwork of Anna Marine
you can find her artwork at  CILM
Scrapkit I'm using is a great kit called Remember Last Summer by Bastel Galaxy,
you can find it here.
Font: Herencia
Drop Shadow of choice.
Mask_83 by Weescotslass
Remember to Save Often!!!

Let's begin

Open new image 600 x 600.
Select frame02_BG_RlS copy paste center tube.
Add your tube below frame, move tube so the head is just above the frame.
 Using your eraser tool carefully erase part of the tube to bring the frame into view.
Select abor_BG_Rls copy paste below frame then move to left top, see tag.
Select hammock_BG_Rls copy paste resize 85 percent move
 below frame to the top right.
Selectt birdbath_BG_Rls copy paste place bottom right side of frame.
Select bow11_BF_Rls copy paste on right top of frame resize 45 percent.
Select flower06_BG_rLS copy paste resize 55 percent
 duplicate 4 times postion them around the frame, see tag.
Select beachhat02_BG_Rls copy paste resize 85 percent place at bottom of tube.

Select butterfly 01 & 04 _BG_Rls copy paste resize both 32 percent
move them around till your happy.
New layer select all copy paper12_BG_Rls paste into selection then apply mask.
Add a Drop Shadow, I used 2/2/50/5.

Add your Artist © and your name then crop and save.
This is only a guide and feel free to use any other element you wish.
Most of all have fun creating.

This tutorial was written by Maree (aka Falcon) on 16 October 2010
Any similarities to this tutorial are purely coincidental


Thursday, October 14, 2010

Autumn Fantasy ♥


Supplies Needed
Tube of choice.
Scrap kit Autumn Fantasy  by Crystals Creations  you can find it here .
Mask_330 by Vix
Animations Shop
Drop Shadow of Choice
Remember to save often!!!

Let's Begin

Open new image 650 x 650.Fill with white.
New layer copy paste Paper 17 into selection-deselect apply mask merge layers.Duplicate.
Select frame 2 center on layer using Magic Wand click inside all 3 frames
,hold down shift key whislt clicking in each frame,
Select Paper 14 copy paste Selections - Invert - hit Delete, move below frame layer.
Click in 1 st frame with Magic wand then select an element copy paste, new layer then paste into selection-deselect move below frame layer.
Repeat this with the next 2 frames I used elements, pumpkin, mushroom 1, squirrel.
Move them below frame layer.
Select Spray element copy paste then Image - Free Rotate - 90 degrees right, duplicate - flip,
move below frame
Select butterfly 2 copy paste resize by 35 percent duplicate, see tag for placement.
Select wordart Autumn copy paste move to bottom of layer, see tag.

Add your Artist © and your name.If you dont wish to Animate the tag then crop save as png.
This is only a guide feel  free to use any other element you wish.
Most of all have fun creating.


Open Animation Shop. 
Click back to Psp,click on wordart layer 
Adjust Add/RemoveNoise with these settings:


click ok.
Copy copy merged, Click in AS and paste as New Animation.
repeat above  twice more and each time  increase the setting to 40 then 45
.Pasting after current frame.
Save as a Gif and your done.


Thank you for trying my tutorial. I would love to see your results.
This tutorial was written by Maree (akaFalcon)on 15 October 2010.
Any similarities to this turtorial are purely  coincidental.


That Erie Feeling ♥


Supplies needed

I an using the artwork of Anna Marina you can purchase her tube/s at CILM
Scrap kit is Everything Erie by Jen of Sleek n Sassy you can find her kit here
Font:: Chiller
Template by Lovey and you can find it here.
Please leave some love.

Remember to save !!!!

Let's Begin

Open your template Shift+D close the original.
Delete the copywrite layer.
Select the gladoval layer Click inside with Magic Wand select haunted house copy,new layer paste into selection-deselect.Merge down. 
Click on 3 grad layer click inside first square with Magic wand new layer select Eyeballs
copy paste into selection-deselect.
Click inside 2nd square with Magic Wand then on layer above paste Kneeling Skeleton
  into selection. Repeat with last square
using Spell Book 2 . Merge layer down.
Select shape1 layer click inside with Magic wand select Paper 13 new layer paste into selection-deselect.
Select Shape 2 layer click inside with Magic wand select Paper12 new layer paste into selection-deselect.
Select Shape 3 layer click inside with Magic wand select Paper11 new layer paste into selection-deselect.
Select shapefilter layer click inside with Magic wand select Ghost grave new layer paste into selection-deselect.
Select Crow 2 copy paste resize 43 percent - mirror place on right side.
Add your tube place on left side see tag.
New Layer select all copy paste Paper 7 into selection-deselect.
On layer shape 1 give a Drop Shadow of 10/10/50/10 white, 
give all other layers a Drop Shadow 2/2/50/5 black.

Add your Artist © then crop and save.
This is only a guide feel free to use any other element you wish.

This tutorial was written by Maree(aka Falcon) on 14 October 2010
Any similarities to this tut or purely coincidental.


Saturday, October 9, 2010

Love is Sharing with Friends


Supplies Needed

Tube or Image of choice, I am using the fantastc artwork of Suzanne Woolcott
you can find her artwork here 
Scrapkit of choice, I am using a great kit called Berry Red by Scrapping Magic
you can find it here.scrappetizing
Font of choice 
Drop Shadow of choice.
Mask_84 by Weescotslass
Remember to Save Often!!!

Let's begin

Open new image 650 x 650.
Open ceejays_val2 flowerframe copy paste resize by 85 percent.
New layer select all copy paste ceejays_va12_paper, deselect then apply mask, merge group.
Select ceejays_val12_hanginggoldheart coy paste resize by 35 percent, 
place on let side of frame.Using your Freehand selection tool 
draw a small cirlce over hook, see below then hit delete.
Select your tubes copy paste place below frame layer resize if needed.
Selecct ceejays_va12_curledribbon copy paste resize  35 percent place at bottom of frame.
Select ceejays_va12_valbears copy paste resize 25 percent place at center bottom of frame.

Give all your layers a drop shadow of choice.
Add your Artist © and your name then crop and save.
This is only a guide and feel free to use any other element you wish.
Most of all have fun creating.

This tutorial was written by Maree (aka Falcon) on 10 October 2010
Any similarities to this tutorial are purely coincidental

Lady Bug ♥


Supplies Needed
Tube or Image of choice 
Scrapkit I am using a beautiful kit called Sk8 Lady Bugs by Ariasparkle,
you can find it here.
Font: Freestyle Script
Drop Shadow of choice.
Mask_84 by Weescotslass
Remember to Save Often!!!

Let's begin

Open new image 700 x 700.
Select sk8-16 copy paste resize 20 percent. Click inside with Magic Wand 
copy paste sk8-paper6 resize by 20 perent Selections-Invert-hit Delete.
Effects Mura Meisters-clouds with these settings.
Move layer below frame.
Select sk8-4 copy paste resize 25 percent Image-Mirror then move below frame.
Select sk8-3 copy paste resize 20 percent place tbue on top of mushroom.
Select sk8-6 copy paste resize 25 percent place of left side of frame.
Select sk8-7 copy paste resize 15 percent place at bottom  off center of frame then duplicate 

Image-Mirror.
Select sk8-8 copy paste resize 18 percent place on right side of frame.
Select sk8-19 copy paste resize 15 percent place top left side of frame.
Select sk8-24 copy paste resize 20 percent then place between the flowers at bottom of frame.
New Layer select all copy paste sk8-paper 2, apply mask - Merge group.
Give all a Drop Shadow 2/2/50/5 except mask layer.
Add your Artist © and your name then crop and save if not Animating the butterfly.
This is only a guide and feel free to use any other element you wish.
Most of all have fun creating.

Animation

1. Open AS then click back to psp.
2. Using your Magic Wand click on white sections of the butterfly, holding down the shift key.
3. Effect -dbs flux - 45, then click center mix  button once. Ctrl+D- deselct then 
Edit-copy special-copy merged, paste as new animation in AS.
4. Back in Psp hit Undo button twice then this time hit mix button twice
 then Ctrl+D Copy Merged,  paste after Current frame.
5. Repeat step 4 but this time hit mix button 3 times.
6. Save as a Gif.
This tutorial was written by Maree (aka Falcon) on 10 October 2010
Any similarities to this tutorial are purely coincidental

Friday, October 8, 2010

Diamonds R 4 Ever ♥


Supplies Needed
Tube or Image of choice.
Scrap kit I am using a great kit called Diamonds Are 4 Ever by Pspgirl Place,
you can find it here.
Font: ArtermiasNF
Drop Shadow of choice.
Mask_185 by Weescotslass
Remember to Save Often!!!

Let's begin

Open new image 700 x 600. 
We will be making our own frames for this tut..
Using your Ellipse Tool draw out a circle not to big. I used white for frame 
but you can use any color you like.Duplicate 
position both out from the center, see tag.Click inside circle with Magic Wand-selections
 Modify-Expand by 4 copy paste Pspgirl Dimonds Are4Ever_P12 
Selections-Invert - hit Delete.
 Then duplicate and move below frames.
Using your Rectangle tool draw out a square position between the 2 circle frames.
 Selections-Modify-Expand by 4 then copy paste 
Pspgirl Dimonds Are4Ever_P8 Selections-Invert-Delete, move below frame.
Give all frames A Drop Shadow 2/2/5/10 change color -#610004, then -2/-2/5/10.
X-out your background layer then Merge group.
Select Pspgirl Dimonds Are4Ever_ele 7 copy paste resize 45 perent place on bottom of frames..
Select Pspgirl Dimonds Are4Ever_ele 3 copy paste resize 75 percent place at center frame.
Select Pspgirl Dimonds Are4Ever_doll4 copy paste reszie 65 percent , see tag.
Select Pspgirl Dimonds Are4Ever_ele4 copy paste resize 55 percent, duplicate-Mirror
 position them on the edge of circle frame.
Select Pspgirl Dimonds Are4Ever_ele 10 copy paste resize 45 percent plact near top of frames, 
see tag. Duplicate-Mirror.
Select Pspgirl Dimonds Are4Ever_ele 22 copy paste Image -Flip-Duplicate-Mirror,
 move them around til you are happy with position.
I used Pspgirl Dimonds Are4Ever_ele11 and 29 copy paste resize as needed,
 pleae feel free to use any element you wish to use.
Click on Background layer, add a new layer Selections-select all copy paste into s
election Pspgirl Dimonds Are4Ever_P9, apply 

Mask. Duplicate, then on orignal layer Adjust-Blur-Guasian Blur-Radius 10.

Add your Artist © and your name then crop and save.
This is only a guide and feel free to use any other element you wish.
Most of all have fun creating.

This tutorial was written by Maree (aka Falcon) on 9 October 2010
Any similarities to this tutorial are purely coincidental