Wednesday, March 30, 2011

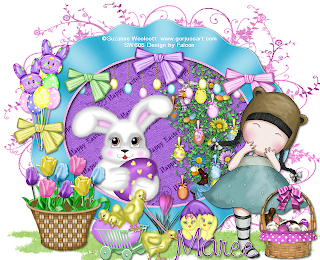
Having A Gorjuss Easter ♥


Supplies Needed

I'm using the artwork of © Suzanne Woolcott,you find it Here
Scrap kit by Rebillious Scraps called Happy Easter Here
Font: Freehand591 BT
Drop Shadow of choice.
LaurieMadeMe mask_128 Here
Remember to Save Often!!!

Let's create

Open new image 800 x 650.
Open Frame 4 Image/FreeRotate 90 Left.
Click indisde frame with MagicWand/Selections/Modify/Expand by 4
copy paste paper 1/Selections/Invert/hit Delete/move below frame.

Open grass move to left of layer then duplicate/Image/Mirror.
Open Plant paste below frame layer thenresize 65% move to right of frame.
Open Bunny with Egg 1 paste below frame layer then resize 45%
move to left of frame.

Open your tube of choice and place on right of frame.
Open Tulips resize 42% move to left of frame.
Open Flower 1 resize 25% move to center of frame.
Open Chicks in a wagon resize 35% move to just of center.
Open Chicks in egg 2 resize 2% move to right of frame.
Open Basket 1 resize 25% move to right of layer near tube.
Open Balloons resize 22% place on left of frame.
Open Bows 1,2,4 and 5 resize all 20% place Bow 5 on Balloon strings
and place the others around top of frame.
New layer Select All/open Paper 12 paste into selection/Deselect/
apply mask/merge group.

Add your Artist © and your name then crop and save.
This is only a guide and feel free to use any other element you wish.
Most of all have fun creating.


Email me your creation, so I can show off your creations on my blog.
Thank you for using my tutorial.

Written by © Maree (aka Falcon) on March 2011
Any similarities to this tutorial are purely coincidental.

Saturday, March 26, 2011

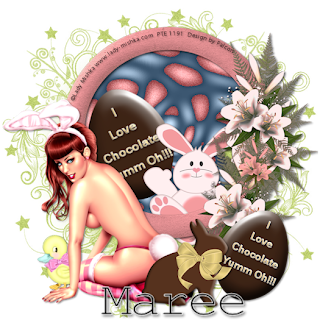
I Love Chocolate ♥


Supplies Needed

I'm using the artwork of© Lady Mishka, you find her artwork Here
Scrap kit by Kim Korner called Easter Time Here
Font:Kalinga and Simplified Arabic
Drop Shadow of choice.
Laurie Made Me mask_113 Here
Remember to Save Often!!!

Let's create
Open new image 650 x 650.
Open kk_EASTER_Frame03 resize 85% click inside with Magic Wand/Selections/Modify/Expand by 4.
Open kk_EASTER_Paper03 resize 65% Selections/Invert/Delete/Deselect/
move below frame.
On paperlayer Effects/GraphicPlus/with these settings:

Open kk_EASTER_Rabbit01 resize 65%/Image/Miror/Move to right of frame.
Open kk_EASTER_Chocolateegg resize 45% place on left side of frame.Duplicate move this layerabove frame layer.
Add your tube of choice I placed mine on left of frame.
Open kk_EASTER_Ducking resize25%/Image/Mirror/move below tube layer
place above tube hand.
Open kk_EASTER_Bunnycandy01 resize 65% move to right of tube.

For the wordart Font-Kalina size 14 #f1c95g " I Love Chocloate Yumm Oh!!!'
or your own.

New layer select all using kk_EASTER_paper09/deselect
then apply mask/merge group.

Add your Artist © and your name then crop and save.
This is only a guide and feel free to use any other element you wish.
Most of all have fun creating.


Email me your creation, so I can show off your creations on my blog.
Thank you for using my tutorial.

Written by © Maree (aka Falcon) on 26th March 2011
Any similarities to this tutorial are purely coincidental

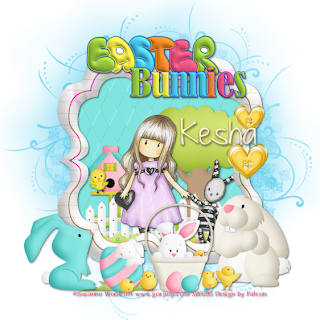
Easter Bunnies ♥


Supplies Needed

I'm using the artwork of© Suzanne Woolcott,you can find her artwork Here
Scrap kit by KnC Scrapz called Easter Bunny Here
Font: Just The Way You Are
Drop Shadow of choice.
Laurie Made Me mask_101 Here
PlugIn
Graphics Plus-Peacock

Remember to Save Often!!!

Let's create

Open new image 750 x 650 floodfill with #ffffff.
Open frame 2 resize 50% click inside with Magic Wand/Selections/Modify/Expand 5.
Open pp8 resize 50%/selections/Invert/hit Delete/move below frame/Deselect.
Open tree resize 25% move to right of frame.
Open birdhouse resize 18% move to left of frame.
Open bird2 resize 12% position on birdhouse.
Open fence resize 15% then duplicate move to right overlapping the center posts.
Open your tube and resize if needed.
Open bunny2 resize 35% move to right of frame.
Open buny 1 resize 35% move to left of frame.
Open bunnychickegg resize 23% move to left of layer.
Open bunnybasket resize 32% move to center of frame.
Open button 2 resize 55% move to right of frame/duplicate then
resize 75% move above the other button.
New layer FloodFill with #68ecef then apply mask/merge group.
Duplicate then on orignal layer Adjust/Blur/Gaussian Blur 20.
Give your all layers a Drop Shadow 2/2/50/5 except Mask layers.

For the name I used BG:#ffffff and FG:#f1c96f stroke 1,
then added Drop Shadow 2/2/50/5.

Add your Artist © and your name then crop and save.
This is only a guide and feel free to use any other element you wish.
Most of all have fun creating.

Email me your creation, so I can show off your creations on my blog.
Thank you for using my tutorial.

Written by © Maree (aka Falcon) on 26th March 2011
Any similarities to this tutorial are purely coincidental

Thursday, March 24, 2011

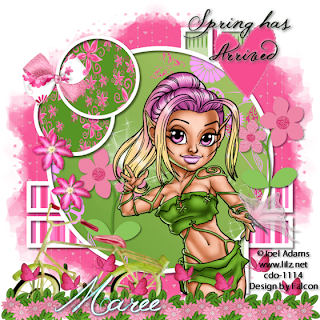
Spring Has Arrived♥


Supplies Needed

I'm using the artwork ©Joel Adam you purchase this Here
Scrap kit by Connie's Creative Chaos called CoraLene TS Here
Font: Jellyka Western Princess
Drop Shadow of choice.
BabesDesignz mask_12 Here
Template 1 by Dawn of Lollipops Candyland Here

Remember to Save Often!!!

Let's create

Open template Shift+S close original.Delete © layer.
Click on Large frame back Selectiions/select all/Float/Defloat/
paste/copy paste Corapaper1 into selection/deselect.

On Small Frame back repeat as above this time using Corapaper3.

On R and L verical frame back layer repeat this time using Corapaper120.

On T and B horizontal frame back layer repeat above using Corapaper15.
Give all your frame layers a Drop Shadow of 4/4/50/5.

Open CoraDazzle resize 65% move over large frame till happy with placement.
Open Corabow1 resize by 33% move to middle of small frame.
Open CoraFlower1 reisze 38% move to left of large frame
then duplicate move to right of frame.
Open CoarFlower6 resize 26% move to left of large frame
duplicate resize 90% move below other flower.

Open CoraBike resize 25% place on left of layer.
Open your tube resize if needed place on right of layer.
Open CoraButterflyRibbon1 resie 75% move to bottom of layer.
Open Corabutterfly 5 resize 23% move so it is sitting on her fingers.
Open CoraHeart1 resize 25% move to right top of layer.
Give a Drop Shadow 2/2/50/50 to all except the frame layers.
New Layer/Layers/Arrange/move to bottom/selections/select all/
open CoraPaper19 paste into selection/deselect.
Apply mask/merge group.

Add your Artist © and your name then crop and save.
This is only a guide and feel free to use any other element you wish.
Most of all have fun creating.

Email me your creation, so I can show off your creations on my blog.
Thank you for using my tutorial.

Written by © Maree (aka Falcon) on 24 March 2011
Any similarities to this tutorial are purely coincidental

Tuesday, March 22, 2011

Wheels of Time ♥


Supplies Needed

I'm using the artwork of © Myka Jenlin, you find it Here
Scrap kit by Scrappin with Lil Old Me called Victorians Musings Here
Font: Kelly AnnGothic
Drop Shadow of choice.
Mask of choice.
Remember to Save Often!!!

Let's create

Open new image 700 x 700 transparent..
Select cim_vm-clogcluster resize 75%.
Select cim_vm-clog1 resize 45% move over middle cog.
Select cim_vm-cog3 resize 85% move to lower left clog
Select cim_vm-cog2 resize 63% move over to top right cog
Select cim_vm-cog5 resize 37% move to bottom cog on right.
Select cim_vm-luggage resize 37% move to lower right of layer.
Add your tube of choice resize if needed.Place on top of chest.
Select cim_vm-candle1 resize 35% move to left side of tube.
Select cim_vm-cogclock resize 35% move over center cog.
Select cim_vm-fallbasket resize move to left of layer

New layer select all/select cim_vm-paper5 paste into Selection/Deselect.
Apply mask/merge/merge group.

Add your Artist © and your name then crop.

Animation

1. Open Animation Shop, click back to psp.
2. Edit/Copy special/copy merged click into AS paste as new animation.
3. On layers 3 Image/FreeRotate 22 Left, repeat this for layers 4/5/6.
4. Edit/copy special/copy merged paste after current frame.
5. Now Repeat no 3 and 4 again.
6. Animation/Property frames change to 25.
Check your animation and if happy with results save as a Gif.

This is only a guide and feel free to use any other element you wish.
Most of all have fun creating.

Email me your creation, so I can show off your creations on my blog.
Thank you for using my tutorial.

Written by © Maree (aka Falcon) on March 2011
Any similarities to this tutorial are purely coincidental

Friday, March 18, 2011

Easter Delights ♥


Supplies Needed

I'm using the artwork of © Suanne Woolcott, you can purchse her artwork Here
Scrap kit by Cajoline called Delights of Easter Here
Font: Wanksaberg Battle
Drop Shadow of choice.
HorsePlay's Pasture mask_11 Here
Remember to Save Often!!!

Let's create

Open new image 650 x 650, floodfill with #ffffff.
New layer Select all Paste in Selection-Cajoline_delightsofeaster_paper10/deselect.
Open Cajoline_delightsofeaster_el60 resize 25% move to bottom of layer.
Open Cajoline_delightsofeaster_el68 resize 12%/duplicate/Image/Mirror
/right click on layer Merge/Merge down.Move below grass layer.

Open Cajoline_delightsofeaster_el80 resize 15% move to left of layer,
move below fence layer.
Open Cajoline_delightsofeaster_el79 resize 15% move to right of layer.
Open Cajoline_delightsofeaster_el29 resize 15%.
Open Cajoline_delightsofeaster_el69 resize 9% move behind mother duck.
Open Cajoline_delightsofeaster_el41 resize 9%/Image/Mirror/
move to lower right corner of layer.
Open Cajoline_delightsofeaster_el8 resize 9% move behind vase, see tag.
Open Cajoline_delightsofeaster_el17 resize 4% move to right of layer behind vase.
Open Cajoline_delightsofeaster_el18 resie 11% Image/Mirror/move to right of layer
Open Cajoline_delightsofeaster_el 3 resie 7% move to right of layer.
Open Cajoline_delightsofeaster_el85 resize 11% move to right of layer.
Open your tube of chocie and paste above paper layer.
Give all a Drop Shadow 2/2/50/5.

Add your Artist © and your name then resize 80% and save.
This is only a guide and feel free to use any other element you wish.
Most of all have fun creating.

Email me your creation, so I can show off your creations on my blog.
Thank you for using my tutorial.

Written by © Maree (aka Falcon) on March 2011
Any similarities to this tutorial are purely coincidental

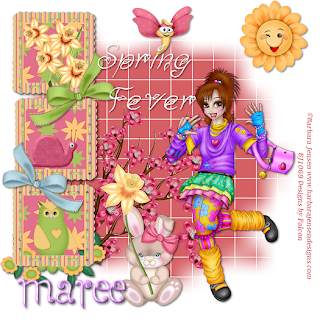
Spring Fever ♥


Supplies Needed

I'm using the artwork of © Barbara Jensen, you find it Here
Scrap kit by Lynn-Scrappers Emproium called Spring Time Here
Font: Seasons-Spring
Drop Shadow of choice.
Weescotslass Mask_84 Here
Remember to Save Often!!!

Let's create

Open new image 650 x 650, Floodfill with #ffffff.
select ST Frame3 resize 18% duplicate twice move them all to the left of layer.
Using your Magic Wand click inside each frame/holding down the shift key to slect

them.Selections/Modify/Expand by 4.
Open ST Paper 4 paste resize 50% move over frames/Selections/Invert/hit Delete/Deselect.
I used ST Felt snail, ST owl and ST Daffodils, resize to fit in frames
Close out background layer and merge visible
Open ST Bows 3 and 4 resize both 18% place on frames.
Open ST Blossom2 resize 26% move to side of frame
Open ST Dragonfly resize 13% move to top of layer.
Open St Sunshine Flower resize 14% move to right top of layer.
Open ST Spring Rabbit with Daffodil resize 19% move to left of layer.
Add your tube resize if needed.
New layer FloodFill with #d56064 apply mask.mergegroup.
Give all a Drop Shadow 2/2/50/3

Add your Artist © and your name then crop and save.
This is only a guide and feel free to use any other element you wish.
Most of all have fun creating.

Email me your creation, so I can show off your creations on my blog.
Thank you for using my tutorial.

Written by © Maree (aka Falcon) on March 2011
Any similarities to this tutorial are purely coincidental

Friday, March 11, 2011

Babes @ Work ○


Supplies Needed

I'm using the artwork of Keith Garvey,using 2 tubes or others of your choice. The license is
from MPT as this is where I purchased my tubes, you now can find his artwork Here
Scrap kit by Imortall Dreams called Pimp', Nookie Here
Font: Freestyle
Drop Shadow of choice.
HorsePlays Pastures mask_13 Here
Xfeno-Constellation
Animation Shop.

Remember to Save Often!!!

Let's create

Open new image 700 x 700 flood fill with #ffffff.
Select ID-PN-Frame5 resize 85%. Click inside frame with Magic Wand,
Selections/Modify/Expand 4,new layer paste into selection/Deselect.
Select your main tube copy paste into frame resize if needed.
Close out backgroundlayer/Merge/Merge visible.

Select ID-PN-Flower 6 paste below frame layer.
Select ID-PN-Frame 5 and duplicate twice, rename F1,F2,F3.
Select ID-PN-Boot1 resie 80% move to left of frame/duplicate/move slightly down, see tag
Select ID-PN-Garter belt resize 65%/Image/FreeRotate 90 left/move left of frame.
Select ID-PN-Bow 9 resize 86% move to lower part of frame.

Select ID-PN-Key resize 45% move to left of frame place it over Bow
then using Eraser tool over middle of key to give effect its hanging on ribbon.

Select ID-PN-Feather2 resize 75% Image/Mirror move to left of layer.
Select ID-PN-Butterfly resize 45% resize 37% move to left of frame.
Select ID-PN-Courset resize 67% move to right of layer.
Select ID-PN-Jewels move to right below corset.

Select ID-PN-Lady resize 90% move to top right of frame.
Select ID-PN-Lips resize 75% move to right of layer.

Open your 2nd tube resize if needed and place at right of layer.
Select ID-PN-Flower1 resize 90% move to lower center of layer.
New layer above background layer Selections/select all/copy and paste ID-PN-Paper17 into

selection/Deselect/apply mask/merge group.
Duplicate layer then on original apply these settings:
Adjust/Blur/Gaussian Blur 20.
Give all a Drop Shadow 2/2/50/5.
Add your Artist © and info and name.I used FG:000000 and BG:7c3f8d.
This is only a guide and feel free to use any other element you wish.
Most of all have fun creating.

Animation Shop.

Open As then click into Psp.
On layer F1 Effects/Xfeno 2/Constellation with these settings:

Repeat above for layers F2 & F3 ,click Random button once,
then close out layer F2 n F3.
Edit/Copy Special/Copy Merged, click in AS paste as new animation.
Click back to Psp close out F1 and open F2 repeat above this time pasting after current frame.
Repeat for F3, you now should have 3 frames ckeck your animation if happy save as a Gif.

Email me your creation, so I can show off your creations on my blog.
Thank you for using my tutorial.

Written by © Maree (aka Falcon) on 11th March 2011
Any similarities to this tutorial are purely coincidental

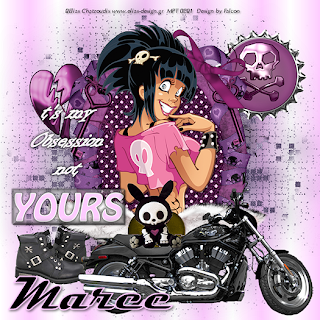
T's My Obsession Not Yours !


Supplies Needed

I'm using the artwork ©Elias Chatzoudis, the license is
from MPT as this is where I my purchased my tubes,
you now can find his artwork Here

Scrap kit by DN Scraps called Obsession Here
Font: Magneto
Laurie Made Me mask_109 Here


Remember to Save Often!!!

Let's create

Open new image 700 x 700.
New layer selections/select open Obessionpaper9 paste into selection/deselect,
apply maskmerge.merge group.
Duplicate and on original layer Adjust Blur/Guassian Blur/Radius 20.
Select Obsessionbigframe resize 85% click inside with
Magic wand Selections/Modify/Expand 5paste Obsessionpaper20
Selections/Invert/delete, move below frame. add your tube resize ifneeded.

Select Obsessionkey2 paste above frame layer then resize 90%.
Select Obsessionbottlecap4 paste below key layer.
Select Obsessionbrokenheart paste below frame layer then resize 85%.

Select Obsessionboots resize 48% move to left of frame.
Select Obsessionheartwings3 resize 75% move to bottom of frame.
Select Obsessionmotorbike resize 67% move to bottom of frame.
Select Obsessionemo resize 65% place above bike.
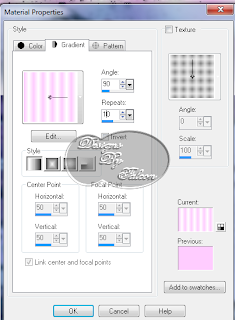
Click Material palatte change FG:feccf BG:#ffffff click on Gradient,
find your Foreground then use these settings:


Then Floodfill your Background layer.
Give all a Drop Shadow 2/2/50/5.
Add your Artist © and your name then resize 80% and save.
This is only a guide and feel free to use any other element you wish.
Most of all have fun creating.

Email me your creation, so I can show off your creations on my blog.
Thank you for using my tutorial.

Written by © Maree (aka Falcon) on 11th March 2011
Any similarities to this tutorial are purely coincidental

Tuesday, March 8, 2011

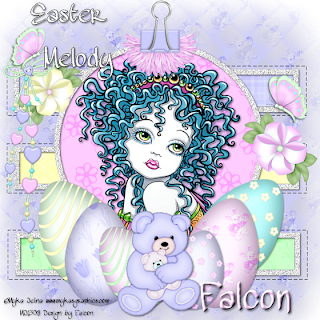
Easter Melody ♥


Supplies Needed

I'm using the artwork of © Myka Jelina, you find it Here
Scrap kit by Wacky Winnie Designz called Easter Melody Here sunflowers
Font: MAWNS Handwriting
Drop Shadow of choice.
HorsePlay's Pasture mask_15 Here


Remember to Save Often!!!
Let's create

Open new image 700 x 700 floodfill with #ffffff.
New layer Foreground #FFFFFF and any color for Background.
using your Preset shape tool select Rectangle shape Use these settings:

then draw out long oblong shape.Duplicate this twice.
Move them so they are sitting like mine.

Click on bottom shape layer, switch the arrow on color palette now Bl ack is FG.
Using these settings to draw out doted line around your rectangle.
Or choose another pattern you like.
Duplicae twice move to surround the other shapes.Change your FG:white & BG:black.

Change you Shape to Elllispe and draw out a Medium size circle
Objects/Align/Align center.
Now using your Magic Wand click inside the white border.
Adjust/AddNoise with these settings:


Click inside your oblong shape with Magic Wand/hit Delete then select a
paper/Selections/Invert/hit Delete, move below frame, Repeat this for other shapes.

I used WWDEMPapers 7/15/39 in oblong shapes and paper26 in circle shape.

Open WWDBinderClip 2 resize 45% move to top of circle.
Add your tube resized if needed.
Open WWDFlower2 resize 35% move to top left of layer.
Open WWDFlower1 reisze 37% move to right of layer.
Open WWDButterfly1 resize 32%/duplicate move them above flowers.
Open WWDString1 resize 75% move to left of layer,
Open WWDEggs1,2,3,4,5,6 resize and place to your liking.
Open WWdMommaBear2 resize65% move in front of eggs.

New layer select all open WWDPaper 19 paste into selection. Apply mask/merge group/Duplicate.
On original layer Adjust/Blur/Guassian Blur/Radius 20.

Add your Artist © and your name then resize 80% and save.
This is only a guide and feel free to use any other element you wish.
Most of all have fun creating.

Email me your creation, so I can display your creations on my blog.
Thank you for using my tutorial.

Written by © Maree (aka Falcon) on 8th March 2011
Any similarities to this tutorial are purely coincidental

Monday, March 7, 2011

Love Me Love My Cat! ♥


Supplies Needed

I'm using the artwork of © Keith Garvery,I purchased this at MPT.
you now can find the artist Here pto
Scrap kit by Nettie Night Owl called Love Me Love My Cat Here
Font:
Drop Shadow of choice.
HorsePlays Pasture mask_26 Here
Remember to Save Often!!!

Let's create

Open new image 650 x 650.
Open frame4 resize 65% click inside with Magic Wand/
selections/modify/expand by 4..
Open nnwfrebeepaper7 paste a new layer under frame/
selections/invert/hit delete.

Add your closeup tubeor chose something else.Deselect.
Add your main tube move to right of frame.
Open nnwdoodle4 resize 25%,Image/FreeRotate 75 Right.Duplicate?image?Mirror.

Open nnwhummingbird resize 22% Image/mirror move to left of frame,see tag.
Open nnwflowers 2 & 34 resize both 22% move to top left corner of frame.

Open nnwsidebow2 resize 26% move to top left corner of frame.
Opennnwwhisps move to bottom of main tube.
Select 2 flowers place at bottom of tube I used nnwflower1 and nnw2flower
resized to 23%.
Open nnwkitty1 resize 25%.
Open wordart nnwwa2 resize 26% move above frame.

Give all except your doodle and mask layers a Drop Shadow.


New layer select all copy paste into selection nnwpaper1,apply mask,
merge group.Duplicate.
On original layer Adjust/Blur/Guassain Blur 20.

Add your Artist © and your name then crop and save.
This is only a guide and feel free to use any other element you wish.
Most of all have fun creating.

Email me your creation, so I can show off your creations on my blog.
Thank you for using my tutorial.

Written by © Maree (aka Falcon) on 7th March 2011
Any similarities to this tutorial are purely coincidental

Friday, March 4, 2011

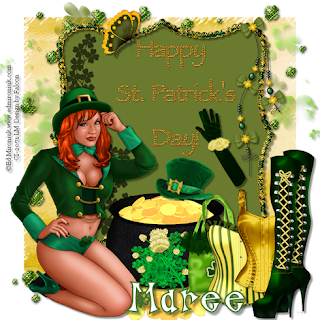
Shaking The Shamrock ♣


Supplies Needed

I'm using the artwork of ©Ed Mironiuk, you find them Here
I purchased tube at CILM so I will use this license you can now find him at CDO.

Scrap kit by Jen Sleek & Sassy called Shake Your Shamrocks Here
Font: LD Clover
Drop Shadow of choice.
HorsePlay's Pasture mask_29 Here

Remember to Save Often!!!

Let's create

Open new image 650 x 650.
New layer select all open paper3 paste into selection, apply mask/merge group.
Open Scattered_Shamrocks paste as new layer.
Open Clovers paste/Edit/Flip move up toward the top of mask.
Open Frame2 click inside with Magic wand/selections/Modify/Expand by 3
paste paper 7 as new layer/Selections/Invert/hit delete
move below frame.
Open Word_Art paste move to top of frame.
Open medi_paddygold8 resize 45% move to center of layer.
OPen medi_paddygold 7 resize 85% move to center of layer.
Open your tube resize if needed move to left of layer.
Open Glove2 resize 65% move right of wordart.
Open Pendant resize 75% move to top right corner of frame.
Open Clover2 resize31% move in front of coins.
Open Bag resize 43% move to right of frame.
Open Corset3 resize 55% move to right of layer.
Open Corset resize 65% move to right of layer.
Open Boot3 resize 75% duplicate move it slightly down,see tag.
Open Butterly resize 35% move to top of word_art.
Give all a Drop Shadow 2/2/60/5

Add your Artist © and your name then crop and save.
This is only a guide and feel free to use any other element you wish.
Most of all have fun creating.

Email me your creation, so I can show off your creations on my blog.
Thank you for using my tutorial.

Written by © Maree (aka Falcon) on 5th March 2011
Any similarities to this tutorial are purely coincidental.