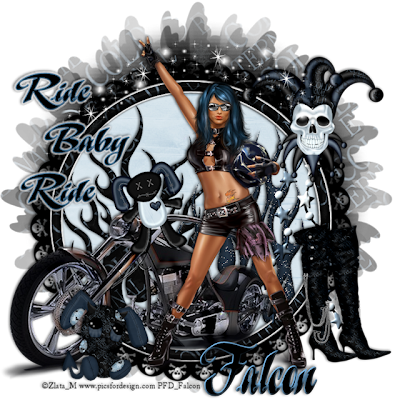
For this Tutorial you will need.
A Tube of your choice I am using the awesome artwork of © Zlata_M ,
which you must have a license to use you can get one at PFD
Elements and Papers from a scrap Cold Eternal by Sue Ellen *Wicked Creation*
you can purchase it Here.
Font: A&S Graceland.
Drop Shadow of choice.
Remember to Save Often!!!
Let's create
Open new image 700 x 700 transparent background.
Select Frame copy paste as new layer, add drop shadow. Click inside
frame with Magic wand.
Selections-Modify-Expand by 5. Copy paste paper 6 as new layer.
Selections-Invert-hit delete.
Move below frame layer.
Copy paste bike as new layer above frame layer then resize to fit.
Position it just out of frame, see tag.Add drop shadow.
Copy Flame 1 an 2 paste below frame layer, add drop shadow to both.
Copy StringofStars paste as new layer above frame layer.
Copy Jester paste as new layer resize 75% position on right of layer, add drop shadow.
Copy Sparkles paste above frame.
Copy Bunny paste above bike layer resize position him to sit on front of bike
resize 42%. add drop shadow.
Copy Boots paste as new layer resize 65% position on right of layer.
Add drop shadow.
Copy DamnedBear paste as new layer resize 75% position on left of layer,
add drop shadow.
Add your main tube now resize if needed then add drop shadow.
New layer-Selections-Select All, copy paper8 paste into selection, deselect.
Apply mask-merge -merge group.
Add your Artist © and your name then crop and save.
This is only a guide and feel free to use any other element you wish.
Most of all have fun creating.
Thank you for using my tutorial.
Written and copyrighted to Maree (aka Falcon) on 20th August 2011.
Under no uncertain terms are you allowed to make money
from anything produced from this tut, this is against my TOU's.
Any similarities to this tutorial are purely coincidental.

No comments:
Post a Comment