Tuesday, August 30, 2011

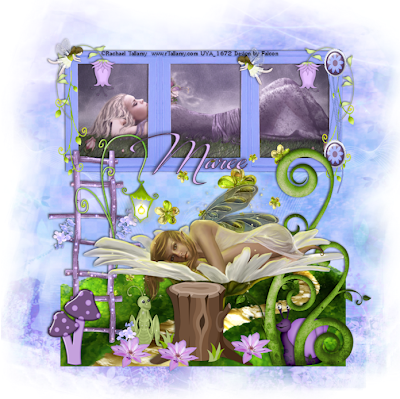
Window of Dreams ♥


For this Tutorial you will need.

A Tube of your choice I am using the awesome artwork of © Rachael Tallamy ,
which you must have a license to use you can get one at UYA

Elements and Papers from scrap Finding Neverland by Jen *Sleek n Sassy*
you can purchase it Here.

Font: Fragance

Drop Shadow of choice.

Mask by Designs by Vabys * #DBV_133 you can download it Here
Remember to Save Often!!!

Let's create

Open new image 700 x 700 transparent background.
Paste FN_Element76 as new layer resize 45%, position on right, add drop shadow.
Paste FN_Element 27 as new layer resize 85& move to top of layr, add drop shadow.
Click inside each frame, select a tube of choice paste as new layer,
Selections-Invert-hit delete, move below frame layer.
Paste FN_Element 68 as new layer, move to bottom of layer.Use your Pick tool to stetch it to

edge of layer.
Paste FN_Element 19 as new layer position on right side of frame then resize to fit. Add drop

shadow.
Paste FN_Element 32 as new layer resize 65% move to left of layer.
Add drop shadow.
Paste FN_Element 30 as new layer then position on right of layer.
Add drop shadow
Paste FN_Element 51 as new layer select Pick tool to resize, see tag for placement,
add drop shadow.
Paste FN_Element 62 as new layer again use Pick tool place on left of layer.
Add drop shadow.
Paste your tube as new layer resize if needed add drop shadow.
Paste FN_Element 47 as new layer place at bottom of ladder, resize 35%,
add drop shadow.
Paste FN_Element 14 as new layer, Image-Mirror-resize 43%
Paste FN_Element 22 as new layer resize 65% place on ladder,
add drop shadow.
Paste FN_Element 21 as new layer position on corner of frame, resize 23%.
Layers-duplicate-Image-Mirror. Add drop shadow.

Paste FN_Element 6 as new layer resize 22% then duplicate postion on frame,
add drop shadow.
Paste FN_Element 93 as new layer position on corner of frame, resize 23%.
Layers-duplicate-Image-Mirror. Add drop shadow.
Paste FN_Element 29 as new layer resize 23% then duplicate a couple of times ,
add drop shadow.
New layer-Select all. Paste FN_paper10 into selection,apply mask. Merge group.

Add your Artist © and your name then crop and save.
This is only a guide and feel free to use any other element you wish.
Most of all have fun creating.


Thank you for using my tutorial.


Written and copyrighted to Maree (aka Falcon) on 28th Augsut 2011.
Under no uncertain terms are you allowed to make money
from anything produced from this tut, this is against my TOU's.

Any similarities to this tutorial are purely coincidental.

Monday, August 29, 2011

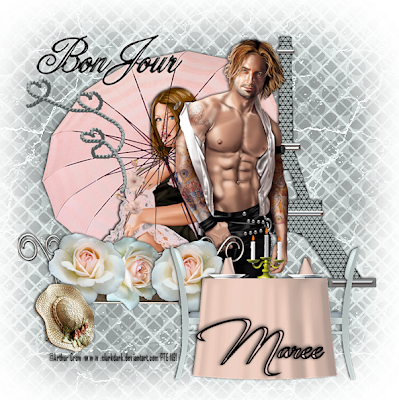
Bon jour Paree ♥


For this Tutorial you will need.

A Tube of your choice I am using the awesome artwork of © PFD ,
which you must have a license to use you can get one at PFD

Elements and Papers from a scrap Lunch in Paris by Kim *Kim's Korner*
you can purchase it Here.
Font: Of choice.
Drop Shadow of choice.
Mask by Bev *Horsplay' Pastures*, it's #HPP_11 you can download it Here.

Remember to Save Often!!!

Let's create

Open new image 700 x 700 transparent we can resize later.

Paste kk_LIP_umbrella as new layer, add drop shadow.
Paste your closeup tube as new layer.then on-Blend Mode- Select - Darken.
Add drop shadow.
Paste kk_LIP_flower01 as new layer, resize 32%, postion near hand,
add drop shadow.

Paste kk_LIP_eiffletower as new layer place on right of layer, add drop shadow.
Add your tube as new layer position in center, add drop shadow.
Paste kk_LIP_bench as new layer position to the left, add drop shadow.
Paste kk_LIP_flower2 as new layer resize 35%, duplicate-Image-Mirror place on bench.
Add drop shadow.
Paste kk_LIP_flower3 as new layer positon in center of the other 2 flowers resize to fit.
Add drop shadow.
Paste kk_LIP_romanticdonner as new layer position on right.
Add drop shadow,
Paste kk_LIP_hate 2 as new layer resize 28% position on left of bench.
Paste kk_LIP_wordart01 as new layer resize 85%,place at top left.
Add drop shadow.
Paste kk_LIP_heartrop06 as new layer resize 65% position on left under wordart.Add drop shadow.
New layer, Select all copy paste kk_LIP_Paper07 into Selection.
Apply mask-Merge-Merge group.


Add your Artist © and your name then crop and save.
This is only a guide and feel free to use any other element you wish.
Most of all have fun creating.


Thank you for using my tutorial.


Written and copyrighted to Maree (aka Falcon) on 26th August 2011.
Under no uncertain terms are you allowed to make money
from anything produced from this tut, this is against my TOU's.

Any similarities to this tutorial are purely coincidental.
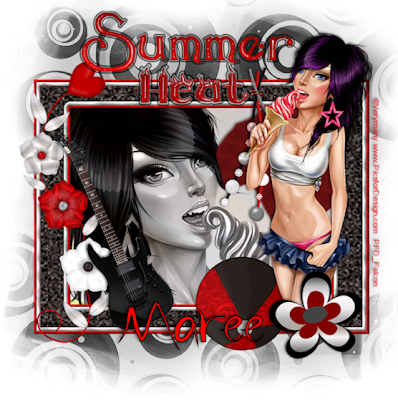
Summer Heat ♥


For this Tutorial you will need.

A Tube of your choice I am using the awesome artwork of ©Verymany ,
which you must have a license to use you can get one at PFD

Elements and Papers from a scrap Summer Heat by *Freaks Creations*
you can purchase it Here.

Font: Imagination Theory
Drop Shadow of choice.

Mask by Vabys, #DBV_133 you can download it Here

Remember to Save Often!!!

Let's create

Open new image 700 x 700 transparent background.

Paste fc_sumerheat_squareframe as new layer click inside with Magic wand.
Selections-Modify-Expand by 4. Paste as new layerfc_summerheat_paper3.
Selections-Invert-hitdelete. Move below frame layer.
Give frame layer a drop shadow.

Paste your closeup tube as new layer then position on left the Blend Mode-Luminance(L)
Paste fc_sumerheat_emo as new layer resize 45%.Position of right of frame.
Add drop shadow.
Paste fc_sumerheat_beads as new layer resize 65% position on right of frame.
Add drop shadow
Paste fc_sumerheat_guitar as new layer resize 70% then use yur pick tool
to position on left of frame. Add drop shadow.
Add your main tube as new layer position on right of frame, resize to fit.
Add drop shadow
Paste fc_sumerheat_beachball as new layer resize 65%,
add drop shadow.
Paste fc_sumerheat_flowerhead as new layer resize 47% position bottom of frame,
add dropshadow.
Paste fc_summerheat_wordart as new layer position top of frame,
add drop shadow.
Paste fc_sumerheat_paper 12 as new layer-apply mask, merge group.


Add your Artist © and your name then crop and save.
This is only a guide and feel free to use any other element you wish.
Most of all have fun creating.


Thank you for using my tutorial.


Written and copyrighted to Maree (aka Falcon) on 27th August 2011.
Under no uncertain terms are you allowed to make money
from anything produced from this tut, this is against my TOU's.

Any similarities to this tutorial are purely coincidental.
Monday, August 22, 2011

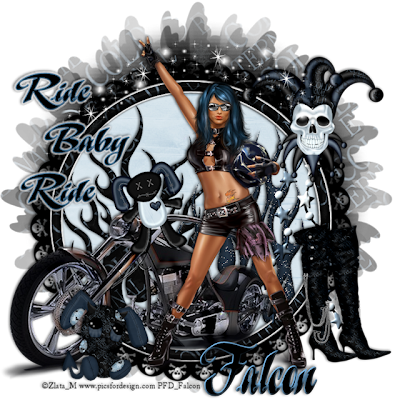
Ride Baby Ride ♥


For this Tutorial you will need.

A Tube of your choice I am using the awesome artwork of © Zlata_M ,
which you must have a license to use you can get one at PFD

Elements and Papers from a scrap Cold Eternal by Sue Ellen *Wicked Creation*
you can purchase it Here.

Font: A&S Graceland.

Drop Shadow of choice.

Mask by *Designs by Vaybs*, #DBV_135 you can download it Here

Remember to Save Often!!!

Let's create

Open new image 700 x 700 transparent background.
Select Frame copy paste as new layer, add drop shadow. Click inside
frame with Magic wand.
Selections-Modify-Expand by 5. Copy paste paper 6 as new layer.
Selections-Invert-hit delete.
Move below frame layer.

Copy paste bike as new layer above frame layer then resize to fit.
Position it just out of frame, see tag.Add drop shadow.
Copy Flame 1 an 2 paste below frame layer, add drop shadow to both.
Copy StringofStars paste as new layer above frame layer.
Copy Jester paste as new layer resize 75% position on right of layer, add drop shadow.
Copy Sparkles paste above frame.
Copy Bunny paste above bike layer resize position him to sit on front of bike
resize 42%. add drop shadow.
Copy Boots paste as new layer resize 65% position on right of layer.
Add drop shadow.
Copy DamnedBear paste as new layer resize 75% position on left of layer,
add drop shadow.
Add your main tube now resize if needed then add drop shadow.
New layer-Selections-Select All, copy paper8 paste into selection, deselect.
Apply mask-merge -merge group.

Add your Artist © and your name then crop and save.
This is only a guide and feel free to use any other element you wish.
Most of all have fun creating.


Thank you for using my tutorial.


Written and copyrighted to Maree (aka Falcon) on 20th August 2011.
Under no uncertain terms are you allowed to make money
from anything produced from this tut, this is against my TOU's.

Any similarities to this tutorial are purely coincidental.
Wednesday, August 17, 2011

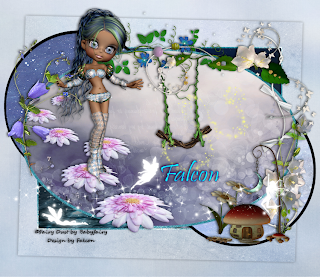
Fairy Whispers♥


For this Tutorial you will need.

Tube of your choice

Elements and Papers from a scrap kit Fairy Dust by *Babyfairy*
you can purchase it Here.

Thank you for this gorjuss kit.

Font:Pristina

Drop Shadow of choice.

*Toxic Desirez* Template 149 Here

Remember to Save Often!!!

Let's create

Open your template, delete these layers-
credit, word,stars 1 & 2 and thin rectangle.

Click on Glitter Rectangle -Adjust-Hue &Sat-Colorize -H135 S-115,
it now should be a blue color.Repeat on Glitter Oval layer.

Select oval layer-Selection all-Float-Defloat, copy paste Babyfairy_ppl 6
resize paper by 18%.
Selections-invert-delete.Deselect.Delete original layer.
Repeat above this time using these or ones of your choice:
Circles- Babyfairy_ppl 3 -resize by 18%
Large Rectangle -Babyfairy_ppl 7 new layer, paste this paper into selection.

I used these Elements

Babyfairy_Elmtl 8 resize 21% position top right corner.
Babyfairy_Elmtl 20 resize 13%, Image Mirror position on left -oval layer.
Babyfairy_Elmtl 15 resize 15% position on left of oval layer.
Babyfairy_Elmtl 6 resize 9% position on left.
Babyfairy_Elmtl 16 resize 9% position on lower right.
Babyfairy_Elmtl 19 resize 9% position on top of oval.
Babyfairy_Elmtl 31 resize 10% position under flowers.
Babyfairy_Elmtl 21 resize 13% place on right of layer.
Babyfairy_Elmtl 17 resize 10% position on right.
Babyfairy_Elmtl 7 resize 10% position on right.
Babyfairy_Elmtl 33 resize 19% position.
Babyfairy_Elmtl 1 resize 15% position near swing.
Babyfairy_Elmtl 3 resize 25% position on left.
Give all a drop shadow except element 1 and 33.

New layer-select all copy paste into Selection Babyfairy_ppl 2, Deselect.


Add your Artist © and your name then crop and save.
This is only a guide and feel free to use any other element you wish.
Most of all have fun creating.


Thank you for using my tutorial.


Written and copyrighted to Maree (aka Falcon) on 2011.
Under no uncertain terms are you allowed to make money
from anything produced from this tut, this is against my TOU's.

Any similarities to this tutorial are purely coincidental.
Monday, August 15, 2011

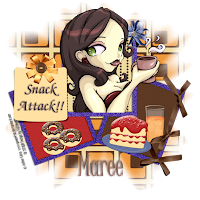
Snack Attack! ♥


For this Tutorial you will need.

A Tube of your choice I am using the awesome artwork of ©Amber Keslo ,
which you must have a license to use you can get one Here
* Please note that I purchased my tube from *CILM
Elements and Papers from a scrap kit Midnight Snack by Pia *Digital BluePrint * you can purchase it Here.exquisite
Font: Of choice.
Drop Shadow of choice.
Mask *WSL*, it's #wsl_84 you can download it Here

Remember to Save Often!!!

Let's create

Open new image 700 x 700 transparent background.

Select Preset tool-Rectangle then a color for your FG I used #2d0688
then X-out BG color.
Draw out a Med size square.Give your frame a drop shadow.
Select square with Magic wand-Adjust Add Noise-Gaussian-50%. Deselect.
Duplicate twice.
You now should have 3 frames.Move your frames around till your happy with placement.
Click inside a frame-Selections-Modify-Expand by 6.
Select a paper copy paste resize by 40% twice, this defines the pattern better.
Selections-Invert-Delete, move below frame.
Repeat above using 2 different papers for the other frames.
Select DBP_MidnightSnack_Embellishments_Ribbon2 copy paste resize 15% move
to frame on right side of layer,add drop shadow.
Select DBP_MidnightSnack_Embellishments_Orange juice copy paste place on
frame then resize 12%, add drop shadow.
Select DBP_MidnightSnack_Embellishments_Cheesecake copy paste place on frame
then resize 13%, position then add drop shadow.
Select DBP_MidnightSnack_Embellishments_Doughnut copy paste resize 9%
then duplicate twice, add drop shadow. Move them into position in frame on left.
Add your tube to top frame, crop to fit, add drop shadow.
Select DBP_MidnightSnack_Embellishments_Journal copy paste resize 12% move to
left frame, add drop shadow.
Select DBP_MidnightSnack_Embellishments_Flower2 copy paste resize 10%
,move to top of Journal paper, add drop shadow.
Select DBP_MidnightSnack_Embellishments_Button copy paste resize 30% twice
place on top of flower 2, add drop shadow.
Select DBP_MidnightSnack_Embellishments_Flower 1 copy paste resize 12%
copy paste, position on top frame on right side, add drop shadow.
New layer select all cop paste into selection DBP_MidnightSnack_Papers_Square,
then apply mask-merge group.


Add your Artist © and your name then crop and save.
This is only a guide and feel free to use any other element you wish.
Most of all have fun creating.


Thank you for using my tutorial.


Written and copyrighted to Maree (aka Falcon) on 12th August 2011.
Under no uncertain terms are you allowed to make money
from anything produced from this tut, this is against my TOU's.

Any similarities to this tutorial are purely coincidental.
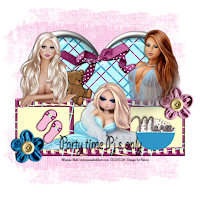
Pajama Party ♥


For this Tutorial you will need.

A Tube of your choice I am using the awesome artwork of © Jamie Kidd ,
you must have a license to use you can get one at CDO
* Please note that I purchased my tube from *CILM

Elements and Papers are from a scrap kit Pajama Party by Pia *BluePrint Design* you can purchase it Here.
Font: Of Choice
Drop Shadow of choice.
Mask Bevie *HorsePlays Pastures*, it's #HHP9 you can download it Here

Remember to Save Often!!!

Let's create

Open new image 750 x 700 transparent background.
Select DBP_PajamaParty_Embellishments_Brad 1 copy paste resize 30%.
Add drop shadow.
Select DBP_MidnightSnack_Embellishments_Frame copy paste resize 20%.
Add drop shadow.
Use your Selection Tool to outline the frame.New layer flood fill with #fffccd,
deselect.Move below frame layer.
Select DBP_MidnightSnack_Embellishments_Popcorn copy paste below frame layer,
position on right then resize 10%, add drop shadow.
Select DBP_MidnightSnack_Embellishments_Slippers copy paste below frame layer
position on left resize 8%, add drop shadow.
Select DBP_MidnightSnack_Embellishments_Flower 1 and 2 copy paste resize
both 10% position on ends of frame.Add drop shadow.
Select DBP_MidnightSnack_Embellishments_Ribbon 1 copy paste position on Brad
in center. Resize 12%, add drop shadow.
Add your tubes now position to your liking, add drop shadow to all.
Select DBP_MidnightSnack_Embellishments_TeddyBear copy paste resize 12%, I positioned mine next to tube.
New layer Select all, copy paste into Selection DBP_MidnightSnack_Papers_Pink,
apply mask-merge group.


Add your Artist © and your name then crop and save.
This is only a guide and feel free to use any other element you wish.
Most of all have fun creating.

Thank you for using my tutorial.


Written and copyrighted to Maree (aka Falcon) on 12th August 2011.
Under no uncertain terms are you allowed to make money
from anything produced from this tut, this is against my TOU's.

Any similarities to this tutorial are purely coincidental.
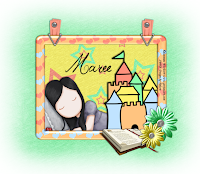
Bedtime Story ♥


For this Tutorial you will need.

A Tube of your choice I am using the awesome artwork of ©Suzzane Woolcott ,
which you must have a license to use you can get one Here

Elements and Papers from scrap kit BedTime Story by Pia *Digital BluePrint * you can purchase it Here.
Font:
Drop Shadow of choice.
Mask Bevie *Horseplays Pastures*, it's #HHP11 you can download it Here

Remember to Save Often!!!

Let's create

Open new image 650 x 500 transparent background.

Select DBP_BedtimeStory_Embellishments_Frame copy paste resize 30%,
add a drop shadow.
Copy paste your tube, give it a drop shadow.
Click inside frame with Magic wand then selections-Modify-Expand by 4.
Select DBP_BedtimeStory_Paper_Stars copy paste resize 50% twice.
Selections-Invert-Delete, move paper below frame layer.
Select DBP_BedtimeStory_Embellishments_Castle copy paste below frame layer
then resize 15%, move to left of frame.Add drop shadow.
Select DBP_BedtimeStory_Embellishments_Buckle copy pste resize 20% place
on top of frame then duplicate, add drop shadow.
Select DBP_BedtimeStory_Embellishments_Storybook copy paste resize 18%,
move to bottom of frame, add drop shadow.
Select DBP_BedtimeStory_Embellishments_Flower 1 copy paste resize 20%,position
on bottom right of frame, add drop shadow.
Select DBP_BedtimeStory_Embellishments_Flower 2 copy paste resiz e 16%
position this nest to flower1, add drop shadow.
New layer-Select all then select DBP_BedtimeStory_Paper_Green copy Paste into selection.
Apply mask then Merge group.

Add your Artist © and your name then crop and save.
This is only a guide and feel free to use any other element you wish.
Most of all have fun creating.


Thank you for using my tutorial.


Written and copyrighted to Maree (aka Falcon) on 12th August 2011.
Under no uncertain terms are you allowed to make money
from anything produced from this tut, this is against my TOU's.

Any similarities to this tutorial are purely coincidental.
Sunday, August 14, 2011

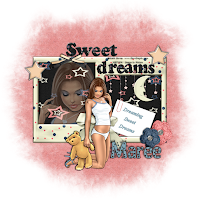
Sweet Dreams ♥


For this Tutorial you will need.

A Tube of your choice I am using the awesome artwork of ©Keith Garvey ,
which you must have a license to use you can get one at PTE
* Please note that I purchased my tube from *MPT
Elements and Papers are from a scrap kit called by Pia *Digital Blueprint *
you can purchase it Here.
Font: Sprinkles
Drop Shadow of choice.
Mask by *Vaybs*, it's #DBV111 you can download it Here

Remember to Save Often!!!

Let's create

Open new image 700 x 700 transparent background.
Select DBP_SweetDreams_Embellishments_Frame copy paste resize 45%.
Click inside frames with Magic wand-selections-modify-expand by 5 copy paste on new layer
DBP_SweetDreams_Paper_Stars. Selections-Invert-Delete, move paper below frame layer.
Select DBP_SweetDreams_Embellishments_Star Dangles copy paste resize 15% move to right frame, add drop shadow.
Select DBP_SweetDreams_Embellishments_Journal copy paste resize 15%.
Select pick tool and angle it, see tag, add drop shadow.
Add any text you would like I used "Dreaming Sweet Dreams".
Select DBP_SweetDreams_Embellishments_Moon copy paste resize 14% place
top right corner of frame, add drop shadow.
Select DBP_SweetDreams_Embellishments_Ribbon 1 copy paste resize 50% move to
center of frame, add drop shadow.
Select your close up tube and copy paste resize if needed.Select Blend Mode-screen then Ocpacity 50%.
Add your main tube give a drop shadow.
Select DBP_SweetDreams_Embellishments_Flower 1 copy paste resize 12%
move to right bottom of frame.
Select DBP_SweetDreams_Embellishments_Flower 2 copy paste resize 10% mov
close to other flower, give both a drop shadow.
Select DBP_SweetDreams_Embellishments_Brad2 copy paste resize 18%, duplicate-Image Mirror, move down a bit on left of frame.
Select DBP_SweetDreams_Alpha letters to spell out Sweet Dreaming.Resize to fit.
Select DBP_SweetDreams_Embellishments_Ribbon2 copy paste resize 10% place under
word art you made.Add drop shadow.
New layer select all copy paste into selection DBP_SweetDreams_Paper_Pink,
apply mask, merge group.

Add your Artist © and your name then crop and save.
This is only a guide and feel free to use any other element you wish.
Most of all have fun creating.


.
Thank you for using my tutorial.

Written and copyrighted to Maree (aka Falcon) on 2011.
Under no uncertain terms are you allowed to make money
from anything produced from this tut, this is against my TOU's.

Any similarities to this tutorial are purely coincidental.
Friday, August 5, 2011

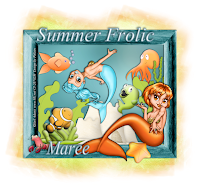
Summer Frolic ♥


For this Tutorial you will need.

A Tube of your choice I am using the awesome artwork of © Joel Adams ,
which you must have a license to use you can get one at CDO
* Please note that I purchased my tube/s from CILM *
Elements and Papers are from a scrap kit - South Beach Summer Fun FS by Jen *SleeknSassy Designz* you can find it Here.
Font: Vijaya
Drop Shadow of choice.
Mask by Vybas **, it's #DBV133 you can download it Here
Please leave some love ♥

Remember to Save Often!!!

Let's create

Open new image 750 x 700 transparent background.
Select Frame 3 copy paste resize 65%.Click inside with Magic wand, Selections-Modify-Expand by 6.
Copy paste Paper 1, Selections-Invert-Delete, move below frame layer.

Copy paste these elements I used or select your own:
Clownfish resize by 10%
Fish 6 by 10%
Fish by 12%
Sandcastle by 14%
Octopus 2 by 10%
Seaweed by 15%
Seaweed2 by 13%
Shrimp by 10%
Starfish 3 by %8

Position them to your liking add drop shadow to all.
Copy paste 1st tube I resize by 85% then Image-Flip, add drop shadow.
Add your2nd tube copy paste place on right side of frame, add drop shadow.
New layer-send to bottom select all copypaste into selection Paper10-aply mask-merge group.Resize 105%
New layer select all copy paste into selection Paper6-apply mask-merge group.


Add your Artist © and your name then crop and save.
This is only a guide and feel free to use any other element you wish.
Most of all have fun creating.


If you wish to show off your creations.Email me your creation
and I will place iton my show off Page.
Thank you for using my tutorial.


Written and copyrighted to Maree (aka Falcon) on 4th August 2011.
Under no uncertain terms are you allowed to make money
from anything produced from this tut, this is against my TOU's.

Any similarities to this tutorial are purely coincidental.