Sunday, July 31, 2011

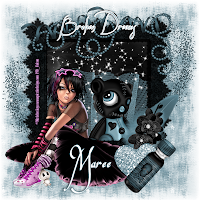
Broken Dreams ♥


For this Tutorial you will need.

A Tube of your choice I am using the awesome artwork of © Misticheskaya ,
which you must have a license to use you can get one at Pics For Design.

Elements and Papers are from a scrap kit called Tracey by *Pink Candy Designs*
you can find it here at Scrappin Dollars.
Font: Wankstaberg
Drop Shadow of choice.
Mask by Vaybs **, it's #DBV97 you can download it Here
Please remember to leave some love!!

Remember to Save Often!!!

Let's create

Open new image 800 x 800 transparent background we will crop later.
Select pcd_frame2 copy paste, click inside frame with Magic wand-
selections-Modify-Expand by 6.
Copy paste pcd_paper5,Selections-Invert-Delete, move below frame layer.
Select pcd_sparkles copy paste-duplicate-Image-flip.
Select pcd_netting copy paste move to bottom of frame.
Select pcd_bear copy paste, Image-Mirror. Add drop shadow.

Add your main tube position on left of frame, add drop shadow.
Select pcd_feather copy paste, position on lower right of frame.
Select pcd_flowers copy paste-Image-Mirror-resize 35%, add drop shadow.
Select pcd_heart 2 copy paste position on right of frame.

Select pcd_bottle copy paste resize 43%-Image-FreeRotate-43 Right,
add drop shadow.
Select pcd_streamer copy paste position at top of frame,
add drop shadow.
Select pcd_bead2 copy pastem Image-Flip position on stramer.
Using your Eraser, erase some of the bead giving the effect it is
entwined between the ribbon.
Select pcd_glitter copy paste above background layer, move to center
of frame-duplicate-Image-Mirror.
Click on background layer select all.Select pcd_paper6 copy paste into selection.
Apply mask-merge group.


Add your Artist © and your name then crop and save.
This is only a guide and feel free to use any other element you wish.
Most of all have fun creating.


If you wish to show off your creations.Email me your creation
and I will place iton my show off Page.
Thank you for using my tutorial.


Written and copyrighted to Maree (aka Falcon) on 31st July 2011.
Under no uncertain terms are you allowed to make money
from anything produced from this tut, this is against my TOU's.

Any similarities to this tutorial are purely coincidental.

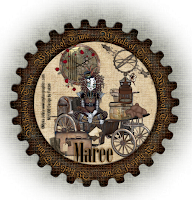
Wheels of Time ♥


For this Tutorial you will need.

A Tube of your choice I am using the awesome artwork of © Myka Jelina ,
which you must have a license to use you can get one Here.

Elements and Papers are from a scrap kit called A Little Vintage by Lynn *Scrappin Emporium* you can purchase it Here.
Font: Parchement and Onyx.
Drop Shadow of choice.
Mask by Bev *HorsePlay's Pastures*, it's #HPP25 you can download it Here
Remember to Save Often!!!

Let's create

Open new image 700 x 700 transparent background.
Select SCE Alv carriage copy paste add dro shadow.
Open your tube position on seat, add drop shadow.
Select SCE Alv Teddy bear copy paste resize 35% position on front carriage seat,
add drop shadow.
Select SCE Alv Dial copy paste resize 75% psoition add drop shadow.
Select SCE Alv Clock copy paste resize 55% position add drop shadow.
Select SCE Alv Case copy paste resize 45% position add drop shadow.
Select SCE Alv Vintage roses cop paste resize 50% position on left of clock,
add drop shadow.
Select SCE Alv Bird cage copy paste resize 20% position on carriage seat,
add drop shadow.
Select SCE Alv Boots cop paste above case layer resize 25% move to left of cases,
add drop

shadow.
Select SCE Alv Butterfly 3 copy paste resize 15% move above cage,
add drop shadow.
Select SCE Alv Letter copy paste resize 25%, position, FreeRotate 42 Left,
add drop shadow.
Close out your background layer.
Layers Merge-Merge visible, resize 65%.
Select SCE Alv Frame 2 copy paste resize 140%. Click inside frame with Magic wand.
Selections-Modify-Expand by 6 copy paste SCE Alv paper 2,
Selections-Invert-Delete-move below merged layer,
right click merge visible.
New layer-selections-select all copy paste paper3-apply mask-merge-merge group.
Select Font-Parchment-72 BG:#a47337 close out FG.
used my wordart-Wheels of Time....
continue to type until it encircles the frame.
Add drop shadow.

Add your Artist © and your name then crop and save.
This is only a guide and feel free to use any other element you wish.
Most of all have fun creating.


If you wish to show off your creations.Email me your creation
and I will place iton my show off Page.
Thank you for using my tutorial.


Written and copyrighted to Maree (aka Falcon) on 31st July 2011.
Under no uncertain terms are you allowed to make money
from anything produced from this tut, this is against my TOU's.

Any similarities to this tutorial are purely coincidental.
Saturday, July 23, 2011

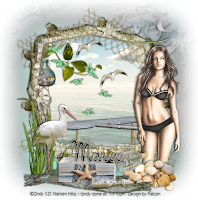
Ocean Secret ♥


For this Tutorial you will need.

A Tube of your choice I am using the awesome artwork of © Zindy Neilson ,
which you must have a license to use you can get one Here.
* Please note that I purchased my tube from MPT *
Elements and Papers are from a scrap kit Secrets of The Sea (FS) by *Baby Fairy*
you can purchase it at Sunflower Scraps Boutique
Font: Kelly
Drop Shadow of choice.
Mask by Bev *Horse Plays Pastures*, it's #HPP11 you can download it Here
Remember to Save Often!!!

Let's create

Open new image 800 x 800 transparent background you can crop it later.
Select Babyfairy_Elm 4 copy paste resize as needed, give a light drop shadow.
Click inside frame with Magic wand.
Selection-Modify-Expand by 10 copy paste Babyfairy_Pp resize 50% twice
then position where you like-Selections-Invert-Delete, move below frame.

Select Babyfairy_Elm 90 copy paste resize to fit frame-Image-Mirror, add drop shadow.
Select Babyfairy_Elm 54 copy paste below frame layer resize 10% move to top left of frame,
add drop shadow.
Select Babyfairy_Elm 51 copy paste resize 12% move to top left of frame,
add drop shadow.
Select Babyfairy_Elm 10 copy paste above frame layer resize to fit left side of frame,
add drop shadow.
Select Babyfairy_Elm 64 copy paste below frame resize 8% duplicate position,
add drop shadow.
Select Babyfairy_Elm 3 copy paste resize 10% move to left of frame, add drop shadow then duplicate.
Select Babyfairy_Elm 8 copy paste resize 15% move to left of frame, add drop shadow.
Add your main tube now position on right of frame, add drop shadow.

Select Babyfairy_Elm 12 copy paste resize 10% move to left of frame,
add drop shadow.
Select Babyfairy_Elm 29 copy paste position in front of tube resize 20%,
add drop shadow.
Select Babyfairy_Elm 78 copy paste position at bottom of frame, resize 12%,
add drop shadow.
Select Babyfairy_Elm 5 copy paste above shell layer resize 13% use your Pick Tool
to position bottle add drop shadow.
New layer Select All copy paste into selection Babyfairy_Pp 12, deselect.
Apply mask-merge merge group.


Add your Artist © and your name then crop and save.
This is only a guide and feel free to use any other element you wish.
Most of all have fun creating.


If you wish to show off your creations.Email me your creation
and I will place iton my show off Page.
Thank you for using my tutorial.


Written and copyrighted to Maree (aka Falcon) on 22nd July 2011.
Under no uncertain terms are you allowed to make money
from anything produced from this tut, this is against my TOU's.

Any similarities to this tutorial are purely coincidental.
Don't Ask Me..Just Don't Ask!!!


For this Tutorial you will need.

A Tube of your choice.

Elements and Papers are from CU Balck N White Kit by Jen *SleeknSassy*
you can purchase this kit at Scrappindollars
Font: Kelly and Dear Diary
Drop Shadow of choice.
Mask by Bev *HorsePlays Pastures*, it's #HPP28 you can download it Here
Please remember to leave some love♥.

Remember to Save Often!!!

Let's create

Open new image 800 x 800 transparent background.
Open Image 54-frame copy paste resize 25%-Image-FreeRotate 90 Left.
Give this a drop shadow 2/2/50/5.
Click inside frame with Magic wand-Selections-Modify-Expand by 10.
Copy paste Image 40-paper resize 35%. Selections-Invert-Delete, move below frame.
Select RockinOut-30 copy paste resize 65% position above frame, add drop shadow.
Select RockinOut-84 copy paste resize 35% move above frame position, add drop shadow.
Select Image-47 copy paste resize 18% move above (84), add drop shadow.
Select font-Kelly-36 Use the wording I used or your own choice.Add drop shadow.
Duplicate-image FreeRotate-90Left. Place on side of frame.
Duplicate-Image-Flip-Mirror position on other side of frame.

Click on your paper layer, then Effects-Texture Effects-Straw wall apply these settings:


I used 2 of the tubes supplied with the CU kit.First one resized by 50% move to left of frame.

2nd tube resize by 65% move to right of frame. Add Drop Shadow to both.
Or use your own choice of tube.
New layer-select all copy paste into selection-Image 44(paper), apply mask-Merge group.
Click on your background layer and floodfill with #ffffff.

Add your Artist © and your nameI used #FG:a47337, BG: #000000 stroke 2
Font: Dear Diary, then crop and save.

This is only a guide and feel free to use any other element you wish.
Most of all have fun creating.


If you wish to show off your creations.Email me your creation
and I will place iton my show off Page.
Thank you for using my tutorial.


Written and copyrighted to Maree (aka Falcon) on 24th July 2011.
Under no uncertain terms are you allowed to make money
from anything produced from this tut, this is against my TOU's.

Any similarities to this tutorial are purely coincidental.

Saturday, July 16, 2011

Secret Treasures ♥


For this Tutorial you will need.

A Tube of your choice I am using the artwork supplied in Scrapkit.

Elements and Papers are from a scrap kit called Sea Secrets by Conchi *DNscraps*
you can purchase it Here.
Font:Jacques
Drop Shadow of choice.
Mask by Bev *Horse Play's Pastures*, it's #HPP27
you can download it Here

Animation Shop.

Remember to Save Often!!!
Let's create

Open new image 700 x 700 transparent background floodfill with #ffffff.
Select Seasecretsstring copy paste, add drop shadow
Select Seasecretsribbonframe3 copy paste add drop shadow.
Select Seasecretstimon2 copy paste add drop shadow.
Select your Selection tool-circl draw out a cirle to fit to over timon2
,floodfill with #0099d2 move below string layer.Rename water.
Select Seascretsalgae copy paste below string layer, add drop shadow.
Select Seascretsbaul copy paste resize 45% move to left.
Select Seascretsanchor copy paste resize 50% use your pick tool to
angle it against chest, add drop shadow.
Select ap_SNjasmineA3 copy paste resize 75% move to middle of layer,
add drop shadow.
Select Seascretsfish copy paste reszie 25% move to left of layer,
add drop shadow.
Select Seascretsfish 3 copy paste image-Mirror resi ze 25%
move to right of layer.
Select Seascretsea copy paste above timon2 layer,
duplicate-Image-Mirror.
Select Seascretshellbed2 copy paste resize85% move to left of layer,
add drop shadow.
Select Seascretsstarfish2 copypaste resize 25% move to center,
add drop shadow.
Select Seascretsconch2 copy paste resize 35% move to right of layer,
add drop shadow.
Select Seascretsbottle2 copy paste resize 50% move to right of layer.
Select Seascretspearls copy paste Image-Mirror move to center of layer,
add drop shadow.
Select Seascretspaper4 copy paste apply mask merge-merge group.
Duplicate-Right click Merge down.
Add your Artist © and your name then crop and save if you dont wish to animate..
This is only a guide and feel free to use any other element you wish.
Most of all have fun creating.

Animation.
Open AS then click Propagate Paste to activate later, click back into Psp.
1. Copy Background and Mask layer only-paste as new animation.
Hit Ctrl+L 9 times, now you should have 10 frames
2. In Psp click on water layer copy paste as new animation in AS.
3. Effects-Insert Image Effects with these settings.


4. Click on Customize then apply these settings.


5. Click on Wave change to 2 then apply these settings: X -63, Y26
6. Change to wave 3apply X 29, Y65.
7. Change to wave 4 apply X -45, Y63
8. Change to wave 5 apply X -1, Y49.Click OK.
9. Click on Frame 1 and Delete it. You now should have 10 frames.
10.Edit-Select all copy.click on Mask layer to activate. Edit Paste-Into selected
frame (1) position it then click,if not happy then click
the undo button and reposition again.
11. Back in Psp close out background , mask and water layers.
Edit-Copy Special-Copy Merged.
12. In AS paste as new animation.Right click copy then paste over water layer,
remember the undo button is your friend if you need to reposition.

Check your animation. Amination - Frame Properties change to 25.
If you are now happy with your tag save as a Gif.

If you wish to show off your creations.Email me your creation
and I will place iton my show off Page.
Thank you for using my tutorial.


Written and copyrighted to Maree (aka Falcon) on 16th July 2011.
Under no uncertain terms are you allowed to make money
from anything produced from this tut, this is against my TOU's.

Any similarities to this tutorial are purely coincidental.

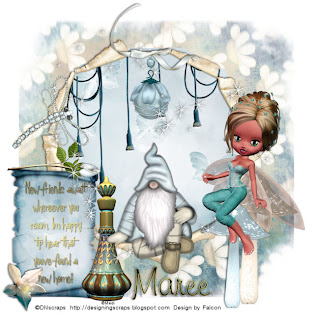
Friendship ♥


For this Tutorial you will need.

A Tube of your choice I am using the artwork supplied with scrap kit.

Elements and Papers are from a scrap kit called Magical and Fantasy
by Conchi *Dnscraps* you can purchase it Here.
Font: Fabulous 50s Freehand 591BT
Drop Shadow of choice.
Mask by *Vaybs*, it's # 111 you can download it Here
Remember to Save Often!!!

Let's create

Open new image 700 x 700 transparent background.
Select Magicandfantasycdouble frame, copy paste click inside with Magic wand-
selections-Modify-Expand by 5.
Select Magicandfantasycpaper4 copy paste-position over frame-Selections
Invert-Delete-move below frame.
Select Magicandfantasyccmusrshroom1 and 2 copy paste resize
Select Magicandfantasycpergament copy paste resize 50% position on left.
Add drop shadow.
Select Magicandfantasycmagicball2 copy paste resize 35%
Select Magicandfantasyclights copy paste resize 65% move to top of frame earase
any parts showing out of frame.Add drop shadow.
Select Magicandfantasycflowess copy paste resize 25%-Image-Mirror,
add drop shadow-position on left side of pergament.

Select Medi-genie1 copy paste resize 65% position on right of pergament
, add drop shadow
Select Magicandfantasycbow copy paste resize 32% position on top of frame,
add drop shadow.
Select Magicandfantasycdragonfly2 copy paste resize35%, add drop shadow.
Image-FreeRotate-Right 65 psoition on left of frame.
Select Magicandfantasycrose2 copy paste resize23% use the Pick tool to place
above scroll,see tag.Add drop shadow.
Use the wordart I have used or your own. Fabulous 50s font-Gold Gradient size 48,
give it a light drop shadow 2/2/50/3.
Select ap_fedinaB1 copy paste resize 65% add drop shadow
.Position her on mushroom.
Select Magicandfantasycgnomo copy paste resize 45% position at bottom of frame,
add drop shadow.
Select Magicandfantasycglitter2 copy paste, add light drop shadow.
Select Magicandfantasycpaper8 copy paste as new layer then
apply mask-merge-merge group.

Add your Artist © and your name then crop and save.
This is only a guide and feel free to use any other element you wish.
Most of all have fun creating.


If you wish to show off your creations.Email me your creation
and I will place iton my show off Page.
Thank you for using my tutorial.


Written and copyrighted to Maree (aka Falcon) on 16th July 2011.
Under no uncertain terms are you allowed to make money
from anything produced from this tut, this is against my TOU's.

Any similarities to this tutorial are purely coincidental.

Sunday, July 10, 2011

Flirting with Spring ♥


For this Tutorial you will need.

A Tube of your choice I am using the awesome artwork of ©Elias Chatzoudis ,
which you must have a license to use you can get one at PTE
* Please note that I purchased my tube from MPT *
Elements and Papers are from a scrap kit called Spring Lime by Jen *Sleek n Sassy*
you can purchase it Here.

Font: Fabulous 50
Drop Shadow of choice.

Animation thanks to Missy from Devine Intenionz-
Novosparks_bymissy Here.
Look for the updated pack with 48 animations.

Medi-Sorting Tiles

Remember to Save Often!!!
Let's create

Open new image 575 x 300 transparent background.

Selections-select all copy paste into selection element 55.
Apply Medi-Sorting Tiles with these settings:


Select element 6 coy paste resize 85%move to bottom of layer
, add drop shadow.
Add your tube of choice position on right of layer,
add drop shadow.
Select element 33 copy paste resize to fit,
add drop shadow.
Select emement 66 copy paste position under heart frame,
using the Pick tool to adjust to fit inner heart shape.
Select element 80 copy paste position on heart frame,
resize 10%, add drop shadow, duplicate-
Image-Mirror-Flip.

Select element 6545 copy paste resize 10% position on left of layer,
duplicate move down below heart layers.Give both a drop shadow.

Select element-untitled-2 copy paste below heart layers resize 14%,
add drop shadow.

Add your Artist © and your name.
Image-Add Border-4 a dark color.Select with Magic wand then flood fill with a
Gold Gradient color of your choice.Deselect.

Image-Add border-10, then flood fill with #91cc68.
Adjust-AddNoise-Guassian-45.Deselect.
If you would like to animate please continue, if not save now.

Edit-Copy

Animation

Open AS then Right click Paste as New Animation.
Back in Psp click undo twice then repeat
Add noise this time 55.Deselect.Edit-Copy.
In AS paste after current frame.
Repeat agian using AddNoise-65 this time.

Ctrl+A-Edit -Duplicate Selected. do this twice.
Now holding down Shift select frames1,2,an 3 only-Edit-duplicate selected.
You now will have 15 frames.
Open Missy animation Ctrl+A-Edit-Copy-click on first frame -
right click -Paste-Into Selected Frame.

Place the animation in center of heart or where you would like to place it.
View your animation is happy save as a Gif.

This is only a guide and feel free to use any other element you wish.
Most of all have fun creating.


If you wish to show off your creations.Email me your creation and I will place it
on my show off Page. Thank you for using my tutorial.


Written and copyrighted to Maree (aka Falcon) on 9th July 2011.
Under no uncertain terms are you allowed to make money
from anything produced from this tut, this is against my TOU's.

Any similarities to this tutorial are purely coincidental.

Cheers to SummerTime ♥


For this Tutorial you will need.

A Tube of your choice I am using the awesome artwork of © Jamie Kidd ,
which you must have a license to use you can get one at CDO

Elements and Papers are from a scrap kit called Beach Bunny Babes by Sherry *D'Ambrosio Arts* ou can purchase it Here.

Font: Christopherhand
Drop Shadow of choice.

Mask by Bev *HorsePlay's Pastures*, it's #HPP28
you can download it Here
Remember to Save Often!!!

Let's create

Open new image 700 x 700 floodfill with #ffffff.

Select DAA_bbb_bamboo frame copy paste resize 25%Selections-Modify-
Expand by 4 copy pasteDAA_bbb_paper3 resize by 70%.
Selections-Invert-Delete.Move below frame-deselect.Duplicate this layer
twice rename water1,2 and 3.
Select DAA_bbb_palm_tree copy paste resize 38% position on right of layer,
add drop shadow.
Select DAA_bbb_surfboard copy paste resize 32% position on palm tree,
add drop shadow
Add your tube resize if needed then add drop shadow.
Select DAA_bbb_flip_flops copy paste resize 26% move to left of frame,
add drop shadow.
Select DAA_bbb_hibiscus copy paste resize 65% add drop shadow position
below tube then duplicate resize 85% position to the left.
Select DAA_bbb_pinic_Basket copy paste position at bottom of frame resize
as needed, add drop shadow.
Select DAA_bbb_crab copy paste resize 23% position near water, see tag.
Add drop shadow.
Select DAA_bbb_pelican copy paste resize 65% move to top of frame,
add drop shadow.
Select DAA_bbb_SummerTime wordart copy paste resize 50% position below pelican,
add drop shadow.

Click on water 1 layer, using your Freehand Tool outline the water.
Adjust-AddRemoveNoise-Add noise. Gaussian-Noise20-Monochrome checked.
Repeat for water2 and 3 layer increase to 21 then 22 for these layers.
Close out w2 andw3 layers.

New Layer select all copy paste DAA_bbb_paper_9 into selection then apply mask-merge-merge group.
Add your Artist © and your name.
This is only a guide and feel free to use any other element you wish.
Most of all have fun creating.
Animation
1. Open AS then click back to Psp.
2. Edit-Copy Special-Copy Merged click into AS Paste as New Animation.
3. Close Water1 layer open W2 layer repeat above.Do this again with Water3 layer.
4. Ctrl+A (select all) check your animation then save as a Gif.

If you wish to show off your creations.Email me your creation and I will place it
on my show off Page. Thank you for using my tutorial.


Written and copyrighted to Maree (aka Falcon) on 9th July 2011.
Under no uncertain terms are you allowed to make money
from anything produced from this tut, this is against my TOU's.

Any similarities to this tutorial are purely coincidental.

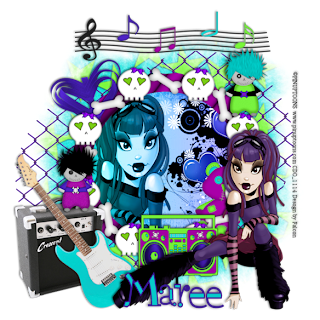
Gonna Be A Star ♥


For this Tutorial you will need.

A Tube of your choice I am using the awesome artwork of ©PinUpToons ,
which you must have a license to use you can get one at CDO.

Elements and Papers are from a scrap kit called Wanna Be RockStar by Kim
*Kim's Korner* you can purchase it Here.

Font: Scruff LET
Drop Shadow of choice.

Mask by *Vabys*, it's #111 you can download it Here


Remember to Save Often!!!

Let's create

Open new image 700 x 700 transparent background.

Open kk_WBRS_Ts_frame09 copy paste resize 85%, add drop shadow.
Click inside with Magic wand-selections-Modify-Expand by 5 copy paste kk_WBRS_Ts_paper17.
Selections-Invert-Delete- move below frame.
Add your closeup tube now or any other element you wish,change
Blend Mode to Luminance(L)-then lock the layer.
Open kk_WBRS_Ts_frame01 copy paste position over main frame, resize 90%.
Open kk_WBRS_Ts_ribbonheart04 copy paste on left side of frame,
resize 43%, add drop shadow.
Open kk_WBRS_Ts_amp copy paste on left of layer then resize 42%.
Open kk_WBRS_Ts_boombox copy paste position bottom of frame,
resize 85%, add drop shadow.
Open kk_WBRS_Ts_Guitar03 copy paste near amp resize 75%.
Image-FreeRotate 35Left, add drop shadow.

Open kk_WBRS_Ts_MusicalNotes copy paste above frame resize 65%,
add drop shadow.
Add your main tube now resize if needed and give it a drop shadow.

Open kk_WBRS_Ts_EmoKid01 copy paste resize 65% place above amp box
add drop shadow.
Open kk_WBRS_Ts_EmoKid02 copy paste resize 48% position on frame above tube.
Open kk_WBRS_Ts_Wire02 copypaste below paper layer.duplicate
position to your liking, add drop shadow.
On background layer select all copy paste into selection kk_WBRS_Ts_paper05
apply mask-merge-merge group.

Add your Artist © and your name then crop and save.
This is only a guide and feel free to use any other element you wish.
Most of all have fun creating.


If you wish to show off your creations.Email me your creation and I will place it
on my show off Page. Thank you for using my tutorial.


Written and copyrighted to Maree (aka Falcon) on 9th July 2011.
Under no uncertain terms are you allowed to make money
from anything produced from this tut, this is against my TOU's.

Any similarities to this tutorial are purely coincidental.
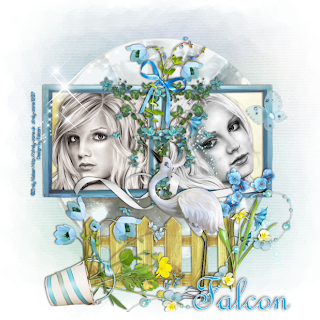
Unforgettable ♥


For this Tutorial you will need.

A Tube of your choice I am using the awesome artwork of ©Zindy Nielsen ,
which you must have a license to use you can get one at Here.

Elements and Papers are from a scrap kit called Blue Lemon by *Cajoline Scraps*
you can purchase it Here.

Font: French Script
Drop Shadow of choice.

Mask by Bev *HorsePlay's Pastures*, it's #HPP27
you can download it Here

Remember to Save Often!!!

Let's create

Open new image 700 x 700 transparent background.
Select cajoline_lemonblue_el71 copy paste, duplicate-Image-Mirror,
make sure the frames just touch and line up.give both a drop shadow.
With Magic wand click inside both frames, Selections-Modify-Expand by 4 copy paste
cajoline_lemonblue_paper13.Selections-Invert-Delete.Move below frame.

Add your closeup tubes now position then hit Delete.Give them a drop shadow
of choice. Move below frame layer.Close ut your background layer then
right click and Merge visible.

Select cajoline_lemonblue_el 106 copy paste resize 18% move to center of frame
then duplicate, add drop shadow.
Select cajoline_lemonblue_el75 copy paste below el 106 position
on right frame, see tag. Add drop shadow.
Select cajoline_lemonblue_el79 copy paste resize 13% place center of frame at top,
add drop shadow.
Select cajoline_lemonblue_el90 resize 13% place behind above element
then duplicate-Image-Mirror, add drop shadow.
Select cajoline_lemonblue_el42 copy paste resize 42% position on bottom of frame, add drop

shadow.
Select cajoline_lemonblue_el35 copy paste resize 15% move to lower
center of layer, add drop shadow.
Select cajoline_lemonblue_el91 copy paste move to left of fence,
resize 14% add drop shadow.
Select cajoline_lemonblue_el29 copy paste move to left bottom of fence.
resize 13%, add drop shadow.
Select cajoline_lemonblue_el42 copy paste position at bottom of fence, resize 12%,Image-Mirror. add drop shadow.
Select cajoline_lemonblue_el26 copy paste position above el 42, resize 13%,
Image-Mirror. Add drop shadow.
Select cajoline_lemonblue_el9 copy paste position on right side of fence,
resize 15%, add drop shadow.
Select cajoline_lemonblue_el75 copy paste position in front of el9 resize 13%,
add drop shadow.
Select cajoline_lemonblue_el22 copy paste position in front of el75
resize 13%, add drop shadow.
Select cajoline_lemonblue_el7 copy paste position on left of layer in front of flowers.
Resize 12%, add drop shadow.
Select cajoline_lemonblue_el30 copy paste position in center of fence
resize 20%, add drop shadow.
Select cajoline_lemonblue_el37 copy paste position on top left frame, resize 25.
Select cajoline_lemonblue_el16 copy paste position at bottom of right frame
resize 20%, add drop shadow.
Select cajoline_lemonblue_el40 copy paste position on top right frame resize 18%,
add drop shadow.
Select cajoline_lemonblue_el15 copy paste above background layer resize 85%.
Select all on background layer then select cajoline_lemonblue_paper14
paste into selection.
Apply mask-merge-merge group.


Add your Artist © and your name then crop and save.
This is only a guide and feel free to use any other element you wish.
Most of all have fun creating.


If you wish to show off your creations.Email me your creation and I will place it
on my show off Page. Thank you for using my tutorial.


Written and copyrighted to Maree (aka Falcon) on 9th July 2011.
Under no uncertain terms are you allowed to make money
from anything produced from this tut, this is against my TOU's.

Any similarities to this tutorial are purely coincidental.

Wednesday, July 6, 2011

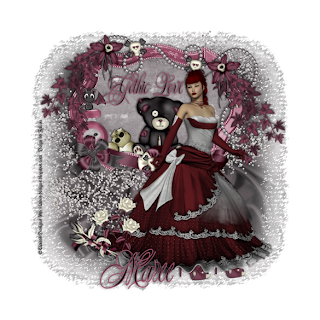
Gothic Love ♥


For this Tutorial you will need.

A Tube of your choice I am using the awesome artwork of ©Claires Design ,
You can download it Here
* Please note that this is a FTU tube please leave some love *

Elements and Papers are from a scrap kit called Beautiful Gothic by Aurelie
*Pink Candy Designs* you can purchase it Here.
Font: Ellida
Drop Shadow of choice.
Mask by Bev *HorsePlays Pastures*, it's #Hpp14 you can download it Here
Remember to Save Often!!!

Let's create

Open new image 700 x 700 transparent background.

Open frame4 copy paste resize 85%,add a drop shadow now. Then with Magic wand
click inside frame-selections-Modify-Expand by 5,
new layer copy paste paper10 into selection-deselect,
move below frame layer.

Copy paste bead2 resize 95% position on right of frame,
add drop shadow.
Copy paste below frame layer, skulls resize 75% move to left,
add drop shadow.
Copy paste emobear resize 73%,
add drop shadow.
Copy paste bottle resize 45% position near skulls on left,
add drop shadow.
Copy paste demon position on top of bottle resize 23%,
add drop shadow.
Copy paste vine position on left top of frame resize 55%
add drop shadow then duplicate-Image-Mirror
move down slightly-see tag.
Copy paste flower position above vineon left then resize 45%,
add drop shadow, duplicate position on other vine.

Copy paste label position at bottom of frame resize 56%
, add drop shadow.
Copy paste bow position in center of lable then resize 35%,
add drop shadow.
Copy paste bow 2 position on left side of label add drop shadow then resize 65%.
Copy paste your tube this will need to be resize by 38%,
add drop shadow position on right of layer.
Copy paste shoe add drop shadow, resize 18%, duplicate position under dress, see tag.
Copy paste roses position to left of tube. Resize 27%-Image-FreeRotate 46 left,
add drop shadow.
Copy paste rose resize 23% add drop shadow, duplicate twice arrange to your liking.
Copy paste glitter move to bottom left of frame, duplicate-Image-Mirror-Flip.
New layer select all copy paste into selection paper1 apply mask, merge merge group.

Add your Artist © and your name then crop and save.
This is only a guide and feel free to use any other element you wish.
Most of all have fun creating.


If you wish to show off your creations.Email me your creation
and I will place iton my show off Page.
Thank you for using my tutorial.


Written and copyrighted to Maree (aka Falcon) on 7th July 2011.
Under no uncertain terms are you allowed to make money
from anything produced from this tut, this is against my TOU's.

Any similarities to this tutorial are purely coincidental.

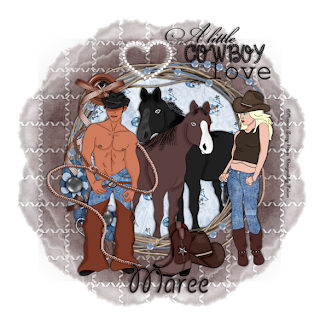
Need A Little Cowboy Love ♥


For this Tutorial you will need.

A Tube of your choice I am using the awesome artwork supplied in this kit.

Elements and Papers are from a scrap kit called Cowboy Love by
*Reece's Scrap Pieces* you can purchase it Here.creativity box
Font: Giddyup Std
Drop Shadow of choice.
Mask *HorsePlays Pastures*, it's #HPP7 you can download it Here

Remember to Save Often!!!

Let's create

Open new image 700 x 700 transparent background.
Select RSP_CowboyLove_Frame3 copy paste resize 65% add drop shadow.
Using Magic Wand click inside frame-Selections-Modify-Expand by 20 copy paste
RSP_VowboyLove_paper5. Selections-Invert-Delete, move below frame layer.

Select RSP_CowboyLove_Horse 1 n 2 copy paste both then resize 45% arrange in
frame to your liking, add drop shadow.
Select RSP_VowboyLove_wordart2 copy paste resize 40% place top right of layer
add light drop shadow.
Select RSP_CowboyLove_button copy paste resize 27% move to left of frame,
add drop shadow.
Select RSP_CowboyLove_Bow3 copy paste resize 43% place on top of button,
add drop shadow.
Select RSP_CowboyLove_Cowboy copy paste resize 65% move to left of frame,
add drop shadow.
Select RSP_CowboyLove_Cowgirl copy paste resize 70%-Image-Mirror move
to right of frame, add drop shadow.
Select RSP_VowboyLove_Cowboy hat copy paste move to bottom of frame
then resize 25%, add drop shadow.
Select RSP_CowboyLove_Cowboy boots copy past near hat resize 25%
add drop shadow.
Select RSP_CowboyLove_lasso copy paste poition over cowboy then use your eraser
, so it looks like it is around him, add drop shadow.

Select RSP_CowboyLove_Heart doodle copy paste above frame near wordart resize 20%.
New layer select all copy paste into selection RSP_CowboyLove_paper7
apply mask merge-merge group.

Add your Artist © and your name then crop and save.
This is only a guide and feel free to use any other element you wish.
Most of all have fun creating.


If you wish to show off your creations.Email me your creation and
I will place it on my show off Page.
Thank you for using my tutorial.


Written and copyrighted to Maree (aka Falcon) on 7th July 2011.
Under no uncertain terms are you allowed to make money
from anything produced from this tut, this is against my TOU's.

Any similarities to this tutorial are purely coincidental.

Monday, July 4, 2011

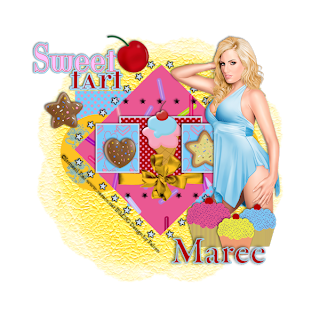
Sweet Tart ♥


For this Tutorial you will need.

A Tube of your choice I am using the awesome artwork of ©Ismael Rac ,
which you must have a license to use you can get one at Here

Elements and Papers are from a scrap kit called SweetHeart by Kim
*Kim's Korner* you can purchase it Here.

Font: Garamond Prem
Drop Shadow of choice.

Mask by Bev *HorsePlay's Pastures*, it's #HPP7 you can download it Here
Template by Sabine from CreativeMisfits Here.

Remember to Save Often!!!

Let's create

Open Template
Click on layer 5 to start.
Selections-Select All-Float-Defloat-new layer, select your kk_SH_Paper24
rseize paper 75%, this gives a better effect.
Paste-Selections-Invert-Delete. Delete original layer.

Continue as above on the different layer I used the following Papers:
kk_SH_Papers 05,07,08,15,16.

Add your tube resize if needed and place on right of layer, add drop shadow.
Select Starline 1 layer select all-Float-Defloat-new layer.Flood fill with color of choice, I
used #000000, repeat for Starline2.

Select kk_SH_Icecream2 copy paste resize to fit, add drop shadow.
Select kk_SH_Bow3 copy paste resize to fit frame, add drop shadow
Select kk_SH_Cookie's 1,2 and 3 resize to fit position, add drop shadow.

Select kk_SH_Cupcakes 1,2 and 3 resize them at 55%,42% and 35% place at bottom of tube position them. Add drop shadow.

Select kk_SH_WordArt02 copy paste position on top left of layer, add drop shadow.
Select kk_SH_Cherry copy paste position near wordart resize 43%, add drop shadow.

New layer-Layers-Arrange-Send to bottom, Select All.
Copy kk_SH_Paper 21 paste into selection-deselect.
Apply mask-merge-merge group.


Add your Artist © and your name then crop and save.
This is only a guide and feel free to use any other element you wish.
Most of all have fun creating.


If you wish to show off your creations.Email me your creation
and I will place iton my show off Page.
Thank you for using my tutorial.


Written and copyrighted to Maree (aka Falcon) on 5th July 2011.
Under no uncertain terms are you allowed to make money
from anything produced from this tut, this is against my TOU's.

Any similarities to this tutorial are purely coincidental.
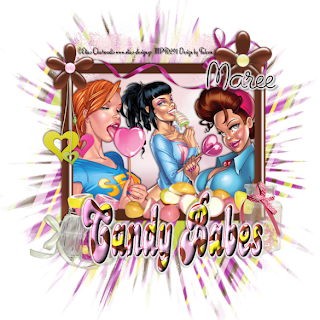
Candy Babes ♥


For this Tutorial you will need.

A Tube of your choice I am using the awesome artwork of ©Elias Chatzoudis ,
which you must have a license to use you can get one at PTE
* Please note that I purchased my tube/s from MPT *

Elements and Papers are from a scrap kit called Summer Candy by
*Darkmoon's Dream* you can purchase it Here.
Font: Birthday & Candy
Drop Shadow of choice.
Mask by Bev *Horseplay's Pastures*, it's #HHP18 you can download it Here.
Remember to Save Often!!!

Let's create

Open new image 700 x 700 transparent background.
Select frame1 copy paste Image FreeRotate 90 Left, add a drop shadow.
Click inside frame with Magic wand-Selections-Modify-Expand by 4
copy paste paper02, resize 70%move over frame till happy with selection-
Selections-Invert-Delete-move below frame layer.

Select deco 02 copy paste above paper layer-move to top of frame,
position it half way out of the frame.
Select your tubes I used 3 different tubes and positioned them inside frame,
add a drop shadow to all. Erase any bits that overhang the frame.

Select ribbon01 copy paste position at top of frame, add drop shadow.
Select hearts copy paste move to left side of frame, resize 48% posoition at top corner.
Select flower09 copy paste move to top left of frame, resize 35%.
Select flower08 copy paste position on top right of frame,
resize 55% place in loop of ribbon, add a drop shadow.

Select candy03 copy paste resize 43% position on bottom edge of frame,
add drop shadow.
Select candy05 copy paste resize85% psoition next to candy3 at bottom of frame,
add drop shadow
Select jar01 copy paste resize 45% position to bottom left corner of frame.
Select jar02 copy paste resize 55% position bottom right corner of frame.
I used Font-Candy - 72 for wordart using paper09.
Select background layer-select all coopy paste into selection paper10,
apply mask-merge-merge group.


Add your Artist © and your name then crop and save.
This is only a guide and feel free to use any other element you wish.
Most of all have fun creating.


If you wish to show off your creations.Email me your creation and
I will place it on my show off Page.
Thank you for using my tutorial.


Written and copyrighted to Maree (aka Falcon) on 4th July 2011.
Under no uncertain terms are you allowed to make money
from anything produced from this tut, this is against my TOU's.

Any similarities to this tutorial are purely coincidental.
Sunday, July 3, 2011

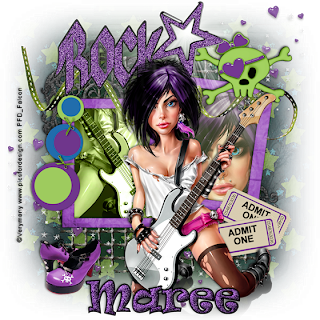
Rock Babe ♥


For this Tutorial you will need.

A Tube of your choice I am using the awesome artwork of © Verymany ,
which you must have a license to use you can get one at PFD

Elements and Papers are from a scrap kit called Hey Now
by *ArtMama Made*you can purchase it Here.
Font:
Drop Shadow of choice.
Mask by *HorsePlay's Pastures*, it's #HHP 11 you can download it Here
Remember to Save Often!!!

Let's create

Open new image 700 x 700 transparent background.
Select AM-HeyNow embellie 03 copy paste click inside frames with
Magic Wand-Selections-Modify -Expand by 6.
Select AM-HeyNow paper 11 copy paste as new layer. Selections-Invert-Delete,
move below frame layer.Don't deselect.

Add your closeup tube/s now postion them then hit delete, move below frame layer.
Deselect now.
I chose to use Luminace(L) on left tube and lowered the Ocapicty to 72 on other tube.
Select AM-HeyNow embellie 55 copy paste place above frame,
add drop shadow.
Select AM-HeyNow embellie 10 coppy pste resize 75% move to left of frame,
add drop shadow.
Select AM-HeyNow embellie 03 copy paste move to lower right of frame.
dupicate then use your pick tool to angle them, add drop shadow.
Select AM-HeyNow embellie 04 copy paste move to top right corner
of frame resize 85%, add drop shadow.
Select AM-HeyNow embellie 19 copy paste move to lower left of frame resize 65%,
add drop shadow.
Select AM-HeyNow embellie 52 copy paste move to top of frame,
add drop shadow.
Select AM-HeyNow embellie 15 copy paste move so its positioned behind the star.
Select AM-HeyNow embellie 12 copy paste below paper layer position lower
left of frame then duplicate position above frame, see tag.

Select AM-HeyNow embellie 16 above background layer,
add drop shadow.
Select background layer-select all copy paste into selection
Select AM-HeyNow paper 08.
Apply the mask to layer-merge-merge group.
Add your main tube resize if needed position, add drop shadow.

Add your Artist © and your name then crop and save.
This is only a guide and feel free to use any other element you wish.
Most of all have fun creating.


If you wish to show off your creations Email me your creation and
I will place it on my show off Page.
Thank you for using my tutorial.


Written and copyrighted to Maree (aka Falcon) on 2nd July 2011.
Under no uncertain terms are you allowed to make money
from anything produced from this tut, this is against my TOU's.

Any similarities to this tutorial are purely coincidental.
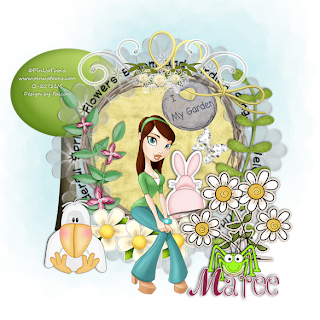
My Garden ♥


For this Tutorial you will need.

A Tube of your choice I am using the awesome artwork of ©inUpToons ,
which you must have a license to use you can get one at CDO
* Please note that I purchased this tube from CILM *
Elements and Papers are from a scrap kit called Spring Temptation by
Angela of *Alika's Scraps* you can purchase it Here.
Font: Seasons Spring
Drop Shadow of choice.
Mask by *HorsePlay's Pastures*, it's #27 you can download it Here
Remember to Save Often!!!

Let's create

Open new image 700 x 700 transparent background.

Select as54 copy paste resize 75% add drop shadow. Click inside with
Magic wand-selections-Modify-Expand by 15. Copy paste aspaper 07-
selections-invert-delete-move below frame.

Select as46 copy paste resize to fit frame add a light drop shadow.
Select as02 copy paste move to left of frame, add drop shadow.
Select as18 copy paste resize 85% move to right of frame, add drop shadow.
Select as51 copy paste below frame layer,
add drop shadow.
Select as 47 copy paste below paper layer add drop shadow resize if needed.
Select as 11 copy paste at top of frame, resize 75%.
Select as 37 copy paste below ribbon layer then use your eraser tool to remove
part of the ribbon, add drop shadow.
Select as 48 copy paste resize 35% position on right center of frame.
Use your Pick tool to angel the butterfly.
Select as 49 copy paste above ribbon layer resize 85% position to your liking.
Select as 08 copy paste position on bottom left of frame then duplicate twice
position them along the bottom of frame.
Select as 07 copy paste to right of frame, add drop shadow.

Select as 34 copy paste resize 35% move to left of frame, add drop shadow.
Select as 35 copy paste resize 67% position in front of flowers, add drop shadow.
Add your tube of choice give it a drop shadow position to your liking.
New layer select aspaper 14 apply mask-merge-merge group.


Add your Artist © and your name then crop and save.
This is only a guide and feel free to use any other element you wish.
Most of all have fun creating.


If you wish to show off your creations.Email me your creation and I will place it
on my show off Page. Thank you for using my tutorial.


Written and copyrighted to Maree (aka Falcon) on 2nd July 2011.
Under no uncertain terms are you allowed to make money
from anything produced from this tut, this is against my TOU's.

Any similarities to this tutorial are purely coincidental.