Friday, July 30, 2010

I Wanna be Hot Like You


Supplies Needed
I am using the amazing artwork of Ismael Rac you can purchase his tubes Here
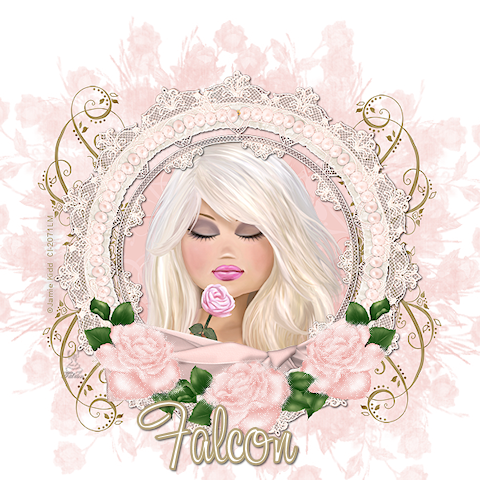
Or tube of choice.
Scrap Pinktastic by Manda'z Dazzling Designz here at Sunflowers Scraps Boutique
Font: Janagrace
Drop Shadow of choice.
Mask_252 by Weescotlass
Template by Dollys Tag World
Remember to Save Often!!!
Let's begin
Open template copy close original.
On heart layer - Selection - select all -float - defloat.
New layer. Select paper26 copy paste into selection then deselect.Delete original layer.
Effect- Inner Bevel with these settings


Select Rectangle then  Selection - select all -float - defloat.
New layer, select paper 2 copy paste into selection - deselect. Delete original layer
On Arrow layer Selection - select all -float - defloat.
New layer, select paper 6 copy paste into selection. Deselect then delete original layer.
Add your tube of choice.
Select the Pinktastic Bling 1 copy paste above background layer, resize as needed.
Add any other element you want. I used
Pinktastic
Bow5,
Flower 8
and Butterfly 2.
Add your Artist © and your name.
This is only a guide and feel free to use any other element you wish.
Most of all have fun creating.

Animation.

1. Click on Bling layer - Adjust -Add noise with these settings,


Now repeat  the same with the Arrow layer.
2. Edit Copy Special -Copy Merged. Click into AS paste as new animation,
3. Back in Psp click undo twice, do step 1 but change to 35, then repeat step 2. This time
   paste after current frame.
4. Repeat all of step 3 but change to 40.
5. Save as a gif and your done

This tutorial was written by Maree (aka Falcon) on 30 July 2010
Any similarities to this tutorial are purely coincidental
©Maree

I Want Candy


Supplies Needed
I used the artwork of Elias Chatzoudis you may purchase his tubes MPT
Or tube of choice
Scrap Candy Shoppe Collab by Jen of Sleek n Sassy
 you can purchase it at Scrappin Dollars
Font: AT &Love and
Drop Shadow of choice.
Mask-84 and 178 by Wescotslass
Remember to Save Often!!!

Let's begin

Open new image 600 x 600.
Select Candy Frame2 copy paste resize by 50 percent.
New layer Select All copy paper-Image 7 paste into selection.Deselect.
Apply mask 84 Merge group.Move below frame.
Copy and paste your tube position just off center of frame.Resize if needed.
Select Fabric flower1 and 2,3,copy paste resize then duplicate 1 & 3 see tag for placement.
Select Fastener 1 copy paste resize by 40 percent place in front of flowers
Select Butterflies 3 copy paste resize by 30 percent place on right side of frame,
Select Snow cones 1 & 2 coy paste resize by 20 percent
then using your move tool position them on the Fastner.
Do the same for Cotton Candy elelment.Using your Eraser with these settings.
Carefully erase part of cone and candy stick to show string.
Add New Layer select all copy paste paper-Image 4 into selection. Deselect.
Apply mask 178 merge group.
Add your Artist © and your name then crop and save.
This is only a guide and feel free to use any other element you wish.
Most of all have fun creating.

This tutorial was written by Maree (aka Falcon) on 29 July 2010
Any similarities to this tutorial are purely coincidental
© Maree

Tuesday, July 27, 2010

EVIL LAUGH


Supplies Needed

I am using the beautiful artwork of Ismael Rac and you may
 purchase his tubes  Here
or
Tube of choice
Scrap Echo Bliss by Immortal Dreams you can
purchase this at  Scrappin Dollars
Font: BlackJack
Drop Shadow
Mask_233 by Weescotslass

Remember to Save Often!!!
Let's begin

Open new image 650 x 650
New layer select all copy ID-EB-Paper 4 paste into selection. Apply mask merge group.
Select ID-EB-Frame 2 copy paste resize to fit mask.Use your Deform tool for this.
Select ID-EB-Doodle copy paste below mask layer then resize
 by 38 percent duplicate, mirror.
Then move so that top flowers are just touching see tag.
Add your tube then give it a drop shadow with these settings.
V2, H2, Op50 Blur 5 color black. then again with V-2, H 51 O 50 B 5 Black t
his will give the shadow effect.
Select ID-EB-Evil copy paste place in front of tube then resize
 by using the deform tool.
Select ID-EB-Bow 5 copy paste use deform tool to fit side of frame then
 use these setting for Gradient Glow repeat this.
  Use Drop Shadow 2/2/50/5.Duplicate see tag for placement.
Select ID-EB-Flower 1 copy paste resize by 50 percent drop shadow then
duplicate placing either side of Evil frame.
Select ID-EB-Skull reszie by 27 percent drop shadow then duplicate 5 times
then place them on side of frame, see tag.
Add your Artist © and your name then crop and save.
This is only a guide and feel free to use any other element you wish.
Most of all have fun creating.

This tutorial was written by Maree (aka Falcon) on 27 July 2010
Any similarities to this tutorial are purely coincidental
© Maree

Monday, July 26, 2010

BEAUTIFUL ROSE


Tube of choice or the arwork I am using the art work of Jamie Kidd
you can purchase it from CILM
PTU - Scrap Kit - Victorian Wedding by Kristi
and you may purchase it Here
Mask of Choice

Let's begin

Open canvas 600 x 600 Open frame #1 resize then place in center
add a drop shadow of choice.
Open Doodle #1 Copy / Paste / Resize, add a drop shadow / Duplicate.
Merge them together. Duplicate then Image / Mirror.
Select Magic Wand click inside of freame,
 Selections / Modify /Expand by 4.
Selections / Invert / hit Delete / move below frame.
Select tube Resize / Copy / Paste move below frame,
 give a light drop shadow of choice.
Select / Copy / Ribbon #1 / Resize / add drop shadow.
Select Rose bloom #1 or flower of choice Copy / Paste / Resize,
add drop shadow.
Select Paper #9 Copy / Paste / Move below all layers
 then add Mask of choice.
Add any other elements of choice from the kit.
Add artist © and your name, crop and save.
This is only  a guidee so feel free to use any other elelenets you wish.
Most of all have fun creating.

This tutorial was  written by Maree (aka Falcon) on 20th September 2008
Aany similarites to this tutorial are purely coincidental!
©Maree