Wednesday, June 29, 2011

Butterfly's Forum Set ♥


For this Tutorial you will need.

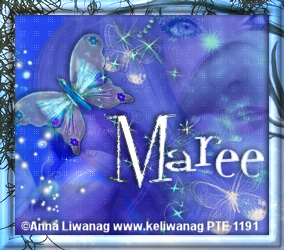
A Tube of your choice I am using the awesome artwork of © Anna Liawanag ,
which you must have a license to use you can get one at PTE

Elements and Papers are from a scrap kit Simply Irresistible by
Jen * Jen's Sweet Temptations* you can purchase it Here.
Font: Fontdinerdotcom
Drop Shadow of choice.

Remember to Save Often!!!

Let's create

Open new image 600 x 250 transparent background/selections/Select all.
Select Paper of choice or the I used Paper8, copy paste, move around till you
have a section that you like.
Selections/Invert/Delete.Duplicate layer.
Effects/Plugins/Penta-apply these settings to back ground layer only:


Open your closeup tube copy paste above background layer, move to right of layer.
Lower the Opacity to 50.
Open Deco2 copy paste/Duplicate/Image/Mirror/move to left of layer
,add drop shadow.
Copy paste your main tube move to left of layer,
add a drop shadow.
Open Flower7 copy paste below main tube layer, resize 75% position to side of tube.
Add a drop shadow.
Open Trail 2 copy paste move to right of layer,
add drop shadow.
Open BFly3 copy paste, resize 35%, move to center of layer,
add drop shadow.

Open Paper 9, minimise for now.
Open your color Material palette/Pattern and find this paper.

Click on your background layer/Merge/Merge Visible use your selection to and copy part you wish to use for your Avatar/Edit paste as New Image.
Minimise your smaller image.

Click Undo then click on background/Select All/Modify/Contract by 15.
Activate the top layer then add a new layer.
Selections/Invert then FloodFill with Paper9.Effects/Inner Bevel with these settings:

Add a Drop shadow to the layer.
Add your Artist © and your name and save.

Activate your small avatar
Selections-Selectall-Modify-contract by 15.
New layer Floodfill with Paper9. Apply the same
settings for Inner bevel then add drop shadow.


This is only a guide and feel free to use any other element you wish.
Most of all have fun creating.

If you wish to show off your creations.Email me your creation and I will place it
on my show off Page. Thank you for using my tutorial.


Written and copyrighted to Maree (aka Falcon) on 29th June 2011.
Under no uncertain terms are you allowed to make money
from anything produced from this tut, this is against my TOU's.

Any similarities to this tutorial are purely coincidental.

Saturday, June 25, 2011

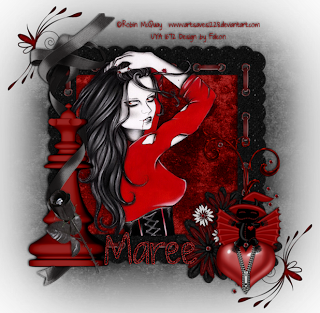
Pawn in The Love Game ♥


For this Tutorial you will need.

A Tube of your choice I am using the awesome artwork of ©Robin McQuay ,
which you must have a license to use you can get one at UpYourArt

Elements and Papers are from a scrap kit Betrayed by Jen *SleeknSassy*
you can purchase it Here.

Font: Just The Way You Are
Drop Shadow of choice.

Mask by *HorsePlay's Pastures*, it's #HPP 11
you can download it Here

Remember to Save Often!!!

Let's create

Open new image 700 x 700 transparent background.
Open Frame copy paste click inside with Magic Wand/selections/Modify/Expand by 6.
Copy Paper8 paste, selections/Invert/Delete/Deselect,move paper below frame layer
then add drop shadow to your frame.

Open your tube copy paste position, add drop shadow.
Open Pawn copy paste resize by 85% position on left of frame.
Open Bow 2 copy paste resize 95%, position on left of frame then using your Eraser/
erase parts of the ribbon to show pawn, see tag.

Open Black_Rose copy paste resize 39%, Image/FreeRotate 36 left, place on Pawn,
add drop shadow.
Open Zipped_Heart copy paste resize 42% move to right of frame, add drop shadow.
Open Voodoo_Devil copy paste resize 37% place on top of heart, add rop shadow.
Open Embellishment2 copy paste below paper layer, add drop shadow.
Place top left of frame/duplicate/Image/Mirror/Flip.

New layer select all copy paste into selection Paper14/
apply mask/Merge/merge group.

Add your Artist © and your name then crop and save.
This is only a guide and feel free to use any other element you wish.
Most of all have fun creating.


If you wish to show off your creations.Email me your creation and
I will place it on my show off Page.
Thank you for using my tutorial.


Written and copyrighted to Maree (aka Falcon) on 24th June
2011.
Under no uncertain terms are you allowed to make money
from anything produced from this tut, this is against my TOU's.

Any similarities to this tutorial are purely coincidental.

Monday, June 20, 2011

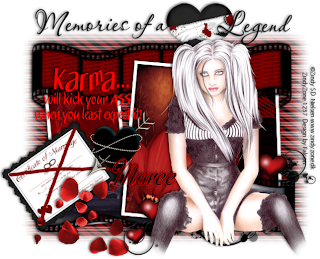
Memories of A Legend!!♥


For this Tutorial you will need.

A Tube of your choice I am using the awesome artwork of ©Zindy Nielson ,
which you must have a license to use you can get one at Here
* Please note that I purchased my tube from *
Elements and Papers are from a scrap kit called Shot Through The Heart by
Jen *Sleek n Sassy* you can purchase it Here.
Font:
Drop Shadow of choice.

Template by ButterflyFlutterby Creations Here

WordArt by Tonya Here

Remember to Save Often!!!

Let's create

Open Template and delete © layer , Wordart -Bettie Page and Background layers.
Click on Mask layer/Sleections/select all/Float/Defloat/new layer/copy paste Paper14 ins
selection/deselect/delete original layer/then Duplicat layer.

Repeat for the following layers using the papers I used or your own choices:
Frame 3 Fill I used Paper9
Frame 1 Fill I used Paper10
Bottom Frame Fill I used Paper1
Top Film Fill I used Paper11
Frame 2 Fill I used Paper2
Open Hearts 2 copy paste above Frame 2 layer/ resize 45% move to right of layer,
add dropshadow.
OPen Marriage Certificate copy paste resize 35%/Image/FreeRotate 35 Left,
move to bottom leftside of layer, add drop shadow.

Open Flower Petals copy paste above Marriage certificate layer.
Open Barbed Heart copy paste resize 39% position beside certificate,
add drop shadow.
Open Bloody Heart copy paste below wordart layer resiz 28% position, see tag,
add drop shadow.
Add your tube position on right of layer, resize if needed and
add drop shadow.
Open the WordArt copy paste above tube layer resize 45%,
I changed the color to red on mine.

Add your Artist © and your name then crop and save.
This is only a guide and feel free to use any other element you wish.
Most of all have fun creating.


If you wish to show off your creations.Email me your creation and I will place it
on my show off Page. Thank you for using my tutorial.


Written and copyrighted to Maree (aka Falcon) on 21 June 2011.
Under no uncertain terms are you allowed to make money
from anything produced from this tut, this is against my TOU's.

Any similarities to this tutorial are purely coincidental.
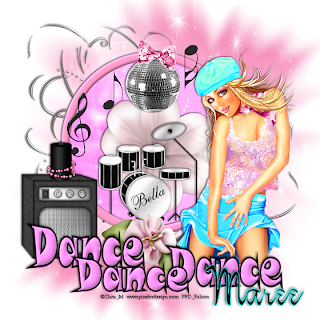
Dance Dance Dance ♥


For this Tutorial you will need.

A Tube of your choice I am using the awesome artwork of ©Zlata_M ,
which you must have a license to use you can get one at PFD

Elements and Papers are from a scrap kit called Cabret Bella TS by Joy *Mystic Creations*
you can purchase it Here.
Font: Snap and
Drop Shadow of choice.
Mask by *HorsePlays Pastures*, it's #HPP17 you can download it Here

Remember to Save Often!!!

Let's create

Open new image 700 x 700 transparent background.
Open MCCBTSDoodle Frame copy paste resize by 85%, click inside frame with Magic wand/selections/Modify/Expnad by 10/New layer, add drop shadow.
Open MCCBTSPaper04 paste into selection on new layer, move below frame layer.
Open MCCBTSSweet Flower02 copy paste under frame layer resize by 85%, add drop shadow.
Open MCCBTSDiscoBall copy paste under frame layer thenresize 20% move to top of frame, add drop shadow.
Open MCCBTSSequin Bow02 copy paste above frame layer resize 18%, add drop shadow.
Open MCCBTSDrums 02 copy paste above flower layer, resize 65% then position, add drop shadow.
Open MCCBTSAmp copy paste above frame layer move to left of frame, resize 32%, add drop shadow.
Open MCCBTSCandle 01 copy paste, position above Amp resize 19%, add drop shadow.
Open MCCBTSGlass Treble Clef copy paste resize 15% move to left of frame, add drop shadow.
Open MCCBTSGlass Eighth Note copy paste resize 14% move next to Dosco ball, add drop shadow.
Open MCCBTSGlass Sixteenth Note copy paste resize 15% move to right of frame.
Open MCCBTSRibbon flower 01 copy paste resize 25% move to botom of frame.
Add your tube move to right of frame, add drop shadow.
Open MCCBTSPaper17, apply Mask, Merge/Merge group.
Duplicate layer/Image Flip/Mirror.
For the WordArt I used BG:000000 FG:fe95f7 font Snap.


Add your Artist © and your name then crop and save.
This is only a guide and feel free to use any other element you wish.
Most of all have fun creating.


If you wish to show off your creations.Email me your creation and I will place it
on my show off Page. Thank you for using my tutorial.


Written and copyrighted to Maree (aka Falcon) on 20th June 2011.
Under no uncertain terms are you allowed to make money
from anything produced from this tut, this is against my TOU's.

Any similarities to this tutorial are purely coincidental.
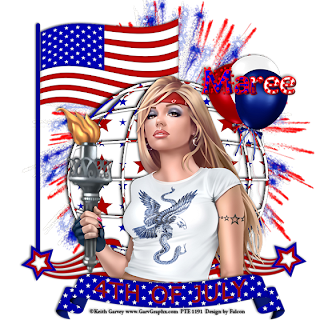
Celebrations ♥


For this Tutorial you will need.

A Tube of your choice I am using the awesome artwork of ©Keith Garvery,
which you must have a license to use you can get one at PTE.

Elements and Papers are from a scrap kit called A 4th Celebration by *Scrappin With Lori Kay*you can purchase it Here.

Font:Sprinkles
Drop Shadow of choice.

Remember to Save Often!!!

Let's create

Open new image 700 x 700 transparent background.
Select A4thCelebrationPaper7 minimize then in your Material Palette FG: select it in your Pattern section.Angle 0/Scale 100.
Select Preset Shapes-Basic shapes-Globe, draw out a large circle-Line width set at 5.
Right click convert to Raster.Effects/Lokas/3D Shadow with these settings/apply twice.

With Magic wand click inside all parts of Globe/Selections/Modify/Expand by 4.
Select A4thCelebrationPaper4 resize 50% twice all layers ticked. Paste as New layer.
Selections/Invert/hit Delete, move below globe layer, click on globe layer/Merge/ Merge Down.
Add your tube selection I used a closeup give it a drop shadow.
Select A4thCelebrationBalloons copy paste resize 12% move to right of layer, add drop shadow.
Select A4thCelebrationStar copy paste resize 10%move to left of globe then duplicate/Image/Mirror/add drop shadow.
Select A4thCelebrationFireworks1,2 and 3 copy paste below Globe layer resize all layers 50% twice then arrange to your liking.
Select A4thCelebrationBanner copy paste resize 19% move below tube layer.
Select A4thCelebrationFlag cop paste below globe layer then resize 35% position to left of globe.

Add your Artist © and your name then crop and save.
This is only a guide and feel free to use any other element you wish.
Most of all have fun creating.


If you wish to show off your creations.Email me your creation and I will place it
on my show off Page. Thank you for using my tutorial.


Written and copyrighted to Maree (aka Falcon) on 20th June 2011.
Under no uncertain terms are you allowed to make money
from anything produced from this tut, this is against my TOU's.

Any similarities to this tutorial are purely coincidental.
Monday, June 13, 2011

Bauble of Beauties ♥


For this Tutorial you will need.

A Tube of your choice I am using the awesome artwork of ©Keith Garvey ,
which you must have a license to use you can get one at PTE
* Please note that I purchased my tube/s from MPT *
Elements and Papers are from a scrap kit Christmas Wishes by *Honored Scraps*
you can purchase it Here.

Font:Arbat

Drop Shadow of choice.
Mask *Vaybs*, it's #133 you can download it Here
Remember to Save Often!!!

Let's create

New image 700 x 700 transparent background.
Open Frame2 copy paste resize 15%, give this a drop shadow.
Now duplicate this 4 times rename L1 to L4.
Position them as you like or as i hadve done.
Close out backgrund layer Merge visible.

Click inside all frames/Selections/Modify/Expand by 7/paste paper9/
Invert/Delete/move below frame layer.

Add your tube/s now, I used 4 different tubes/deselect,
give them all a drop shadow.
Add your main tube now and give a drop shadow position to your liking.

I used this mask as a background If it belongs to you please let me know
so that I can give you credit.

Save and open in Psp.

Open paper 9 apply mask/merge group, then duplicate/right click /merge down.


Open Baubles1 copy paste resize 25% position above frames, add a drop shadow.
Open Bow2 copy paste resize 33% position bottom of frames.

New layer Select all copy paste paper4 into selection,
deselect apply mask merge group.


Add your Artist © and your name then crop and save.
This is only a guide and feel free to use any other element you wish.
Most of all have fun creating.


If you wish to show off your creations.Email me your creation and I will place it
on my show off Page. Thank you for using my tutorial.


Written and copyrighted to Maree (aka Falcon) on 2011.
Under no uncertain terms are you allowed to make money
from anything produced from this tut, this is against my TOU's.

Any similarities to this tutorial are purely coincidental.
From Garv With Love ♥


For this Tutorial you will need.

A Tube of your choice I am using the awesome artwork of ©Keith Garvey ,
which you must have a license to use you can get one at PTE
* Please note that I purchased my tube from MPT *
Elements and Papers are from a scrap kit SnowFlake Dreams by Patty *Honored Scraps*
you can purchase it Here.

Font:Kingsthings Christmas 2
Drop Shadow of choice.
Mask by *Dee's Design *, it's #DD 20 you can download it Here

Filter - VanDerLee Snowflakes.

Animation Shop


Remember to Save Often!!!

Let's create

Open new image 700 x 700 transparent background.
Copy paste Frame 2 then resize 55% cllick inside with Magic wand.
Selections/Modify/Ecpand by 10 copy paste paper 1/Selections/Invert/
Delete/move below frame layer.

Open your close-up tubes position, hit delete, move below frame layer.
Add a drop shadow to tubes.
Copy paste Candle resize 18% move to bottom of frame, add drop shadow.
Copy paste Bells resize 42$ move to top of left frame, add drop shadow.

Copy paste Snowflake2 resize 22%, add a drop shadow.
Duplicate twice position around frame.
Click on Frame layer duplicate twice rename 1,2,3.

Using Magic wand click on frame/selections/Modify/expand by 10
then apply these settings:


Hit Ok.
On F2 apply filter this time Increase Random seed to 12.Close out this layer.
On F3 apply filter this time Increase Random seed to 14. Close out this layer.

New layer select all copy Paper10 paste into selection then apply mask/
duplicate then on orginal layer apply/Adjust/Blur/Guassian blur-100%

New layer floodfill with #ffffff, Right click /Arrange/Send to bottom.

Add your Artist © and your name then crop.
This is only a guide and feel free to use any other element you wish.
Most of all have fun creating.

Animation.

1. Open AS then click back into psp.
2. Make sure F1 is open then Edit/Copy special/Copy merged.
3. Click into AS then paste as new animation.
4. In psp closeout F1/Open F2/copy merged.
5. Edit/paste/paste after current frame.
6. Click back to psp closeout F2/open F3/copy merged.
7. Click into As Edit/paste/paste after current frame,
now you shuld have all 3 frames.
8. Select all then Animation/Frame Properties change to 35.
9. Resize animation by 75%.
10.View you Animation then save as a Gif.

If you wish to show off your creations.Email me your creation and I will place it
on my show off Page. Thank you for using my tutorial.

Written and copyrighted to Maree (aka Falcon) on 12th June 2011.
Under no uncertain terms are you allowed to make money
from anything produced from this tut, this is against my TOU's.

Any similarities to this tutorial are purely coincidental.

Tuesday, June 7, 2011

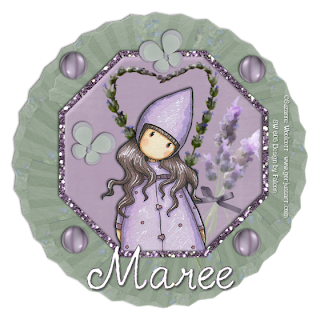
LavenderGirl ♥


For this Tutorial you will need.

A Tube of your choice I am using the awesome artwork of ©Suzanne Woolcott ,
which you must have a license to use you can get one Here.

Elements and Papers are from a scrap kit called Lavender by *BlueBird*
you can purchase it Here.

Font: 2Peas Mademoiselle
Drop Shadow of choice.

Remember to Save Often!!!
Let's create

Open new image 700 x700.
Select your Preset shape-Octagon set Width to 15/Line style-Solid.
Set your Forground to BBLavenderGlitter02 and Background to null.
Draw out a large shape.
Objects/Align/center in canvas.Add a drop shadow to frame.
Click inside frame with magic wand select BBLavenderpaper02 copy
paste/Selections/Invert/Delete/move below frame.
Effects/Inner Bevel apply these settings:


Open BBLavenderAccents use your freehand selection tool to copy lavender
paste above paper layer resize 45% move to right of layer.
I used a couple of different sizes.

Open BBLavenderBows select a ribbon with freehand selection-tool
copy paste onto the lavender stems.
Resize Bow 52% move to middle of stems.
Add your tube and give it a drop shadow.
Select BBLavenderHeartFrame copy paste below tube layer.

Select BBLavenderFans select a fan I choose the green one,
copy paste below paper layer.
Then apply these settings using MuRa's Filter-copies:

Select BBLavenderButterflies select one copy paste resize 36%
position on left of frame.
Duplicate then move it above heart frame.

Select BBLavenderBeads copy bead of choice paste resize 85%, add a drop shadow.
Duplicate/Image Mirror/right click merge down/Duplicate/Image/Flip.

Add your Artist © and your name then crop and save.
This is only a guide and feel free to use any other element you wish.
Most of all have fun creating.


If you wish to show off your creations.Email me your creation and I will place it
on my show off Page. Thank you for using my tutorial.


Written and copyrighted to Maree (aka Falcon) on 7th June 2011.
Under no uncertain terms are you allowed to make money
from anything produced from this tut, this is against my TOU's.

Any similarities to this tutorial are purely coincidental.

Monday, June 6, 2011

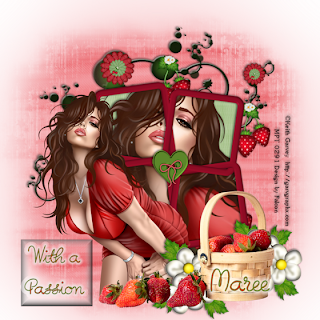
With A Passion!! ♥


Add Image
For this Tutorial you will need.

A Tube of your choice I am using the awesome artwork of ©Keith Garvey ,
which you must have a license to use you can get one at PTE
* Please note that I purchased my tube from MPT *
Elements and Papers are from a scrap kit called Strawberry Love by Karen
*Sweet Occasion Designs* you can purchase it Here.
Font: Birthday
Drop Shadow of choice.
Mask *Dees Design Masks*, it's #28 you can download it Here

Remember to Save Often!!!

Let's create

Open new image 700 x700.

Open frame 2 resize 35%, add drop shadow.
Click inside each frame with Magic Wand/Selections/Select all/Modify/Expand by 10.
Copy paste paper12/selections/Invert/Delete/move below frame layer.
Add your closeup tube now, hit delete move below frame, add drop shadow.
Merge visible yor frame, paper and tube layers.

Open PHF_Erdbeeren_elements36 copy paste resize 66%, add drop shadow.
Open your main tube and paste into position, add dro shadow.
Open CAJ.SCR.FR.ENV.FR2 copy paste position add drop shadow resize 39%.

Open button 2 resize 18% position in center of frame, add drop shadow.
Open flower cluster resize 20% add drop shadow/duplicate then position,
I place them either side of basket.

New layer select all copy paste paper9/apply mask.
Duplicate layer then on orignal layer Adjust/Blur/Guassian Blur 100%.

Add your Artist © and your name then crop and save.
This is only a guide and feel free to use any other element you wish.
Most of all have fun creating.


If you wish to show off your creations.Email me your creation and I will place it
on my show off Page. Thank you for using my tutorial.


Written and copyrighted to Maree (aka Falcon) on 7th June 2011.
Under no uncertain terms are you allowed to make money
from anything produced from this tut, this is against my TOU's.

Any similarities to this tutorial are purely coincidental.

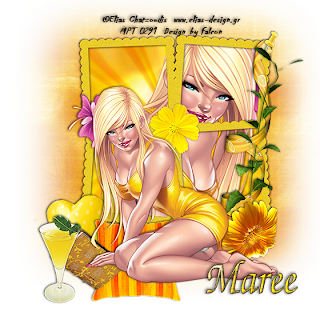
That Refreshing Feeling!! ♥


For this Tutorial you will need.

A Tube of your choice I am using the awesome artwork of ©Elias Chatzoudis,
which you must have a license to use you can get one at PTE
* Please note that I purchased my tube from MPT *
Elements and Papers are from a scrap kit called Freaky Freshy Lemon by Stef * Stef's Scrapkits* you can purchase it Here.
Font: Invitation
Drop Shadow of choice.
Mask *Horseplays Pastures*, it's #HHP11 you can download it Here
Remember to Save Often!!!

Let's create

Open new image 700 x 700.
Select Frame05_FreakyFreshLemon_StefsScrapkits resize 85%/click inside all frame with Magic wand.Selections Modify/Expand by 4 copy paste Paper09_FrealyFreshLemon_StefsScrapkits?Invert/elete/move below frame layer.

Add your closeup tube place into position/hit delete/move below frame layer/deselect.Give frame and tube a drop shadow.Then right click and merge visible.

Select element29_FreakyFreshLemon_StefsScrapkits, use your pick tool to move to right side of frame. Move into position/see tag.
Select element48_FreakyFreshLemon_StefsScrapkits resize 15% position above ribbon,
add drop shadow.
Select emement19_FreakyFreshLemon_StefsScrapkits/place on ribbon then use
your Eraser to remove part of the branch, add a drop shadow.

Select element17_FreakyFreshLemon_StefsScrapkits/Image/Mirror/ move to right and bottom of frame,resize 45% then add a drop shadow.

Add your main tube place then add a drop shadow.
Select element46_FreakyFreshLemon_StefsScrapkits resize32% move below tube layer,
add drop shadow.
Select element42_FreakyFreshLemon_StefsScrapkits resize 22% then use your pick tool to angle it under the tube hand, add drop shadow.
Select element44_FrealyFreshLemon_StefsScrapkits resize 37% place behind cushion,
add drop shadow.
Select element15_FreakyFreshLemon_StefsScrapkits resize 24% move to left of layer,
add drop shadow.

Select element16_FreakyFreshLemon_StefsScrapkits resize 21% move to center of frame,
add drop shadow.
New layer Selections/select all copy paste into selectionPaper11_FreakyFreshLemon_StefsScrapkits
apply mask/merge/merge group.


Add your Artist © and your name then crop and save.
This is only a guide and feel free to use any other element you wish.
Most of all have fun creating.


If you wish to show off your creations. Email me your creation and I will place it
on my show off Page. Thank you for using my tutorial.


Written and copyrighted to Maree (aka Falcon) on 5th June 2011.
Under no uncertain terms are you allowed to make money
from anything produced from this tut, this is against my TOU's.

Any similarities to this tutorial are purely coincidental.